Shannon from Luvinthemommyhood had a post this week that she calls "creating - fill in the blanks with you and me." She's given a list of questions to fill in the blank and I thought it might be fun to give it a whirl!
* i'm longing to make some new socks right now.
* i want to try Knittingwith some Socks That Rock yarn.
* i wish i could sew with more Amy Butler fabric.
* i dream of making more garments for myself
* i keep track of my ideas in my head - no wonder I can't remember them half the time!
* i'm inspired by all sorts of things
* i would love to meet my Ravelry/blog friends in person.
* my favorite fiber is wool.
* i like to sew with cottons or knits.
* my favorite color is I don't really have a favourite colour - there's too many I like and I'm fickle so the favourite changes.
* i rock at sewing
* i would like to learn how to make more intricate quilts.
* i like to listen to the silence of sleeping toddlers while i sew.
* i bring my knitting everywhere.
* my favorite thing to sew is diapers and kids clothing.
* my favorite thing to knit are socks
* my crafting space is often a disaster.
* if i had my own crafting room it would be organized without clutter... Oh wait a minute I do have my own crafting room. Maybe I should stop blogging and start cleaning... ;)
* i sew with a twenty-something year old Singer (Old Faithful), a five year old Singer (The Goodtime Gal) and a 15+ year old Brother serger (whose name is usually a string of profanity muttered under my breath)
* i like to dream up new ideas or figure out better ways to do something before I go to sleep
* i can never get enough fabric
* i adore sewing - it's my first crafty love
* i also enjoy knitting and a new found love for making Waldorf inspired dolls.
* i like to fill my shelves with books, fabric, patterns and yarn
* i create the best when i'm not distracted.
* i am currently excited for getting some gifts made then clearing the craft schedule for some "me" projects.
* right now i am working on a never ending list of baby gifts - it's an ongoing baby boom out there folks!
* i love to watch movies while knitting
* my guilty pleasure when it comes to creating is acquiring patterns
* my current favorite music crush to listen to while creating is ... Hmmm. I don't often listen to music because sewing is most often done late at night after Baby Boy, Little Toddler Man and (BF)G have gone to bed. I like the quiet.
Pages
▼
Friday, September 28, 2012
Monday, September 24, 2012
While There Is Tea There is Hope
 |
| There's truth to this! |
Tuesday, September 18, 2012
The Schoolhouse Tunic : Show and Tell
First let me say I love Sew Liberated. Remember these projects?
Both were from the book Growing Up Sew Liberated. I love that book! It's by far my favourite sewing book - so many great ideas in it!
I've known about Sew Liberated since I stumbled across her Schoolhouse Tunic
a few years. I've been coveting it since I first clapped eyes on it, but kept putting it off. Then a few weeks ago, on a lark I decided to fill out the order just to see what shipping was. So often shipping to (or within Canada) is crazily expensive. But lo and behold it wasn't over at Sew Liberated! Not only that, my pattern popped up on sale! After that the order just sort of placed itself. (Funny how that can happen). But it was fate. Wouldn't you say?!?
Pattern ordered I had to set to work finding fabric. I wanted something special. Not just something on sale from the less than stellar local fabric store chain in the city. Off to Etsy I went. I adore Amy Butler Fabric. ADORE it! But never splurge on it given it's usually higher price tag, plus once you factor in the whole "shipping to Canada" matter it gets totally out of reach for this SAHM's justification. However, the gods of fabric were smiling down upon me, because I found Amy Butler's Trailing Cherry in brown for a fabulous price with inexpensive shipping (love Etsy!!!!); a quick convo with the seller to see if they had two yards and the fabric was ordered!
With some reservation I measured myself, compared with the pattern and cut it out. I didn't want to mess with my Amy Butler! I squeaked the pattern out of exactly 2 yards with about an inch of fabric left over. Feeling pleased, I waited until every one went to bed and started sewing.
The pattern instructions are incredibly thorough. So very detailed that even the newest sewing beginner could make it. I was impressed. A little nagging voice in my head kept whispering that things were looking a little large and placement of a large box pleat at center back... Not such a flattering location. But I pressed on. The hour grew late, so I put it aside until the next day.
I was still anxious about the fit so the next day I basted the skirt part on, ran upstairs, tried it on and groaned. It was huge. Like a tent. A ten man tent. And that pleat situated squarely on my backside? Yikes. You don't get pictures of that. My ego couldn't handle it.
Back to the machine I went. Unpicked bodice side seams and skirt removed from tunic, I restitched. This time with about three inches less width throughout, (seriously! I took off at least an inch and a half per side) but I left the box pleat on the back. Why?????????
Back to the drawing board. I tried again, this time taking out the pleat and gathering instead. Yes. Because a big poofy gather is a splendid idea. NOT! Then I tried a more subtle gather across the whole back. It then hit me as I stood in front of the mirror thinking perhaps I should just scrap the whole thing, that perhaps the key was to take out all the fullness across the back of the skirt. Ding! Ding! Ding! We have a winner!!!!
I still wasn't terribly pleased with it - there was still something unflattering about the way it sat. I tried it on to show (BF)G and he looked for a moment and suggested folding the neck line open. I did and somehow it all came together for me into a top I could live with. And probably wear comfortably! About bloomin' time!!
Believe it or not, I think, armed with what I now know about the fit on me, I think I'd like to try another one. Maybe one for next summer using that gorgeous orange floral lawn I got with my birthday present from my mom. It was supposed to be for the sorbetto that never happened. Hmmmmmmm...
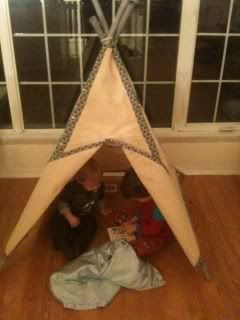 |
| The Play Tent |
 |
| The Little Amigo Dolls |
Both were from the book Growing Up Sew Liberated. I love that book! It's by far my favourite sewing book - so many great ideas in it!
I've known about Sew Liberated since I stumbled across her Schoolhouse Tunic
a few years. I've been coveting it since I first clapped eyes on it, but kept putting it off. Then a few weeks ago, on a lark I decided to fill out the order just to see what shipping was. So often shipping to (or within Canada) is crazily expensive. But lo and behold it wasn't over at Sew Liberated! Not only that, my pattern popped up on sale! After that the order just sort of placed itself. (Funny how that can happen). But it was fate. Wouldn't you say?!?
Pattern ordered I had to set to work finding fabric. I wanted something special. Not just something on sale from the less than stellar local fabric store chain in the city. Off to Etsy I went. I adore Amy Butler Fabric. ADORE it! But never splurge on it given it's usually higher price tag, plus once you factor in the whole "shipping to Canada" matter it gets totally out of reach for this SAHM's justification. However, the gods of fabric were smiling down upon me, because I found Amy Butler's Trailing Cherry in brown for a fabulous price with inexpensive shipping (love Etsy!!!!); a quick convo with the seller to see if they had two yards and the fabric was ordered!
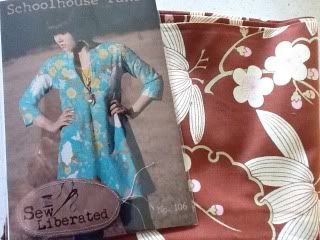 |
| Ready to go!! |
With some reservation I measured myself, compared with the pattern and cut it out. I didn't want to mess with my Amy Butler! I squeaked the pattern out of exactly 2 yards with about an inch of fabric left over. Feeling pleased, I waited until every one went to bed and started sewing.
The pattern instructions are incredibly thorough. So very detailed that even the newest sewing beginner could make it. I was impressed. A little nagging voice in my head kept whispering that things were looking a little large and placement of a large box pleat at center back... Not such a flattering location. But I pressed on. The hour grew late, so I put it aside until the next day.
I was still anxious about the fit so the next day I basted the skirt part on, ran upstairs, tried it on and groaned. It was huge. Like a tent. A ten man tent. And that pleat situated squarely on my backside? Yikes. You don't get pictures of that. My ego couldn't handle it.
 |
| Image via Pinterest |
Back to the machine I went. Unpicked bodice side seams and skirt removed from tunic, I restitched. This time with about three inches less width throughout, (seriously! I took off at least an inch and a half per side) but I left the box pleat on the back. Why?????????
Back to the drawing board. I tried again, this time taking out the pleat and gathering instead. Yes. Because a big poofy gather is a splendid idea. NOT! Then I tried a more subtle gather across the whole back. It then hit me as I stood in front of the mirror thinking perhaps I should just scrap the whole thing, that perhaps the key was to take out all the fullness across the back of the skirt. Ding! Ding! Ding! We have a winner!!!!
I still wasn't terribly pleased with it - there was still something unflattering about the way it sat. I tried it on to show (BF)G and he looked for a moment and suggested folding the neck line open. I did and somehow it all came together for me into a top I could live with. And probably wear comfortably! About bloomin' time!!
 |
| Full view |
 |
| Close up of the new and improved (for me) neckline |
Believe it or not, I think, armed with what I now know about the fit on me, I think I'd like to try another one. Maybe one for next summer using that gorgeous orange floral lawn I got with my birthday present from my mom. It was supposed to be for the sorbetto that never happened. Hmmmmmmm...
Sunday, September 16, 2012
It Feels Like Fall!
And with fall comes the need for hearty warm meals. Or at least I always think it does!
It feels like fall here. Temps are cooler during the day, and chilly at night. We've already had our first frost of the season just the other night. Tonight it's to dip down to a crisp +3C!
I have a favourite fall recipe to share with you tonight! It's corn chowder. Mmmmmmm. So, so tasty! And of course one can't just serve soup for supper so I'm also going to share a recipe for cheddar biscuits.
The biscuit recipe has been adapted from a recipe one of my old co-workers shared with me. She lived close to the university and every now and again she'd bring biscuits in, still piping hot from her oven. Those were good mornings I tell you. Especially since I was pregnant with Baby Boy and always hungry.
Anyways without further ado here's the recipes!
Corn Chowder
1/2 lb bacon, cooked and crumbled
2 medium onions, chopped
2 stalks celery, chopped
4 medium potatoes, peeled and chopped
4 cups corn kernels (frozen, fresh or canned - drained)
4 cups chicken or turkey stock
2 bay leaves
Salt and pepper to taste
Add all ingredients to crock pot and cook on low for 8-10 hours or high for 4-6 hours.
Half an hour before serving prepare the cream base as follows:
2 TBSP butter
2 TBSP flour
1 can (13 oz/385 ml) evaporated milk
1 cup cheddar cheese, grated
Melt butter in saucepan over medium heat. Add flour and mix well. Add milk and cook until thick. Stir in grated cheese continuing to stir until cheese is melted. Remove bay leaves from crock pot and add cheese/milk mixture. Cook a further 20 minutes. Serve with extra grated cheese for garnish and fresh buns or biscuits.
Cheddar Chive Biscuits
2 cup flour
3tsp baking powder
1/2 tsp salt
1/2 cup butter (Margarine or oil)
1 1/4 cup sour cream
1 cup cheddar cheese, grated
1/4 cup chives
Preheat oven to 450F. Grease or parchment line baking sheets.
In large bowl combine dry ingredients, add cheese and chives and mix well. Add in butter, cut with fork until mixture is crumbly then add sour cream and mix well. Drop dough onto prepared sheets and bake about 12 minutes until golden brown. Serve warm.
I hope you enjoy these tasty fall recipes! Now I'd better go cover up my tomato plants before I forget!
It feels like fall here. Temps are cooler during the day, and chilly at night. We've already had our first frost of the season just the other night. Tonight it's to dip down to a crisp +3C!
I have a favourite fall recipe to share with you tonight! It's corn chowder. Mmmmmmm. So, so tasty! And of course one can't just serve soup for supper so I'm also going to share a recipe for cheddar biscuits.
The biscuit recipe has been adapted from a recipe one of my old co-workers shared with me. She lived close to the university and every now and again she'd bring biscuits in, still piping hot from her oven. Those were good mornings I tell you. Especially since I was pregnant with Baby Boy and always hungry.
Anyways without further ado here's the recipes!
Corn Chowder
1/2 lb bacon, cooked and crumbled
2 medium onions, chopped
2 stalks celery, chopped
4 medium potatoes, peeled and chopped
4 cups corn kernels (frozen, fresh or canned - drained)
4 cups chicken or turkey stock
2 bay leaves
Salt and pepper to taste
Add all ingredients to crock pot and cook on low for 8-10 hours or high for 4-6 hours.
Half an hour before serving prepare the cream base as follows:
2 TBSP butter
2 TBSP flour
1 can (13 oz/385 ml) evaporated milk
1 cup cheddar cheese, grated
Melt butter in saucepan over medium heat. Add flour and mix well. Add milk and cook until thick. Stir in grated cheese continuing to stir until cheese is melted. Remove bay leaves from crock pot and add cheese/milk mixture. Cook a further 20 minutes. Serve with extra grated cheese for garnish and fresh buns or biscuits.
 |
| Hearty soups are made for fall! |
Cheddar Chive Biscuits
2 cup flour
3tsp baking powder
1/2 tsp salt
1/2 cup butter (Margarine or oil)
1 1/4 cup sour cream
1 cup cheddar cheese, grated
1/4 cup chives
Preheat oven to 450F. Grease or parchment line baking sheets.
In large bowl combine dry ingredients, add cheese and chives and mix well. Add in butter, cut with fork until mixture is crumbly then add sour cream and mix well. Drop dough onto prepared sheets and bake about 12 minutes until golden brown. Serve warm.
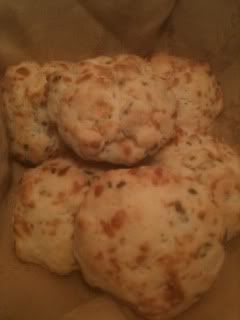 |
| Nom! Nom! Cheddar and chives! |
I hope you enjoy these tasty fall recipes! Now I'd better go cover up my tomato plants before I forget!
Tuesday, September 11, 2012
Still crafty...
I realized it's been ages since I did a post on knitting or sewing. I have been doing things. At least I think I have. How long has it been? Wow. Over a month! How'd that happen?
I guess this warrants a bit of a round up so here goes!
First up would be a new pair of training pants for Baby Boy. They're from the Tinkle Time Pocket Trainer pattern, although I did alter the pocket more to my liking. It's a pretty good pattern. This is my second time making it. I made a Pair back in the spring for LTM.
Next up was a gift for a friend's little girl. I modified the Habitual Kimono Top so that it would be double layered and a Velcro close. The "baby legs" and hat are my own design and the little knit gnome from Plain and Joyful Living.
Then I had another baby gift to make for another friend. Apparently I'm big into gnomes right now because I chose to make him a "Dangly Dell" from Little Oke Dolls. I also couldn't resist freezer paper stenciling a little onesie for him!
Moving along, a good friend of mine has been going through some trying times lately and I really wanted to send her something to let her know I was thinking of her and hopefully brighten her day. I chose to do my very favourite tea wallet pattern and a mug rug from Molly's Meanderings. I love this design and will make it again many times I'm sure!
I also did a couple things for me!!! First would be a "too long on the needles" WIP. My lace weight clapotis. This thing did not want to be finished. I can't tell you how many times the stitches and bazillion stitch markers were accidentally (or not...) removed from the needles. Ugh. Anyways. I started this baby in December of 2009. So very glad to have it done!
Then I finished my summer dress. (a modified Simplicity 2180) Unfortunately after the warm weather had passed. It was a rather nippy +8C when this picture was taken.
Oh! And I almost forgot! I used a tutorial to whip up a mei-tai carrier for a friend's little girl so she can wear her baby just like her mama. Baby Boy and LTM both want one for their dolls now too. LTM and "he's a big boy, not a baby, Mommy" doll were happy to pose for a quick pic. I think the boys will have slightly less floral carriers. I believe I have a monkey fat quarter perfect for Baby Boy and an awesome bug print for LTM! Just need some time...
Speaking of time, it's high time I get back to house work. I have puppy treats to get made, supper to figure out and a disaster of a "no longer a teen/should be able to clean it themself but isn't here to do so" bedroom to straighten before our houseguest arrives tomorrow.
I guess this warrants a bit of a round up so here goes!
First up would be a new pair of training pants for Baby Boy. They're from the Tinkle Time Pocket Trainer pattern, although I did alter the pocket more to my liking. It's a pretty good pattern. This is my second time making it. I made a Pair back in the spring for LTM.
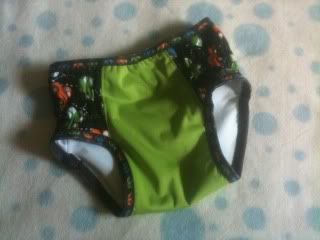 |
| Ready for potty training! |
Next up was a gift for a friend's little girl. I modified the Habitual Kimono Top so that it would be double layered and a Velcro close. The "baby legs" and hat are my own design and the little knit gnome from Plain and Joyful Living.
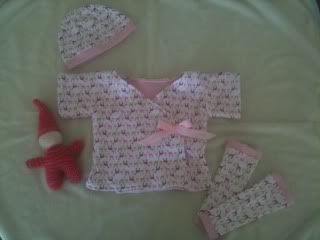 |
| For Baby Girl! |
Then I had another baby gift to make for another friend. Apparently I'm big into gnomes right now because I chose to make him a "Dangly Dell" from Little Oke Dolls. I also couldn't resist freezer paper stenciling a little onesie for him!
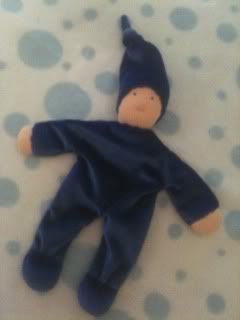 |
| Gnome!!!! |
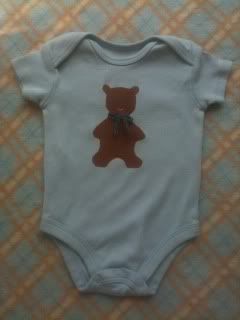 |
| Fun with freezer paper |
Moving along, a good friend of mine has been going through some trying times lately and I really wanted to send her something to let her know I was thinking of her and hopefully brighten her day. I chose to do my very favourite tea wallet pattern and a mug rug from Molly's Meanderings. I love this design and will make it again many times I'm sure!
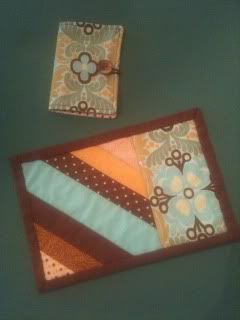 |
| Tea makes everything better. Or at least not as bad. |
I also did a couple things for me!!! First would be a "too long on the needles" WIP. My lace weight clapotis. This thing did not want to be finished. I can't tell you how many times the stitches and bazillion stitch markers were accidentally (or not...) removed from the needles. Ugh. Anyways. I started this baby in December of 2009. So very glad to have it done!
 |
| Finally Done! |
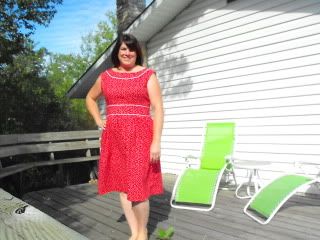
Then I finished my summer dress. (a modified Simplicity 2180) Unfortunately after the warm weather had passed. It was a rather nippy +8C when this picture was taken.
 |
| Maybe next summer this will get some wear... |
Oh! And I almost forgot! I used a tutorial to whip up a mei-tai carrier for a friend's little girl so she can wear her baby just like her mama. Baby Boy and LTM both want one for their dolls now too. LTM and "he's a big boy, not a baby, Mommy" doll were happy to pose for a quick pic. I think the boys will have slightly less floral carriers. I believe I have a monkey fat quarter perfect for Baby Boy and an awesome bug print for LTM! Just need some time...
 |
| Happy boy wearing his doll! |
Speaking of time, it's high time I get back to house work. I have puppy treats to get made, supper to figure out and a disaster of a "no longer a teen/should be able to clean it themself but isn't here to do so" bedroom to straighten before our houseguest arrives tomorrow.
Friday, September 07, 2012
A Picture Is Worth A Thousand Words
Reading Soulemama's blog I was inspired by her {this moment}. She says,
In the busy hustle, bustle of life, this notion of a photo capturing a moment to pause and savor really appeals to me.
A Moment To Remember
"A Friday ritual. A single photo - no words - capturing a moment from the week. A simple, special, extraordinary moment. A moment I want to pause, savor and remember."
In the busy hustle, bustle of life, this notion of a photo capturing a moment to pause and savor really appeals to me.
A Moment To Remember
 |
| September 7/12 |
Saturday, September 01, 2012
This Mornin' I'm Makin' Waffles!
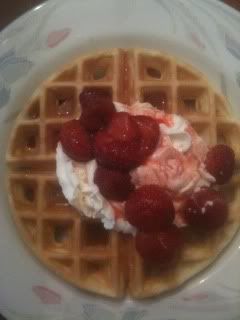
It's Saturday morning. The last glorious Saturday that (BF)G has off for the summer before his normal crazy work schedule resumes! It's been nice having home most weekends over the summer, and when he's home I always make a big breakfast. My usual repertoire consists o a rotation of things including bacon, eggs (from my neighbour's farm - farm fresh are truly the best!!!!!), homemade hash browns, toast and jam, or blueberry pancakes and sausages, or Eggs Benedict (made with homemade English muffins!) and fried potatoes, or like this morning, waffles with whip cream, strawberries (that we picked at my neighbour's early in the summer then froze) and bacon or sausages on the side.
Waffles are so easy to make and so good! Here's my go-to recipe:
Waffles
2 1/2 cups of flour
4 tsp baking powder
1/2 tsp salt
4 eggs, beaten with fork
3 cups of milk
1/2 cup oil or melted butter
Pre-heat waffle maker.
Mix dry ingredients together, then in a separate bowl, combine milk, eggs and oil. Pour liquid into dry ingredients, stirring while you pour to prevent large lumps. Mix until fairly smooth then cook according to your waffle maker's instructions until golden. Serve warm with whip cream, fruit (fresh or thawed from frozen) and syrup (ok. Admittedly I'm the sweet tooth in this house - I'm the only one that adds the syrup). Enjoy!!!
This recipe makes a lot. Enough for two adults and two small boys and enough left over for a weekday breakfast for myself and the little ones. Any leftover waffles freeze well, just wrap them well (and individually unless you like fighting with frozen baked goods) in plastic wrap. When you need a quick breakfast take them out of the freezer and pop in the toaster. You can also half the recipe easily.
 |
| Mmmmmmmm. Good stuff! |