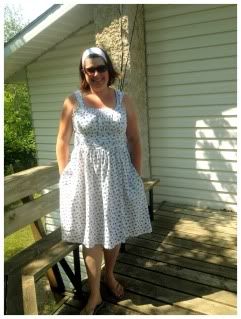
I mentioned in my last post that I did finish the Honey Blouse from Make it Perfect. I fell in love with the pattern a few months ago when I had stumbled across it on another sewing blog. It looked like it would be just the kind of top I could easily live in. I ordered it from Pink Chalk straight away and then started my search for fabric. With (BF)G's help, I finally settled on a cotton lawn with a bright and abstract print on white background that I found at Fabric.com. Once pattern and fabric had both arrived I was so excited to dive right into sewing... and then I read some reviews of the pattern that weren't really enticing, but still I thought, can't be that bad and I really loved the look of it, so I opened the pattern up, ready to trace and set to work and understood the basis for the unfavourable reviews.
For a full priced pattern there's a lot of work to be done. Pattern pieces that need to be traced together are printed back to back on smaller paper and then there are several pieces that need to be just cut to measurements with no pattern piece at all. I can understand that it cuts back on printing for the publisher of the pattern, but at $12, I expected a little more. I tossed the instructions aside after about the first sentence as they just weren't reading well to me - although that could just be me being finicky. I have to say in all honesty I really did not enjoy the making of this pattern. From start to finish I was annoyed with it.
My whole disgruntlement could really just be me. After sewing my Jamie Dress and thoroughly loving the whole process of it, maybe my expectations were just simply set too high. The Sis Boom pattern, as you may recall, went together like a dream. The instructions were clear and thorough not too mention intuitive. I just wasn't getting that feeling from the Honey Blouse.
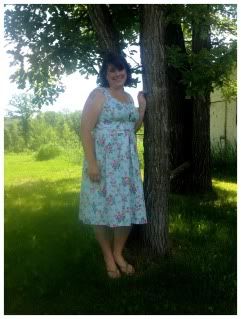
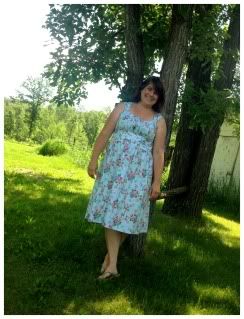
Despite the annoyance with the pattern, I am really happy to say I did end up with a blouse I love. It's comfortable, fits pretty well (although a touch roomy in the hips) and I have worn it several times. Definitely worth the frustrations I had making it. I can truly say I love my Honey Blouse now that it's finished and I'm so glad I persevered!!
(photos once again curtesy of Little Man)
Up next in sewing I have a little project to finish for someone, then possibly another warm weather top for myself and a new pair of warm weather pj pants for (BF)G. After that it may have to be another set of jammies for the little boys because I'm getting tired of having to wash the digger ones every second day. (That's all they want to wear and oh the anguish when they need to be washed as you know, clothes sometimes do...). In between that the Christmas knitting continues as does work on my Miette Cardi.
Pages
▼
Tuesday, July 30, 2013
Saturday, July 27, 2013
Kid's Clothing Week Round Up
Last week was Kid's Clothing Week. KCW means one thing for me usually. I make grandiose plans to sew for the boys all week and in reality, fabric does not get cut out, my machine does not get turned on and nothing gets accomplished.
I was determined to be successful this time. So I didn't sign up. I figured signing up would alert the gods of sewing that I was planning on participating and that would mean I would be dead in the water from that moment on, they would shut me down instantly somehow.
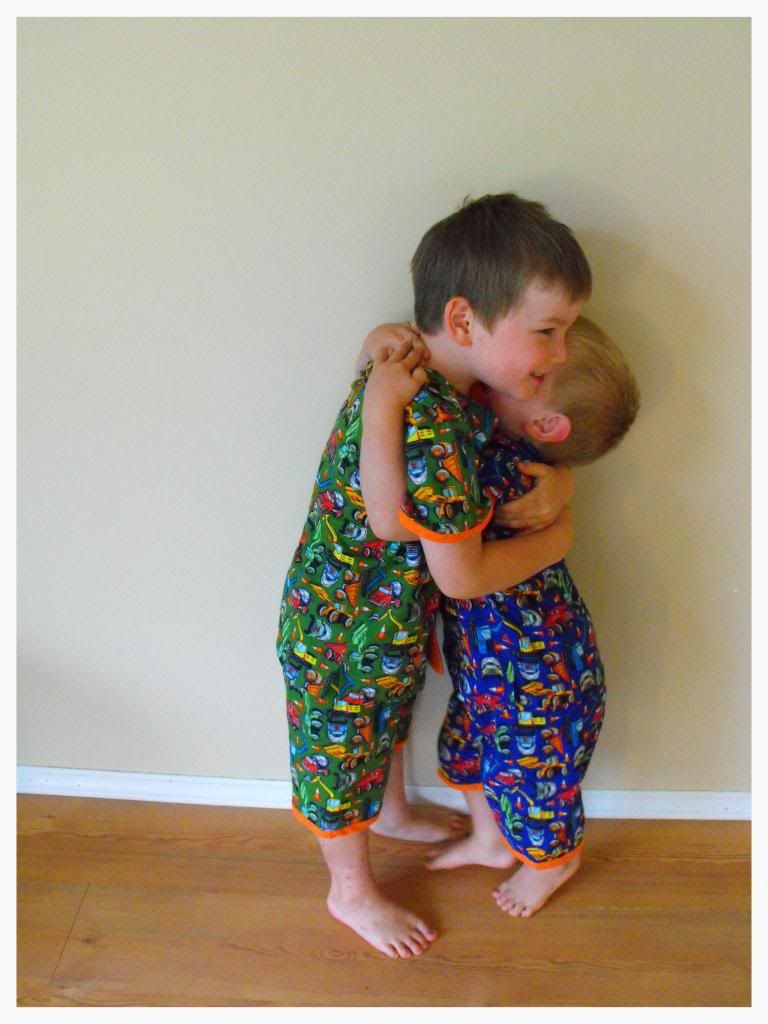
I set the bar low for myself. Instead of making a list of five or six items I made a goal of sewing two pairs of pyjamas. One for Little Man and a matching set for Baby Boy. Easy Peasy. How hard could it be to finish on deadline?
Before diving into the kid's sewing though I really wanted to get my Honey Blouse done first because I was planning on wearing it to a party last weekend that I ended up not able to go to in the end anyways (thanks to my 42 year old back that likes to think it's 90), so I got a bit of a late start to the kid's projects to begin with.
I am happy to say I did finish! Last Thursday. Only four days late. I call it a win. Whoot!!!!!! Success at last. That so rarely happens for me with KCW. Ok, ok. I realize KCW is supposed to mean at least one hour a day for that particular week, but whatever. I have lower standards... And after all, better late then never (or not at all), right?
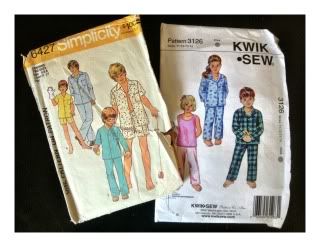
I had the fabric and the patterns picked out well in advance. I decided to use a vintage Simplicity pattern for Little Man that I used to use a lot for J and N when they were little. (Vintage. Ha ha! It's c1974. That would be three years younger than me... Does that mean I'm vintage too?) I could make that pattern in my sleep I've done it so many times before and it makes nice comfy jammies. For Baby Boy I used my standard go to Kwik Sew pattern that I've also made about a billion times now, and just altered it to match Little Man's. The fabric I had picked up early in the spring and have had sitting in my stash waiting to be used for months. I made a size bigger than they really needed in hope that since summer is half over already they will still be able to wear them next year. Of course this likely guarantees growth spurts of epic proportions over the winter months.
I was provided with motivation to finish in the manner that about once every five minutes Little Man would ask if his digger jammies were finished yet. Once his were done, he asked about once every five minutes if his brother's were done. (I had told him he had to wait for Baby Boy's to be finished or it wouldn't really be fair). Nothing like an incessantly demanding child to light a fire under you to get things done if for no other reason saving your sanity. (PSA: if you do not want to be harassed do not tell the child what you are making...)
I finished late Thursday evening long after they had gone to bed, so last night was finally the night they got to wear them. Both were very pleased.
Wednesday, July 10, 2013
Some Selfish Sewing
I decided in the spring that I was going to do some selfish sewing to go along with my selfish knitting. Projects that were for me all me! So far I've done the Washi Tunic - which I absolutely love on really hot summer days, and two dresses.
Today I want to tell you about my new favourite dress pattern. It's the Jamie Dress from Sis Boom patterns. It's a fantastic pattern. For a PDF, the pattern pieces went together like a dream. Sis Boom makes it completely fool proof. There's no fiddly lining up of pieces or worse fudging pieces that don't line up together (I've had that happen before. Grrrrr). The sizing it great with many options to choose from. They have even included extra where needed in the bodice for us bustier girls. Love it! I didn't have to alter a thing in that department. The instructions are very detailed and very clear except for what appears to be a small typo in one of the directions where the seam allowance was somewhat unclear, but it was easy enough to figure out. (It's 1/4" in case you get stuck too!).
I could wax poetic about this pattern I adore it so much. In fact I loved it so much that the minute I finished sewing the first dress, I immediately cut out a second one. I never do that. (Ok. I do. If its for the kids and its a Fishsticks Designs pattern. But for me? NEVER!) Anyways. Onto the details!
The only modification I made to the first dress was to skip the zipper. I loathe doing zippers. They (and buttonholes) are the bane of my sewing existence, being never able to get them just perfect. Oh how they vex me. To ensure fit without the zipper, I sewed the bodice as instructed, then basted the side where the zipper was meant to be and tried it on. There was plenty of room to get in and out, which is important. I made a dress last year that I skipped the zipper on and I'm constantly getting stuck in it. It's not pretty.
The fabric is Happy Land Claudia in Sky Blue (by Jennifer Paganelli of Sis Boom). I was able to snag it on sale from Fabric.com back in the spring. I love the trailing flowers and their bright colours. A bonus was up until a few days ago I had two pairs of sandals that matched the fabric perfectly. Then the dogs ate one sandal. I'm still a tad bitter about that, but at least I still have one pair that matches perfectly!
I didn't have anyone over four feet tall at home to take pictures for me when I finished making the dress so Little Man (Oh how it feels strange to leave out the "Toddler" part of his nickname!!) took some for me.
A few of them were mighty unflattering - that happens apparently when taking pictures at that angle. Yikes! But I was able to save a few that aren't too bad and show the dress pretty well. As I said I love this dress so much that as soon as Little Man finished snapping pictures I went in and cut out a second dress.
The second dress is made from a random very lightweight cotton that I got in the clearance section of my local fabric store. I had intended it for a different project, but then it seemed to say Jamie Dress to me so it's purpose quickly shifted. I had to fully line this one as it's so light it would have felt a bit indecent. I used an inexpensive cotton lawn that I was able to pick up in the city. I skipped the zipper again and added side seam pockets. I do love pockets on, well, anything. I had meant to put them on my first dress, but had forgotten until I'd sewed the side seams of the skirt using French seams. Unpicking them, it turns out, was far less desirable than having pockets.
I will admit to pretty much living in my second dress. It's lightweight and cool even with the lining, comfortable as pyjamas and I like to think pretty and feminine too with it's little sprigs of blue flowers and dots.
Again, I relied on my four year old fashion photographer for this next picture.
To wrap up, I can't say enough good things about the Jamie Dress from Sis Boom. It's well worth the $10 price tag - I got mine on sale so I feel like I got an exceptionally great find!! Anyone from beginner sewist on up to experienced will enjoy this pattern. Go forth and make yourself one. You won't regret it!
Next up I'll be making myself The Honey Blouse from Make It Perfect. I'll let you know how it goes!
Tuesday, July 09, 2013
Birthday Time!
It was birthday time around here this past weekend. Little Toddler Man and I celebrated another year older on Friday. I suppose being four years old, means he's not really a toddler anymore, is he? Maybe he hasn't been for awhile and I've just been clinging to the idea that he's still little...
I thought I'd share some pictures of the fun with you!
I made the now traditional annual birthday crown. Little Man is thoroughly obsessed with dinosaurs right now, so it seemed fitting his crown be dino related. Volcanoes and lava are also very important apparently so I thought I'd incorporate that too. I was quite happy with the result, as was he!
On Friday night we had a small gathering with a few people that weren't going to be able to make it out for the party the next day. Little Man was excited to open some presents and have some cake, but it was a late night and the birthday boy ended up pretty tuckered out by the end of the evening.
The next morning J and his girlfriend arrived early in the day (thank goodness!!) and jumped right into helping prepare for the party! They also pitched in to help decorate the cake that was a volcano made from a layer of chocolate cake, a layer of homemade strawberry ice cream, a layer of homemade chocolate ice cream, which was all covered with chocolate buttercream and then covered in clodhoppers candies. Strawberry sauce stood in as lava and sparklers, candles and plastic dinos completed the cake that Little Man has been planning since about February.
All in all it was a good birthday weekend, which (BF)G, Baby Boy, Little Man and I finished off with a trip to the beach on Sunday afternoon!
I thought I'd share some pictures of the fun with you!
I made the now traditional annual birthday crown. Little Man is thoroughly obsessed with dinosaurs right now, so it seemed fitting his crown be dino related. Volcanoes and lava are also very important apparently so I thought I'd incorporate that too. I was quite happy with the result, as was he!
 |
| Rawr! |
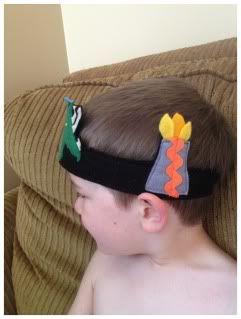 |
| Volcanoes and Lava!! |
On Friday night we had a small gathering with a few people that weren't going to be able to make it out for the party the next day. Little Man was excited to open some presents and have some cake, but it was a late night and the birthday boy ended up pretty tuckered out by the end of the evening.
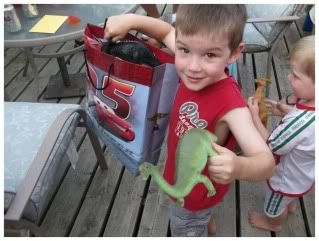 |
| Whoot! Dinos!! |
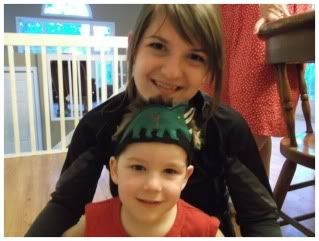 |
| The Birthday Boy and his big sister G! |
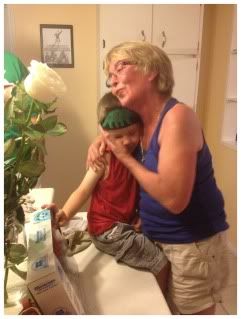 |
| Birthday Snuggles from Aunty G! |
The next morning J and his girlfriend arrived early in the day (thank goodness!!) and jumped right into helping prepare for the party! They also pitched in to help decorate the cake that was a volcano made from a layer of chocolate cake, a layer of homemade strawberry ice cream, a layer of homemade chocolate ice cream, which was all covered with chocolate buttercream and then covered in clodhoppers candies. Strawberry sauce stood in as lava and sparklers, candles and plastic dinos completed the cake that Little Man has been planning since about February.
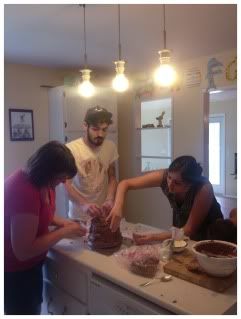 |
| Team Work! |
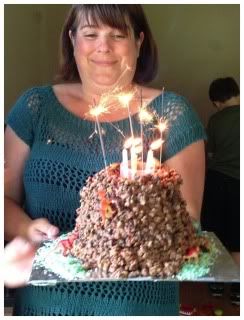 |
| Sparklers in my face - not sure I like that much... |
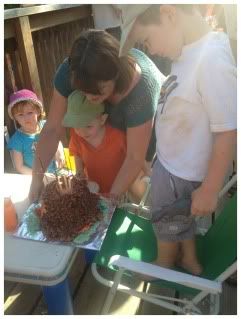 |
| Ready to blow out his candles! |
 |
| Fun on the beach! |


