I'm back this week and once again talking about another new Itch to Stitch pattern. I'm starting to feel a bit crazy fan girl with all my posts about them these days, but I really do apparently sew them up the most compared to other companies.
Today is the release of the Aveiro Cardigan and given how I live in cardi's all the time I thought it would be a great opportunity to finally branch out from my tried and true Blackwoods. While the Blackwood is awesome, I have been wanting a cardi that has an option to close for the longest time. Last year (or was it the year before?) I tried another pattern for a v-neck, button up cardi and it was an unmitigated disaster. Everything about it was awful and completely unwearable for me. It ended up being cut up for use in another pattern because there was just no way to selvedge it. Because it was such a disaster, I've literally avoided so much as looking at any other patterns in that style since. Then Kennis posted a tester call for the Aveiro Cardi and I was definitely game for trying it...
I knew being an Itch to Stitch pattern I could forget about any concerns regarding fit that I'd have with other patterns, and it was exactly what I was looking for all this time. It did not disappoint. It went into immediate rotation in my wardrobe as soon as I snipped the last threads from the machine.
It's an easy pattern and quick to sew (unless you're me - more on that later) which of course gives it big points in my books. There are four different length options for the body - long, regular, short and bolero. Then there are three sleeve options - long, 3/4 and short. Add to that two cuff options - regular and long cuffs. Use buttons or snaps or leave your cardi plain, the choice is yours. With all these options you've got plenty of ways to mix and match for completely different looks every time.
In the spirit of keeping things real here at chez Prairie Girl Knits though, I have to tell you I had THE WORST time sewing this one up. Not because of the design. Not because of the pattern. Not because of the fabric. Not because of any of those reasons. The design is great. The pattern is great. The rayon, spandex, poly blend fabric, whilst drapier than perhaps needed, is just fine.
However, my serger tension kept going out of whack and I apparently forgot every single thing I knew about sewing. Honestly. If there was a possibility of making a mistake I did it. I must have sewed on and ripped out the neckband at least three times and in the process I manhandled the fabric so much that it was all rippled and warped on one side. Thankfully I was able to steam the neckband pieces back into shape and finally re-attached it like I actually knew what I was doing. I was really happy to have finally sorted out all that and went to apply the snaps.
I must have applied hundreds of KAM snaps at this point in my life. After all the diapers, swim diapers, diaper covers, and other miscellaneous projects that I've used snaps on you would think it would be a task I could do with my eyes shut. But no. Not so much. I managed to get all the way to the last snap and then I put it in backwards. WHY?!?! HOW?!?! It took several attempts with various tools, implements and bad language before my husband gently took it from me, and got the snap out without damaging my poor much abused neckband fabric any more. New snap set, my cardi was good to go. Something that should have taken me an hour to sew at most, took me the better part of three days, but in the end it was worth it. And next one I sew up will definitely go easier. At least so long as I don't take complete leave of my senses again. Just goes to show that it doesn't matter how long you've been at it, sewing is not always rainbows and unicorns and projects that go together without a hitch.
I plan on making a few more Aveiros over the next few weeks - I definitely want the long version, and one in the short version and if time permits, I'll be making another in the same length as this one. I'd like to play with the longer cuff option too. If you'd like to grab your own copy of the Aveiro Cardigan , head on over to the Itch to Stitch website! The pattern is on sale for the release week (no code necessary) and to optimize your savings, Kennis offers a "buy more, save more" style discount that is still in effect with the sale price - check out the shop for all the details on that.
I'm not sure how often I'll be blogging in the next few weeks. After being off work since mid-June when my term position finished, I'm about to head back to working full time next week, so crafting and blogging may be put on the back burner for a week or two as I wrap my head around my new job, and we launch headlong into hockey season the same week. This year the boys are on different teams - one has aged up and the other has not - so the two practice schedules are going to be a bit nuts. I hope to pop in soon though because I do have some other fall sewing projects that I'm eager to show off!
Monday, September 24, 2018
Wednesday, September 19, 2018
Time to Sew - Itch to Stitch Blog Tour
I was so excited when I found out about the blog tour for Itch to Stitch*! I feel so honoured to be amongst some amazing bloggers to be part of it! If you've read my blog before you know that I'm a huge fan of Kennis Wong's designing. I've done loads of pattern tests for her over the last few years as well as sewn plenty of her patterns I haven't tested. I know how much attention she pays to details and fit, so if I want a pattern I don't have to worry about fussing a lot with I often choose an Itch to Stitch one.
This fall's blog tour theme was sewing up something we'd been meaning to make, but hadn't got around to yet. Itch to Stitch has so many options to choose from, and although I've made several of the patterns, there were still a few I've not had the chance to do yet.
Because we're well into football season here (man those evening practices are getting chilly to watch - brrrrrrr) and hockey season will be well underway in a few weeks (and I'll be shivering in the stands of the local arenas on a regular basis), I decided that cozy and comfy should be my go to. I want to wear all the warm and soft fabrics! With that in mind, I chose to sew both the Newport Top and Tierras Woven Joggers. To be honest, I hadn't thought that I'd be at all interested in the Tierras. I'm not a joggers person... I'm definitely not a jogger either! LOL) But once I started seeing the tester versions, and then they popped up a few times randomly on my Facebook feed I was definitely feeling my interest piqued.
First up is my Newport Top. I chose a snuggly soft baby french terry from Sly Fox Fabrics, who is one of our blog tour sponsors and very generously sent me the fabric. Let's talk about my fabric for just a second. It's got just the right amount of stretch for the pattern and the recovery is really good so it's not going to get saggy or baggy with wear but because the Newport is a boxy silhouette I wanted to make sure my fabric had a nice drape to it as well. The print is on the loop side of the fabric giving it a bit of texture for interest. After looking at a few different choices there was no doubt that this fabric checked all the boxes for me and of course it's a floral so that made it absolutely irresistible to me and when it arrived in the post, I was not disappointed.
As for the pattern? Comfort - check! Cozy - check! Dress up/Dress down - check! I love the fact that it has the lapped neckline and while I'm usually definitely not a fan of a high low hem, I really like this one (and the fact that it'll be a bit more warmth when I'm sitting on cold arena benches this year is a definite drawing point!!! Is it just the arenas that my kids play in or do all arenas steadfastly refuse to turn on the heat over the benches in the dead of winter???). Plus it's so quick to make. There is nothing I enjoy more than a pattern that I can whip up in a short time frame! All I needed to do was my standard adding length - on this one I didn't add quite enough length and ended up feeling it was going to be too short for my liking if I hemmed it as stated in the pattern, so I just made a facing pattern by tracing around the bottom of the actual pattern pieces, then stitched it on, turned it up and topstitched it down. I am super particular about the length of my tops and I'm ridiculously long waisted. While you'd never know if I hadn't told you, it was a quick but necessary rescue. I've already corrected my pattern for my next one (I'm looking at you blush pink and navy striped french terry sitting in my stash!)
Onto the Tierras! I had a hard time deciding on fabric - I wanted to stay away from anything that might be construed as pj pants given the elasticated waist and jogger silhouette - but I wanted something with some drape that would also be a bit warmer feeling. I ended up choosing a rayon blend twill that was just from my local fabric store. Its super soft with drape, but not so much drape that it feels flimsy. It's got a bit of weight to it too, which will make it warmer in the cooler months.
For the pattern, I did do a few minor modifications. The rise on the front of these joggers is pretty low, but the pattern gives detailed instructions how to change that up to give them a higher rise. I measured both front and back and decided to just adjust the front because I knew if I did both, the rise would then be too high on my back so I slashed and spread the pattern at center front to my desired amount (in my case 2") and then I tapered that to nothing at the side seam. I had to re-draw the side seam and smooth everything out and re-angle the center front seam back to the proper place, but it all worked out nicely in the end. I also scooped out the back crotch curve a bit to get a better fit there. (I just followed the instructions on the Itch to Stitch Blog from the Liana Stretch Jeans sew along to figure out exactly what I needed to do!). Unfortunately with all my concentration on perfecting the fit of the top part of my joggers, I forgot to add some length to the bottom part, so I did the straight hem rather than the elastic one, and unfortunately I feel like these are just on the verge of being a bit too short. Note to self for next time...
I really like the comfort factor of these pants with the slightly looser fit and elastic waist (I left out the drawstring), but the slash front pockets lend themselves well to making this a pant that is easy to dress up or down too depending on fabric choice.
I'm super pleased with my end results and glad I took the time to finally try out these two patterns!!
Before you head off though, there's more fun for the tour! First of all be sure to check out all our incredible sponsors.
Next you'll want to keep tabs on all the tour stops. Click on the links below for that.
As an added bonus, for today only there is a flash sale on the patterns that have been featured today on the tour!!!!
Anza Jumpsuit and Dress
Chai Shirt and Dress
Chirripo Top
Havar Jacket
Idyllwild Top and Dress
Newport Top
Tierras Woven Joggers
Just click on the pattern names to check out these great deals today! You don't want to miss out!!! (*hint* you will want to be checking out all the tour posts as there's some great deals to be had each day. I know I will be definitely adding to my pattern stash!)
Last but not least, remember those sponsors I showed you up above? Not only does Mabel Madison have a fantastic offer for our readers - $10 off a $50 order using the code ITSTOUR until September 30, 2018, we've got a contest going on as well, with lots of great prizes to be had so be sure to enter using the rafflecopter below!
a Rafflecopter giveaway
Good luck and I hope you enjoy today's stop on the tour and get a chance to check out all the other stops as well!
Monday, September 10, 2018
Petaluma Dress
I'm going to my first ever Frocktails event later on this week - I'm both ridiculously excited (Meeting new sewing friends!!!) and ridiculously anxious (Meeting new sewing friends!!!). I know I'll have fun when I get there, it's just the walking in the door that is a bit nerve wracking. Like the first day at a new school when you were a kid, or the first day on a new job as an adult. You know that nervous, but excited feeling?
Anyways, I've been pondering what dress I wanted to make for the event and was having trouble deciding. I was leaning towards a wrap style dress, but couldn't make up my mind which pattern I wanted to use. Then Kennis posted a testing call for her latest pattern, Petaluma Faux Wrap Dress*. HELLO DRESS OF MY DREAMS!!!!!!! Decision made.
My husband asked if I was sure I wanted to choose a pattern that was just at the testing stage for a dress for an event and I thought, "Of course! It's an Itch to Stitch pattern!!" I had all the confidence in the world that I could make my dress in the testing phase and be happy with it. I've been lucky enough to test enough of the Itch to Stitch patterns to know how much work Kennis puts into them before she even releases it for testing. They're always so incredibly well drafted that the first version of a test pattern is often the final version. Her patterns always fit like a dream too. I rarely have any alteration to make besides adding a bit of length to the bodice. So of course I was sure!
Petaluma was everything I hoped it would be! I used some fabric I've had stashed away for probably three years at least. I haven't wanted to "waste" it on a pattern that might not be worthy of it. It's just a poly peachskin, but its pretty and it seemed "special" so I've held onto it all this time. It just goes to show how much faith I have in the ITS patterns, that I was willing to risk a precious cut of fabric on a first run of a test!
So let's talk about the pattern now! It's got a crossover bodice with the choice of three sleeve options - short like mine, flutter and double petal. All are so pretty and the flutter ones are definitely going on my next Petaluma dress! There is an optional tie belt (I absolutely adore the tie belt!!!) that can be tied in the front, or around the back depending on the look you like. The petal skirt is finished off with a narrow hem. Check out the ITS blog for some great tips on doing a narrow hem without pulling your hair out and/or throwing a temper tantrum. It does require a serger, so if you have one, you'll be set. (If not, she does give some other options in the post that you can look into further). I don't know why I don't always try the serger method. I did it on my Crystal Cove Camis and was amazed at how much easier it was. With Petaluma I fought and cursed and burnt my fingers with the iron and just about cried. Then Kennis gently reminded us of her serger method and I went back, stitched ripped the hideousness that was my hem pressed it all nice and flat again, serged the edge, folded and stitched. I was done the front hems in about five minutes. Oh. And this dress has pockets!!! Told you. Dress of dreams!!
Petaluma promises to be a go to pattern whether you're looking for a new dress for fall (or one for summer if you're in the Southern Hemisphere). If you head over to the Itch to Stitch site you can get your copy for a discounted price right now and don't forget the volume discount still applies so if you've got your eye on any other patterns, right now is the time to scoop them up!
Happy crafting until next time!
I'm baaaaaaaack! Did you miss me? LOL
Just popping if for a quick edit, because I wanted to show you all the flutter sleeve version that I finished last week. This one is in the "Sarah" crepe from Sew Me Sunshine in the UK - let me just stop for a moment to tell you how amazing Sew Me Sunshine is!!! By some sort of postal miracle, she had my fabric to me in less than a week from when it shipped. WHAT KIND OF SORCERY IS THAT?!?!?! Unheard of. That's what that is.
My only problem is trying to get my narrow hem on my sleeve to lay flat. That sucker just keeps flipping up and driving me mad. Anyone have a solution for that? Because I love this dress and would prefer not to lose my sanity over a sleeve...
For this version I did a wee bit of a broad back adjustment, so I have more room for my linebacker-esque shoulders and I did grade out a little bit at the waist for a slightly looser fit in the mid-section.
This dress. Red. Polka dots. Flowers. Flutter sleeves. I have all the LOVE for it.
There. Now I'm done! For real this time! ;)
So let's talk about the pattern now! It's got a crossover bodice with the choice of three sleeve options - short like mine, flutter and double petal. All are so pretty and the flutter ones are definitely going on my next Petaluma dress! There is an optional tie belt (I absolutely adore the tie belt!!!) that can be tied in the front, or around the back depending on the look you like. The petal skirt is finished off with a narrow hem. Check out the ITS blog for some great tips on doing a narrow hem without pulling your hair out and/or throwing a temper tantrum. It does require a serger, so if you have one, you'll be set. (If not, she does give some other options in the post that you can look into further). I don't know why I don't always try the serger method. I did it on my Crystal Cove Camis and was amazed at how much easier it was. With Petaluma I fought and cursed and burnt my fingers with the iron and just about cried. Then Kennis gently reminded us of her serger method and I went back, stitched ripped the hideousness that was my hem pressed it all nice and flat again, serged the edge, folded and stitched. I was done the front hems in about five minutes. Oh. And this dress has pockets!!! Told you. Dress of dreams!!
Petaluma promises to be a go to pattern whether you're looking for a new dress for fall (or one for summer if you're in the Southern Hemisphere). If you head over to the Itch to Stitch site you can get your copy for a discounted price right now and don't forget the volume discount still applies so if you've got your eye on any other patterns, right now is the time to scoop them up!
Happy crafting until next time!
I'm baaaaaaaack! Did you miss me? LOL
Just popping if for a quick edit, because I wanted to show you all the flutter sleeve version that I finished last week. This one is in the "Sarah" crepe from Sew Me Sunshine in the UK - let me just stop for a moment to tell you how amazing Sew Me Sunshine is!!! By some sort of postal miracle, she had my fabric to me in less than a week from when it shipped. WHAT KIND OF SORCERY IS THAT?!?!?! Unheard of. That's what that is.
My only problem is trying to get my narrow hem on my sleeve to lay flat. That sucker just keeps flipping up and driving me mad. Anyone have a solution for that? Because I love this dress and would prefer not to lose my sanity over a sleeve...
For this version I did a wee bit of a broad back adjustment, so I have more room for my linebacker-esque shoulders and I did grade out a little bit at the waist for a slightly looser fit in the mid-section.
This dress. Red. Polka dots. Flowers. Flutter sleeves. I have all the LOVE for it.
There. Now I'm done! For real this time! ;)
Tuesday, August 28, 2018
There's a Certain Greatness to My Lateness...
This afternoon as I sat here in a sweatshirt and jeans and contemplated how many layers of warmth I should plan to take to watch the boys football practice tonight, I started writing a blog post about sleeveless dresses and tops. The season is fast wearing down, but better late than never and all that. I had planned to write this post weeks ago. I even took the photos weeks ago. And then life happened. And then distractions happened. And then other blog posts happened... However, maybe there'll still be some warmer days, or maybe you're in the southern hemisphere and you're heading into summer soon. Or maybe you can just tuck this away in your mental filing cabinet for next year. Whatever the case, I wanted to highlight two free patterns that have been in constant rotation in my wardrobe this summer.
The first is the Agnes dress from Halla Patterns. It's a paid for pattern unless you're in their Facebook group - go join the group, check out the announcements and get a coupon code to get it for free. You won't regret either of those instructions I'm giving you. The Facebook group is warm and welcoming and you'll get lots of inspiration from the sharing going on in there. As for Agnes, when I downloaded it last summer, it was simply a top or dress. Now, it's been updated to include sleeve options as well as more length options. Last summer I made the top version, because I was convinced I wouldn't like the dress. (what was I thinking????) I made it from a one metre remnant of Liverpool that I found at the local fabric shop for a couple of dollars. I wasn't willing to spend a lot on it, because I wasn't sure I'd even like the top - I normally shy away from swing tops and dresses - but I sewed it up figuring I had nothing to lose. I then wore it all the time for the rest of the summer. I wore it so often with my jeans to work I'm sure people were starting to wonder if I didn't own any other tops. Here's that first version last summer.
Because I loved last summer's top version, I decided to throw caution to the wind and make a dress version at the beginning of the summer. It's such a ridiculously quick sew and turns out I loved the dress version as much as the top version. For my dress I used a Double Brushed Poly from Sew Sew English that I'd bought last summer and had been hoarding.
I decided I absolutely needed to make a second dress because like last year's top, I was starting to wear my dress every second day. I ordered more DBP, this time from Elevated Fashion Fabrics and as soon as it came in I sewed it up too and have worn it approximately eleventy billion times since.
These dresses are perfect for throwing on and feeling comfy for kicking about home in, but dressed nicely enough to go out in. I have all the love for these dresses. I'm now on the lookout for the perfect fabric for a sleeved version for fall to wear with tights and boots!
I also have another metre of Liverpool I ordered in the spring to make another top version, but have kind of run out of time and hot weather so I'll probably plan that for next summer instead.
The next pattern I want to tell you about is Itch to Stitch's Lago Tank. It's one of her free patterns that is available on her site all the time and although it's a freebie, like all ITS patterns you are guaranteed to have the same great standard of pattern drafting that you've come to expect from designer, Kennis Wong. I made two tanks in quick succession and only thing stopping me from making more was time. I can't tell you how many times I've washed and worn these two tanks since making them! The only change I made to the pattern was to add my usual length in the body. You can squeeze this pattern out of such a little amount of fabric that it's fantastic stash buster. I keep thinking it would be a fun one to use my Silhouette Cameo and cut out some vinyl for on the front too. Hmmmm. Future project idea...
The first one was made using a jersey of unknown content, left over from the fabric I made my green Molly top in during the winter. It definitely has a touch of drape to it more than a regular cotton lycra, but I have no clue what it is. Maybe it's just a poly knit because I can wash and dry it without any signs of shrinkage. (and if there's one thing I excel at, it's shrinking all cotton). Whatever it is, it's soft, washes and dries like a dream and feels cool and comfy.
The second one I made is DBP that I had in my stash from the same Sew Sew English order as the feathers print I used for the Agnes. I loved this print so much and was going to make a Patterns for Pirates Sunshine dress. I had planned to do a sleeve hack and got everything cut out and sewn up. I don't know what happened along the way, but disaster ensued. Ok. I know full well what happened with the sleeves. Like a complete dolt, I had forgotten to change the armscye to accommodate sleeves and couldn't move my arms. Rookie mistake there. I know better! So no worries, I'd make it sleeveless like the pattern... except things went south from there. My bodice was way larger on one side than the other throughout the shoulder. My bodice was also hella crooked in length. As in a good 1 1/2" out from one side to the other. AGGGHHHHHH. I called it quits at that point. I mean really. There's a line that has to be drawn in the sand as to what you can selvedge and what you can't and this was it. But I was so sad about the fabric. I was able to cut on the cross grain (thank you gods of four way stretch!) and rescue just enough fabric from the skirt. So while the fabric wasn't destined to become the dress I dreamed I'd wear all fall long, it did become my very favourite tank top of the summer and I'm ok with that!
I'm thinking I might still make a few more Lago Tanks if I have the chance even though summer is fast coming to an end. I think they'd make the perfect layering piece for fall.
So there you go. Two awesome patterns to fill your warm weather wardrobe with! Now I'm off to go have a cup of tea and find my fuzzy slippers because damn it's chilly tonight!
The first is the Agnes dress from Halla Patterns. It's a paid for pattern unless you're in their Facebook group - go join the group, check out the announcements and get a coupon code to get it for free. You won't regret either of those instructions I'm giving you. The Facebook group is warm and welcoming and you'll get lots of inspiration from the sharing going on in there. As for Agnes, when I downloaded it last summer, it was simply a top or dress. Now, it's been updated to include sleeve options as well as more length options. Last summer I made the top version, because I was convinced I wouldn't like the dress. (what was I thinking????) I made it from a one metre remnant of Liverpool that I found at the local fabric shop for a couple of dollars. I wasn't willing to spend a lot on it, because I wasn't sure I'd even like the top - I normally shy away from swing tops and dresses - but I sewed it up figuring I had nothing to lose. I then wore it all the time for the rest of the summer. I wore it so often with my jeans to work I'm sure people were starting to wonder if I didn't own any other tops. Here's that first version last summer.
Because I loved last summer's top version, I decided to throw caution to the wind and make a dress version at the beginning of the summer. It's such a ridiculously quick sew and turns out I loved the dress version as much as the top version. For my dress I used a Double Brushed Poly from Sew Sew English that I'd bought last summer and had been hoarding.
I decided I absolutely needed to make a second dress because like last year's top, I was starting to wear my dress every second day. I ordered more DBP, this time from Elevated Fashion Fabrics and as soon as it came in I sewed it up too and have worn it approximately eleventy billion times since.
These dresses are perfect for throwing on and feeling comfy for kicking about home in, but dressed nicely enough to go out in. I have all the love for these dresses. I'm now on the lookout for the perfect fabric for a sleeved version for fall to wear with tights and boots!
I also have another metre of Liverpool I ordered in the spring to make another top version, but have kind of run out of time and hot weather so I'll probably plan that for next summer instead.
The next pattern I want to tell you about is Itch to Stitch's Lago Tank. It's one of her free patterns that is available on her site all the time and although it's a freebie, like all ITS patterns you are guaranteed to have the same great standard of pattern drafting that you've come to expect from designer, Kennis Wong. I made two tanks in quick succession and only thing stopping me from making more was time. I can't tell you how many times I've washed and worn these two tanks since making them! The only change I made to the pattern was to add my usual length in the body. You can squeeze this pattern out of such a little amount of fabric that it's fantastic stash buster. I keep thinking it would be a fun one to use my Silhouette Cameo and cut out some vinyl for on the front too. Hmmmm. Future project idea...
The first one was made using a jersey of unknown content, left over from the fabric I made my green Molly top in during the winter. It definitely has a touch of drape to it more than a regular cotton lycra, but I have no clue what it is. Maybe it's just a poly knit because I can wash and dry it without any signs of shrinkage. (and if there's one thing I excel at, it's shrinking all cotton). Whatever it is, it's soft, washes and dries like a dream and feels cool and comfy.
The second one I made is DBP that I had in my stash from the same Sew Sew English order as the feathers print I used for the Agnes. I loved this print so much and was going to make a Patterns for Pirates Sunshine dress. I had planned to do a sleeve hack and got everything cut out and sewn up. I don't know what happened along the way, but disaster ensued. Ok. I know full well what happened with the sleeves. Like a complete dolt, I had forgotten to change the armscye to accommodate sleeves and couldn't move my arms. Rookie mistake there. I know better! So no worries, I'd make it sleeveless like the pattern... except things went south from there. My bodice was way larger on one side than the other throughout the shoulder. My bodice was also hella crooked in length. As in a good 1 1/2" out from one side to the other. AGGGHHHHHH. I called it quits at that point. I mean really. There's a line that has to be drawn in the sand as to what you can selvedge and what you can't and this was it. But I was so sad about the fabric. I was able to cut on the cross grain (thank you gods of four way stretch!) and rescue just enough fabric from the skirt. So while the fabric wasn't destined to become the dress I dreamed I'd wear all fall long, it did become my very favourite tank top of the summer and I'm ok with that!
I'm thinking I might still make a few more Lago Tanks if I have the chance even though summer is fast coming to an end. I think they'd make the perfect layering piece for fall.
So there you go. Two awesome patterns to fill your warm weather wardrobe with! Now I'm off to go have a cup of tea and find my fuzzy slippers because damn it's chilly tonight!
Saturday, August 11, 2018
2018 Outfit Along
I can't believe that I actually managed to get my outfit done in time for the 2018 Outfit Along done. I was sure that this year was going to be a bust, but by some sort of OAL miracle, I finished up the morning of the final day!
For those of you that may not know what the Outfit Along is, it is an annual event taking place on Ravelry in the Untangling Knots group. Knitwear designer Andi Satterlund and Lauren of the famed Lladybird co-host the "along". The goal is to knit a piece and sew a piece so that you end up with a complete outfit at the end of the two months. There are official patterns each year, but participants are free to choose whichever patterns they want. The outfit along is truly my very favourite "along" and I look forward to it every year.
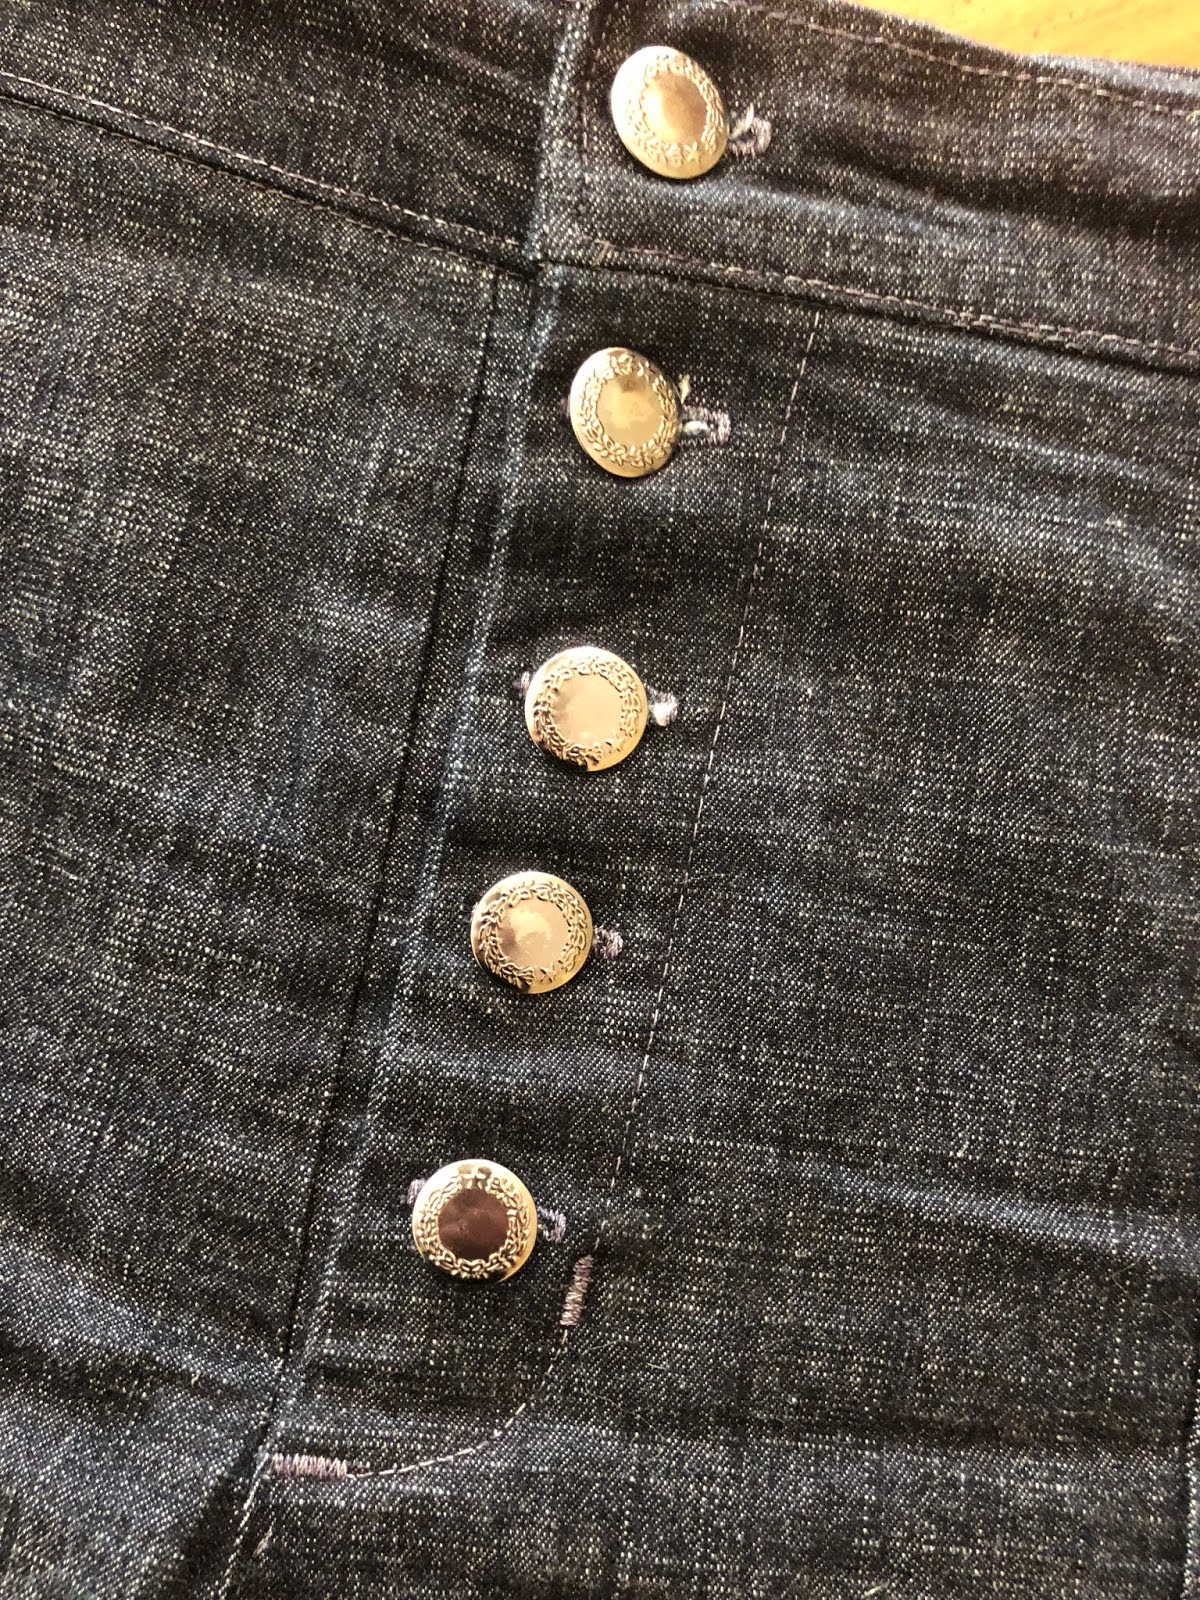
This year's official patterns were the Waters Tee by Andi and the Lander Pants by True Bias and I decided to both. Waters is a very simple top down knit tee that has a scoop back and almost boat neck front. I'm sure that the Lander Pants need no introduction. I may, in fact, be the last person in the world to sew them up. They've been out for ages now and are a high waisted, button fly, wide legged pant with three different length options.
While the Waters was a super simple pattern it took me what felt like forever to knit. I think the combination of miles of stockinette stitch on tiny needles and fingering yarn slowed me down. Combine that with my distinct lack of knitting mojo and I really didn't think I'd get finished within the two months of the challenge. In fact had I not had a sudden short-lived burst of motivation in the last two weeks of the Outfit Along, I can guarantee that my top would not have been finished in time. (the mojo has once again disappeared, and I'm struggling to pick up my needles for any reason right now). The Lander Pants sat waiting because to be honest the thought of having to go through the fitting of pants was really not what one could call enticing. Pants. Ugh...
Everyone has what seems to be some serious Lander love going on. I definitely did not. In fact I dubbed my the "No Love Landers" and thought I'd never wear them. However, now that they're done and I have had some distance from sewing them, it turns out I'm wearing them quite a bit. Fitting quickly became a nightmare - I clearly have no clue what size I really am when it comes to pants, because I am fairly certain I started out two sizes too big. Of course I followed the steps according to the instructions which meant all the fancy bits like top stitching and the buttonholes and bar tacks for the fly were already done before I sewed up the side seams only to have the shorts fall straight off when I tried them on. I was pretty peeved with myself for the rookie mistake and was determined I was going to get them to at least sort of passably fit before throwing my hands up in defeat and wasting all the effort of my top stitching not too mention my fabric. I took a good inch and a half beyond the already allowed 1" side seam at the hips, about another 3/4" at the waist on either side, then took in the back center seam tapering from the original seam to a decrease of an 1 1/4" at centre back. Then I shaved off a good 5/8" from the height in the back. I still need to wear a belt with them or they're not staying up, but given how often I've worn them this week, maybe they deserve some love after all.
Waters is pretty good fit wise. As it turns out I like to wear it backwards favouring the scoop neck in the front rather than the back. Its kind of nice to choose whichever way I feel like wearing it depending on my mood. I think I could have done with a few less waist decreases and a bit more length, but at the point I cast off I was just happy to have it done on time. I can live with the not re-doing the waist decreases, but I may at some point down the road add a bit of length to my tee to make it more comfortable for me. It's not enough to keep me from wearing it so we'll see. I'd have to actually find my knitting mojo first.
Labels:
knitting,
Lander Pants,
OAL2018,
sewing,
True Bias,
Untangling Knots,
Waters Tee
Wednesday, July 25, 2018
So I Made A Swimsuit!
I know. I know. I was supposed to work on finishing up my Eve Dress and my Outfit Along outfit, but oooooh! Shiny things. I am a magpie.
I've actually been hording my swimsuit fabric for approximately four or five summers now with the intention of making a suit. I've also been amassing swimsuit patterns like nobody's business. I don't really know what's been holding me back. I did make a swimsuit years ago without so much as batting an eye. It was a Kwik Sew pattern. I remember buying the pattern and fabric and then sewing it up. No fear, no hesitation, just doing it.
I've come to the conclusion that my hesitation was based on a fear of sorts, and that fear was founded on the basis of nothing. I blame the internet. While it has great resources that are very useful, it also contributes to hesitation and worry with the deluge of warnings, "Don't do this, don't do that, swimsuits are scary..." on and on. Before the dawn of the internet, we saw a pattern we liked, we bought the fabric and we sewed it up.
Anyway, I digress. Let me start again. So I made a swimsuit. Helping get me to the starting point on my suit was listening to the Love to Sew Podcast about sewing swimwear which served as a good pep talk and that the Curvy Sewing Collective's Challenge for the #curvyyearofsewing for July and August is, of course, swimwear and bodysuits and I do love a challenge. I was frustrated with the RTW suits I owned already and I loathe swimsuit shopping with all my being. It was definitely time to make my own. My first choice was the Mama Roxy from Made for Mermaids and it's everything I could want in a swimsuit. Good coverage and cute and modern but at the same time feels just a bit retro with the wide straps.
First off, let's talk about fit. This suit? It fits. Better than any RTW suit I've owned in the span of forever. It wasn't without some effort mind you. I cannot even begin to tell you how many times I altered the swim bottoms to get a good fit. Taking a bit in on the side seams, putting the elastic in. Nope. Take the elastic out. Take a bit more in. Put the elastic back in. Put the elastic in the waist. Nope. Take the elastic out. Shave a bit off the back that was coming up far higher than any high waisted short should ever come. Put the elastic back in. Crap. Still not enough. Take the elastic out. Take out more height. Put the elastic back in. Rinse and repeat. A lot of my time spent could have been avoided had I not been so concerned about not over fitting the first time around, but I chose to do it in baby steps, so my seam ripper and I ended up with a lot of time together. They're still not perfect, but you know what? They are darn well close. I can make some little adjustments on the next pair and they'll be even better for me.
![]() |
Next lets talk about the practical applications of this suit. I spent a good hour in the pool with Baby Boy testing it out. Playing, swimming laps, doing a bit of a work out (the boys are slave drivers! Baby Boy was my "coach", Little Man sat on the deck, note pad in hand and was my "ref" keeping track of my form and performance in the pool). The suit held up just fine through it's paces. No shifting about. No straps slipping off my shoulders. No bottoms falling off when I jumped. (Don't laugh. That happened with a RTW pair about two weeks ago. Jumped in the pool and the bottoms didn't come with me. Thank the good Lord it was in the privacy of my own back yard!!!)
Lastly, let's talk about body positivity for just a moment. It took a huge leap of faith to put pictures up online of myself in a swimsuit. You may have seen them already - I posted on Instagram and a couple of sewing groups I'm in on Facebook. I had some serious reservations about doing so, remembering that "Cake with Cashmerette" all came about after she posted something about swimwear on her Instagram account. I know there is nastiness out there and I'm not sure I could be so open minded about something like that as Jenny is. At times I've not got the thickest of skin when it comes to hurtful comments. But then I thought about it some more and thought I'm damn proud of my swimsuit. I feel like a million bucks wearing it, and darn it all, if you don't like it scroll past. Maybe it helps someone else out there to feel good about themselves no matter what size they're wearing. Maybe we don't need to just post bathing suit selfies if we're a size six. The whole reason I was finally inspired to start making my suit was that all over my Facebook and Instagram feed photos of ladies looking fabulous in their hand made suits were popping up every where. Slim ladies, curvy ladies, young ladies, older ladies. What resonated most was they all looked great and they all looked happy and confident in their suits. After posting I couldn't believe the comments and love my photos got. It was to the point of overwhelming! Just shy of 1000 people took time to either click a button or comment, each one of them positive and supportive. So a huge thank you to all those out there who helped boost my confidence and make me feel great!!
I'll hopefully be back next week with a finished Outfit Along project to tell you about. No promises - I've just finally assemble the pattern pieces for my Lander Shorts and I've still got quite a bit of knitting left to do on my Waters Tee - but I'm going to do my best to get it done! Right now though, I'm going to go put on my awesome new swimsuit and jump in the pool!
Labels:
body positivity,
madeformermaids,
mamaroxy,
sewing,
swimsuit
Monday, July 09, 2018
Plitvice
It's been super hot here lately with day time temperatures in the +30 range - temps on Saturday were even hotter in the mid 40s with the humidex - so I've been trying to beat the heat by either being in the swimming pool with the boys or by hiding in the basement. We don't have a/c in our house, and we've got fans in every room upstairs working double time, but the basement is always cool. I should really spend the time down there sorting through toys and clutter and cleaning it up, but instead I seem to be ignoring the housework and gravitating towards my sewing room (which also is in dire need of a thorough sorting and cleaning). Big surprise there. LOL.
All that being said, hiding from the heat and not working anymore has given me a bit more sewing time lately. So here I am with my third post in a row about a new Itch to Stitch pattern that I tested over the last couple of weeks. Today's top is the Plitvice Top*, a sweet little cowl neck tee that once again can be made either casual or dressy depending on the fabric you choose.
Let me just caution you here on fabric choice a bit! You will want to follow the fabric suggestions fairly carefully when it comes to amount of stretch and drape. I first chose to make one out of what was advertised as "Hacci" sweater knit. Now I don't know about you, but I've never met a hacci that wasn't drapey and the one I bought was no exception... until I washed it. I don't know what kind of fabric it really was but it managed to lose most of it's softness and most of its drape. To make matters worse it smelled like some sort of ghastly petroleum product when wet. I don't know why I still went ahead with sewing the top. Suffice it to say, that particular disaster will not see the light of day any time soon.
I was feeling a bit discouraged at that point, but I forged on and rummaged through my stash trying to find something better to use. What I finally chose was a drapey jersey blend that I had purchased from Blended Threads a couple of years ago and had sewed up into the most horrendous dress ever. (You never saw that one either - the style, fit and every other aspect were ALL wrong so it's sat hiding on a shelf in my sewing room for the duration) The skirt alone had enough fabric for my Plitvice pattern pieces, and the ditzy floral print looks so much better as a top, than a dress! The gathers fall in soft, gentle waves and the cowl drapes gracefully just as one would hope with a top like this! Win, win for me! I got a nice new top and got rid of the dress of shame! I love when I can repurpose something so that it doesn't go to waste!
Like the previous two new releases (Nottingham and Crystal Cove) that I've tested for Itch to Stitch, Plitvice was quick to sew up. The cowl neckline is finished off so nicely compared to a few other cowl neck patterns I've done in the past and it was really simple to get that nice finish on it!
I think I may try another, grading up at the bust but I've not decided yet - for this one I did a straight 18 down to the waist then from waist to hip graded down to the 16. I also added 1 3/4" on the lengthen/shorten line as I seem to have to do with all patterns no matter what brand. I always tend to think that my height is in my legs, but it turns out maybe not because I've noticed a lot of patterns from other designers have an average 8" side waist length - I measured the other day and mine comes up at 10 1/4" - not wonder everything always turns out so short waisted on me. Full disclosure - I haven't actually measured the ITS patterns to see what the standard side waist length is, nor have I ever asked Kennis... I should do that out of curiousity's sake! That's a pretty hefty difference and a good reminder that even if a pattern is drafted for someone that is 5'6" (which I am just shy of) we are all proportioned uniquely. But really it's just another good example of why you should take up sewing your own clothes, I'd say!
I have to laugh at this photo - I wanted to show the back of the top and I forgot I don't have long hair anymore. There's no need to lift a tonne of hair up and out of the way for the garment to be seen and yet I still automatically do it. Same if I need to get help zipping the back of a dress. LOL. Someday I'll get used to this short hair business I guess!
I definitely recommend adding this one to your rotation of quick to sew summer patterns! If you head on over to the Itch to Stitch site the pattern is on sale for the release week - and as always, Kennis offers a volume discount, so you can save even more if there's a couple a patterns you have your eye on!
Next up in craftiness and avoiding housework/heat, I think I may finish my SOI Eve dress and then really get cracking on my Untangling Knots 2018 OAL outfit. I'm really missing my knitting mojo so am nowhere near where I'd like to be with my top and I've not got any further than printing out the pattern for my shorts. But we'll see - I tend to make a crafty plan then get easily distracted. Ooooh! Look at the new shiny thing...
![]() |
| I saw this online one day on Pinterest and thought it pretty fitting. ;) |
Let me just caution you here on fabric choice a bit! You will want to follow the fabric suggestions fairly carefully when it comes to amount of stretch and drape. I first chose to make one out of what was advertised as "Hacci" sweater knit. Now I don't know about you, but I've never met a hacci that wasn't drapey and the one I bought was no exception... until I washed it. I don't know what kind of fabric it really was but it managed to lose most of it's softness and most of its drape. To make matters worse it smelled like some sort of ghastly petroleum product when wet. I don't know why I still went ahead with sewing the top. Suffice it to say, that particular disaster will not see the light of day any time soon.
I was feeling a bit discouraged at that point, but I forged on and rummaged through my stash trying to find something better to use. What I finally chose was a drapey jersey blend that I had purchased from Blended Threads a couple of years ago and had sewed up into the most horrendous dress ever. (You never saw that one either - the style, fit and every other aspect were ALL wrong so it's sat hiding on a shelf in my sewing room for the duration) The skirt alone had enough fabric for my Plitvice pattern pieces, and the ditzy floral print looks so much better as a top, than a dress! The gathers fall in soft, gentle waves and the cowl drapes gracefully just as one would hope with a top like this! Win, win for me! I got a nice new top and got rid of the dress of shame! I love when I can repurpose something so that it doesn't go to waste!
Like the previous two new releases (Nottingham and Crystal Cove) that I've tested for Itch to Stitch, Plitvice was quick to sew up. The cowl neckline is finished off so nicely compared to a few other cowl neck patterns I've done in the past and it was really simple to get that nice finish on it!
I think I may try another, grading up at the bust but I've not decided yet - for this one I did a straight 18 down to the waist then from waist to hip graded down to the 16. I also added 1 3/4" on the lengthen/shorten line as I seem to have to do with all patterns no matter what brand. I always tend to think that my height is in my legs, but it turns out maybe not because I've noticed a lot of patterns from other designers have an average 8" side waist length - I measured the other day and mine comes up at 10 1/4" - not wonder everything always turns out so short waisted on me. Full disclosure - I haven't actually measured the ITS patterns to see what the standard side waist length is, nor have I ever asked Kennis... I should do that out of curiousity's sake! That's a pretty hefty difference and a good reminder that even if a pattern is drafted for someone that is 5'6" (which I am just shy of) we are all proportioned uniquely. But really it's just another good example of why you should take up sewing your own clothes, I'd say!
I have to laugh at this photo - I wanted to show the back of the top and I forgot I don't have long hair anymore. There's no need to lift a tonne of hair up and out of the way for the garment to be seen and yet I still automatically do it. Same if I need to get help zipping the back of a dress. LOL. Someday I'll get used to this short hair business I guess!
I definitely recommend adding this one to your rotation of quick to sew summer patterns! If you head on over to the Itch to Stitch site the pattern is on sale for the release week - and as always, Kennis offers a volume discount, so you can save even more if there's a couple a patterns you have your eye on!
Next up in craftiness and avoiding housework/heat, I think I may finish my SOI Eve dress and then really get cracking on my Untangling Knots 2018 OAL outfit. I'm really missing my knitting mojo so am nowhere near where I'd like to be with my top and I've not got any further than printing out the pattern for my shorts. But we'll see - I tend to make a crafty plan then get easily distracted. Ooooh! Look at the new shiny thing...
Labels:
Blended Threads,
Itch to Stitch,
pattern testing,
Plitvice,
sewing
Tuesday, June 12, 2018
Crystal Cove
So after dipping my toes in the water of pattern testing again with Nottingham a few weeks ago, I jumped headlong into applying to test another new pattern from Itch to Stitch* without hesitation. Normally I would probably avoid tops like the Crystal Cove Cami - spaghetti straps, fitted bust, flowy from the bust down. Too many fit issues, too much chance of it becoming tent like. But knowing how Kennis designs her patterns and knowing how well those patterns fit me pretty much "straight out of the package" I was pretty excited to give it a go.
It didn't disappoint. The straps don't feel flimsy and with her pattern offering different cup sizes to choose from the bust fitting wasn't an issue either. The loose lower bodice feels shaped, not tent-y at all and the back cross over detail is so much fun!
My only discovery was that lightweight fabric and 50km/hr wind gusts combined with a flowy bodice can add up to a rather revealing flashing incident. It's a good thing that I had my inaugural wearing of my cami at home in the privacy of my out in the country, well treed property away from innocent bystanders who would've been treated to the bottom of my top billowing right up over my face. So, if you, like myself, have a propensity for wearing the most inappropriate garments for windy days (which you'd think living on the prairies where 99.9% of the days do seem to be windy I'd have learned a lesson or two by now almost 47 years into life), let me suggest taking a few stitches somewhere along the back to tack that crossover down a bit.
I chose to make both my versions from rayon and they're comfy and cool for hot days! I had also bought a cotton lawn on the way home from work on Friday evening, eager to sew up a third version. Then as I was under stitching my Poppy print top, the Pfaff seized up again. Not even a full two weeks since it came back from repair, and barely any sewing done in those two weeks. I was so incredibly upset that I had wasted my money on a repair that did nothing and to had to pull out the good for nothing Singer Advance again. Sewing with it is so terrible - you can't get an even tension, it puckers seams, it skips stitches. No matter what you do it's a nightmare to use. Needless to say the third version will have to wait until I can get my Pfaff 1221 fixed again or get a new machine.
Anyway enough about my machine trials and tribulations and back to the good stuff... the pattern! I will warn you to be careful when cutting out if you use rayon or any other shifty fabric. Also make sure to stay stitch right away to avoid any stretching. On my first one (the bicycle print) I made the mistake of not having the tension quite right on my just back from the repair shop Pfaff and ended up having my armscye stretch out like a beast. I had to do some fancy maneuvering to get that sucker back into shape and get it to match up with the facings. All was well in the end, but there was some gnashing of teeth along the way.
I did add a bit of length to the bodice and am happy I did. It feels like it sits at the right spot for both my body shape, long waistedness (not sure that's actually a word! LOL) and my own preferences, but that was the only change to the pattern I made, which is impressive. Is it any wonder I gravitate towards the Itch to Stitch Patterns with so few alterations necessary?
I feel like this pattern can be one that you'll really be able to stretch your pattern buying dollar with too because there's so many ways to change it up. Some of the testers used lace or other trims along the hem line. Other's did ruffles. I was thinking of doing double spaghetti straps on the "now has to wait" cotton lawn one. You can make it super casual or quirky to wear with shorts (I'm wearing my Liana Jeans shorts) like my bicycle print version. Or you can make it date night dressy with a more feminine print like my poppies one, or elegant with a fancier fabric. So many options! You can head on over to the Itch to Stitch site and grab the pattern on sale right now and don't forget to check out all the tester versions while you're there.
It didn't disappoint. The straps don't feel flimsy and with her pattern offering different cup sizes to choose from the bust fitting wasn't an issue either. The loose lower bodice feels shaped, not tent-y at all and the back cross over detail is so much fun!
My only discovery was that lightweight fabric and 50km/hr wind gusts combined with a flowy bodice can add up to a rather revealing flashing incident. It's a good thing that I had my inaugural wearing of my cami at home in the privacy of my out in the country, well treed property away from innocent bystanders who would've been treated to the bottom of my top billowing right up over my face. So, if you, like myself, have a propensity for wearing the most inappropriate garments for windy days (which you'd think living on the prairies where 99.9% of the days do seem to be windy I'd have learned a lesson or two by now almost 47 years into life), let me suggest taking a few stitches somewhere along the back to tack that crossover down a bit.
I chose to make both my versions from rayon and they're comfy and cool for hot days! I had also bought a cotton lawn on the way home from work on Friday evening, eager to sew up a third version. Then as I was under stitching my Poppy print top, the Pfaff seized up again. Not even a full two weeks since it came back from repair, and barely any sewing done in those two weeks. I was so incredibly upset that I had wasted my money on a repair that did nothing and to had to pull out the good for nothing Singer Advance again. Sewing with it is so terrible - you can't get an even tension, it puckers seams, it skips stitches. No matter what you do it's a nightmare to use. Needless to say the third version will have to wait until I can get my Pfaff 1221 fixed again or get a new machine.
Anyway enough about my machine trials and tribulations and back to the good stuff... the pattern! I will warn you to be careful when cutting out if you use rayon or any other shifty fabric. Also make sure to stay stitch right away to avoid any stretching. On my first one (the bicycle print) I made the mistake of not having the tension quite right on my just back from the repair shop Pfaff and ended up having my armscye stretch out like a beast. I had to do some fancy maneuvering to get that sucker back into shape and get it to match up with the facings. All was well in the end, but there was some gnashing of teeth along the way.
I did add a bit of length to the bodice and am happy I did. It feels like it sits at the right spot for both my body shape, long waistedness (not sure that's actually a word! LOL) and my own preferences, but that was the only change to the pattern I made, which is impressive. Is it any wonder I gravitate towards the Itch to Stitch Patterns with so few alterations necessary?
I feel like this pattern can be one that you'll really be able to stretch your pattern buying dollar with too because there's so many ways to change it up. Some of the testers used lace or other trims along the hem line. Other's did ruffles. I was thinking of doing double spaghetti straps on the "now has to wait" cotton lawn one. You can make it super casual or quirky to wear with shorts (I'm wearing my Liana Jeans shorts) like my bicycle print version. Or you can make it date night dressy with a more feminine print like my poppies one, or elegant with a fancier fabric. So many options! You can head on over to the Itch to Stitch site and grab the pattern on sale right now and don't forget to check out all the tester versions while you're there.
Labels:
Crystal Cove,
Itch to Stitch,
pattern testing,
sewing
Thursday, May 17, 2018
Nottingham
I've got a brand new pattern I want to tell you about today!! It's the just released Nottingham Top from Itch to Stitch Designs*!
Kennis Wong, the designer behind ITS has quite the selection of patterns now and I've been fortunate to test several of them for her! Since going back to work last year though, I've not felt able to give a test pattern the attention it requires. I felt it would be too overwhelming and the pressure to finish would be too difficult. I've really missed it, but knew it was for the best to take a step back. But then she posted a testing call for the Nottingham recently and I decided to apply. It's a great top, looks far more complicated than it is, and knowing the Itch to Stitch patterns as I do, I figured it would be a breeze to sew up. Kennis does such a great job of the instructions, paying really close attention to all the fine details, I knew that even if it was complicated I'd still be able to manage without getting overwhelmed.
I'm happy to say I was 100% correct about her instructions and pattern. I was so very wrong about the sewing it up though. At least my first attempt... and it was all my fault. I bought a drapey rayon blend solid the other day for just the purpose of testing. It was a gorgeous peacock blue. I got it all cut out after much cursing and swearing and trying to keep it from sliding right off the dining room table and set to work sewing.
All was going swimmingly well until I tried it on. I'd added my customary length that I always add to my ITS patterns and guess what. With the drape of the fabric and the pattern itself my top was precisely the 1 1/4" that I'd added too long. Not only that, but it turned out that my fabric, while having exactly the prescribed lengthwise and crosswise stretch, had absolutely pitiful recovery. Such a pretty blue. But such a weird length...
Not to be deterred, I figured no big deal. I do like my tops a bit longer anyways. So I soldiered on. But then part way through my workhorse, dependable, ancient Pfaff simply stopped working. It just seized up and refused to do a thing mid stitch. I assumed a bent needle. So I wrestled the needle out and nope. It was still straight. Misaligned bobbin? Nope. All good there. I tried a few more things than went outside in a mad panic to find my husband who can fix anything and wailed that I needed his help. He dropped what he was doing and came in the house to see what could be done and to give him credit he tried. We thought it was fixed and then it seized up AGAIN at which point he advised that I should probably just take it to the repair shop and get it fixed properly. Which left me with the misery that is the Walmart purchased Singer Advance that functions only slightly better than a paperweight. Oh how I despise using that machine. But desperate times call for desperate measures and thankfully other than the knot and hems, I could use my overlocker for the majority of the sewing.
I finished up the peacock blue and it was so stretched out and wobbly looking from fighting with the Singer, that I thought I'd pop it in the washer and drier and tighten it all up again. DISASTER. It shrunk up first of all. Not a bad thing given its extra length, but beyond that it revealed that I had totally cut it off grain so the seams were twisting like crazy. It's like I'd never cut out a pattern before. Geez Louise.
The next day I regrouped, took out the extra length I'd added to the pattern pieces, dug out a floral double brushed poly and got it cut out. Sewing it took less time than the cutting out I think despite using the beastly Singer although I did it in a few chunks over the course of the evening and by the time I went to bed I had my new version done. I love it! It's everything I hoped it would be and now I need more fabric to make a solid black one. And then I have some grey sweater knit that would be perfect for the long sleeve version. And then...
Yes. This is one of those tops that it's going to become a go to. It's so easy - once you do the knot part, it's just a simple teeshirt and don't worry about that knot. The instructions walk you through it with detailed diagrams, and there's notches on the pattern to line everything up easily so you can't go wrong. The kind of pattern that practically sews itself it goes together so well. Just look at the details of the knot and those flutter sleeves. I think it goes perfectly with my Blended Threads Double Brushed Poly that I bought last summer and had no idea what to make with.
Congratulations, Kennis, on yet another amazing design!!! If you want to grab your own copy, head on over to the Itch to Stitch website! If you hurry, you can get the pattern on sale until May 23rd. I highly recommend this one!!! (and by the way, if you have your heart set on any other Itch to Stitch patterns, don't forget you can use the bundle discounts for a great deal on everything in your cart while you're at it!)
Kennis Wong, the designer behind ITS has quite the selection of patterns now and I've been fortunate to test several of them for her! Since going back to work last year though, I've not felt able to give a test pattern the attention it requires. I felt it would be too overwhelming and the pressure to finish would be too difficult. I've really missed it, but knew it was for the best to take a step back. But then she posted a testing call for the Nottingham recently and I decided to apply. It's a great top, looks far more complicated than it is, and knowing the Itch to Stitch patterns as I do, I figured it would be a breeze to sew up. Kennis does such a great job of the instructions, paying really close attention to all the fine details, I knew that even if it was complicated I'd still be able to manage without getting overwhelmed.
I'm happy to say I was 100% correct about her instructions and pattern. I was so very wrong about the sewing it up though. At least my first attempt... and it was all my fault. I bought a drapey rayon blend solid the other day for just the purpose of testing. It was a gorgeous peacock blue. I got it all cut out after much cursing and swearing and trying to keep it from sliding right off the dining room table and set to work sewing.
All was going swimmingly well until I tried it on. I'd added my customary length that I always add to my ITS patterns and guess what. With the drape of the fabric and the pattern itself my top was precisely the 1 1/4" that I'd added too long. Not only that, but it turned out that my fabric, while having exactly the prescribed lengthwise and crosswise stretch, had absolutely pitiful recovery. Such a pretty blue. But such a weird length...
Not to be deterred, I figured no big deal. I do like my tops a bit longer anyways. So I soldiered on. But then part way through my workhorse, dependable, ancient Pfaff simply stopped working. It just seized up and refused to do a thing mid stitch. I assumed a bent needle. So I wrestled the needle out and nope. It was still straight. Misaligned bobbin? Nope. All good there. I tried a few more things than went outside in a mad panic to find my husband who can fix anything and wailed that I needed his help. He dropped what he was doing and came in the house to see what could be done and to give him credit he tried. We thought it was fixed and then it seized up AGAIN at which point he advised that I should probably just take it to the repair shop and get it fixed properly. Which left me with the misery that is the Walmart purchased Singer Advance that functions only slightly better than a paperweight. Oh how I despise using that machine. But desperate times call for desperate measures and thankfully other than the knot and hems, I could use my overlocker for the majority of the sewing.
I finished up the peacock blue and it was so stretched out and wobbly looking from fighting with the Singer, that I thought I'd pop it in the washer and drier and tighten it all up again. DISASTER. It shrunk up first of all. Not a bad thing given its extra length, but beyond that it revealed that I had totally cut it off grain so the seams were twisting like crazy. It's like I'd never cut out a pattern before. Geez Louise.
The next day I regrouped, took out the extra length I'd added to the pattern pieces, dug out a floral double brushed poly and got it cut out. Sewing it took less time than the cutting out I think despite using the beastly Singer although I did it in a few chunks over the course of the evening and by the time I went to bed I had my new version done. I love it! It's everything I hoped it would be and now I need more fabric to make a solid black one. And then I have some grey sweater knit that would be perfect for the long sleeve version. And then...
Yes. This is one of those tops that it's going to become a go to. It's so easy - once you do the knot part, it's just a simple teeshirt and don't worry about that knot. The instructions walk you through it with detailed diagrams, and there's notches on the pattern to line everything up easily so you can't go wrong. The kind of pattern that practically sews itself it goes together so well. Just look at the details of the knot and those flutter sleeves. I think it goes perfectly with my Blended Threads Double Brushed Poly that I bought last summer and had no idea what to make with.
Congratulations, Kennis, on yet another amazing design!!! If you want to grab your own copy, head on over to the Itch to Stitch website! If you hurry, you can get the pattern on sale until May 23rd. I highly recommend this one!!! (and by the way, if you have your heart set on any other Itch to Stitch patterns, don't forget you can use the bundle discounts for a great deal on everything in your cart while you're at it!)
Labels:
Itch to Stitch,
Nottingham,
pattern testing,
sewing
Tuesday, May 01, 2018
Well That Escalated Quickly!
After knitting six pairs of socks over the course of the last year for other people I felt the urge to knit a pair for me so towards mid March I succumbed to that urge, grabbed the skein of sparkly stripey sock yarn (Plymouth Stiletto) and finally cast on a pair of Zigzagular socks, which is a free pattern on Ravelry and I highly recommend! These socks, between the stripes and the simple, but interesting pattern, pretty much knit themselves! Only change I made was to do an afterthought heel to accommodate the continuity of the stripes!
The whole time I was knitting my sparkly socks, Baby Boy was having serious sock envy. He desperately wanted a pair of stripey socks of his own. If he could've had sparkles it would've been even more perfect. I knew I didn't have enough left over yarn from my socks though and he didn't want to wait for new yarn, so I let him pick out of my stash. He chose an ancient ball of Fortissima Colori Socka for his and I used Joeli's Tiny Treads Basic Top Down pattern. I should have knit up a size. They will probably fit him for all of five minutes. But he wears them all the time so at least he's getting use out of them while he can.
Once his socks were on the needles of course Little Man had a need for stripey socks too. Unfortunately there was nothing to his liking in the sock yarn bin, so I logged onto Webs and let him pick out some yarn for himself. He chose Sirdar's Sole to Sole in the Jungle Fever colourway. Bonus for me, it was super inexpensive! I didn't really follow a pattern this time so much as cast on in between Baby Boy's size and my size and then knit until it fit. Although darn his little hide, I think his feet are bigger than I assumed, because they seem a touch snug. Again I used an afterthought heel to keep those stripes going nicely.
I'm not sure how me wanting a pair of stripey socks escalated so quickly to everyone needing a pair of stripey socks, but that's just how things roll sometimes and that's how I ended up knitting three pairs of socks in a total of eight weeks. Not bad if I do say so myself!
Speaking of hand knit socks, I've decided to partake in Me Made May once again this year. Last year I took the year off because I couldn't think of a challenge given that I pretty much wear me made every day all year round at this point. But after listening to Zoe of the So, Zo blog (and the mastermind behind Me Made May) on the Love to Sew Podcast last week I thought that maybe I could find a challenge for myself after all. I have well over a dozen pairs of hand knit socks that have been languishing in my drawer since I went back to work. I wasn't wearing them during the week because I didn't want to "ruin" them in my work boots, and on weekends I'm usually barefoot around the house or would just grab my sport socks if I was headed out anywhere. I decided that it's high time I enjoy those hand knit socks once again, so my challenge for Me Made May is to wear hand knit socks five days a week at work. (I'm not wearing them on the weekends because there's no snow on the ground anymore, which means no socks thanks!) I'm not committing myself to documenting them daily - I'm just going to go with the flow on this one, but I'll let you know at some point how my challenge is going or went. How about you? Are you Me Made May-ing this year? What is your own challenge?
SaveSave
The whole time I was knitting my sparkly socks, Baby Boy was having serious sock envy. He desperately wanted a pair of stripey socks of his own. If he could've had sparkles it would've been even more perfect. I knew I didn't have enough left over yarn from my socks though and he didn't want to wait for new yarn, so I let him pick out of my stash. He chose an ancient ball of Fortissima Colori Socka for his and I used Joeli's Tiny Treads Basic Top Down pattern. I should have knit up a size. They will probably fit him for all of five minutes. But he wears them all the time so at least he's getting use out of them while he can.
Once his socks were on the needles of course Little Man had a need for stripey socks too. Unfortunately there was nothing to his liking in the sock yarn bin, so I logged onto Webs and let him pick out some yarn for himself. He chose Sirdar's Sole to Sole in the Jungle Fever colourway. Bonus for me, it was super inexpensive! I didn't really follow a pattern this time so much as cast on in between Baby Boy's size and my size and then knit until it fit. Although darn his little hide, I think his feet are bigger than I assumed, because they seem a touch snug. Again I used an afterthought heel to keep those stripes going nicely.
I'm not sure how me wanting a pair of stripey socks escalated so quickly to everyone needing a pair of stripey socks, but that's just how things roll sometimes and that's how I ended up knitting three pairs of socks in a total of eight weeks. Not bad if I do say so myself!
Speaking of hand knit socks, I've decided to partake in Me Made May once again this year. Last year I took the year off because I couldn't think of a challenge given that I pretty much wear me made every day all year round at this point. But after listening to Zoe of the So, Zo blog (and the mastermind behind Me Made May) on the Love to Sew Podcast last week I thought that maybe I could find a challenge for myself after all. I have well over a dozen pairs of hand knit socks that have been languishing in my drawer since I went back to work. I wasn't wearing them during the week because I didn't want to "ruin" them in my work boots, and on weekends I'm usually barefoot around the house or would just grab my sport socks if I was headed out anywhere. I decided that it's high time I enjoy those hand knit socks once again, so my challenge for Me Made May is to wear hand knit socks five days a week at work. (I'm not wearing them on the weekends because there's no snow on the ground anymore, which means no socks thanks!) I'm not committing myself to documenting them daily - I'm just going to go with the flow on this one, but I'll let you know at some point how my challenge is going or went. How about you? Are you Me Made May-ing this year? What is your own challenge?
SaveSave
Labels:
handknit socks,
knitting,
Me Made May 2018,
sparkles,
stripes
Subscribe to:
Posts (Atom)