Tuesday, August 28, 2018

There's a Certain Greatness to My Lateness...

This afternoon as I sat here in a sweatshirt and jeans and contemplated how many layers of warmth I should plan to take to watch the boys football practice tonight, I started writing a blog post about sleeveless dresses and tops. The season is fast wearing down, but better late than never and all that.  I had planned to write this post weeks ago.  I even took the photos weeks ago.  And then life happened.  And then distractions happened.  And then other blog posts happened... However, maybe there'll still be some warmer days, or maybe you're in the southern hemisphere and you're heading into summer soon.  Or maybe you can just tuck this away in your mental filing cabinet for next year.  Whatever the case, I wanted to highlight two free patterns that have been in constant rotation in my wardrobe this summer.

The first is the Agnes dress from Halla Patterns.  It's a paid for pattern unless you're in their Facebook group - go join the group, check out the announcements and get a coupon code to get it for free.  You won't regret either of those instructions I'm giving you.  The Facebook group is warm and welcoming and you'll get lots of inspiration from the sharing going on in there.  As for Agnes, when I downloaded it last summer, it was simply a top or dress.  Now, it's been updated to include sleeve options as well as more length options.  Last summer I made the top version, because I was convinced I wouldn't like the dress.  (what was I thinking????)  I made it from a one metre remnant of Liverpool that I found at the local fabric shop for a couple of dollars.  I wasn't willing to spend a lot on it, because I wasn't sure I'd even like the top - I normally shy away from swing tops and dresses - but I sewed it up figuring I had nothing to lose.  I then wore it all the time for the rest of the summer.  I wore it so often with my jeans to work I'm sure people were starting to wonder if I didn't own any other tops.  Here's that first version last summer.


Because I loved last summer's top version, I decided to throw caution to the wind and make a dress version at the beginning of the summer.  It's such a ridiculously quick sew and turns out I loved the dress version as much as the top version.  For my dress I used a Double Brushed Poly from Sew Sew English that I'd bought last summer and had been hoarding.


I decided I absolutely needed to make a second dress because like last year's top, I was starting to wear my dress every second day.  I ordered more DBP, this time from Elevated Fashion Fabrics and as soon as it came in I sewed it up too and have worn it approximately eleventy billion times since.


These dresses are perfect for throwing on and feeling comfy for kicking about home in, but dressed nicely enough to go out in.  I have all the love for these dresses.  I'm now on the lookout for the perfect fabric for a sleeved version for fall to wear with tights and boots!

I also have another metre of Liverpool I ordered in the spring to make another top version, but have kind of run out of time and hot weather so I'll probably plan that for next summer instead.

The next pattern I want to tell you about is Itch to Stitch's Lago Tank.  It's one of her free patterns that is available on her site all the time and although it's a freebie, like all ITS patterns you are guaranteed to have the same great standard of pattern drafting that you've come to expect from designer, Kennis Wong.  I made two tanks in quick succession and only thing stopping me from making more was time.  I can't tell you how many times I've washed and worn these two tanks since making them!  The only change I made to the pattern was to add my usual length in the body.   You can squeeze this pattern out of such a little amount of fabric that it's fantastic stash buster.  I keep thinking it would be a fun one to use my Silhouette Cameo and cut out some vinyl for on the front too.  Hmmmm.  Future project idea...

The first one was made using a jersey of unknown content, left over from the fabric I made my green Molly top in during the winter.  It definitely has a touch of drape to it more than a regular cotton lycra, but I have no clue what it is.   Maybe it's just a poly knit because I can wash and dry it without any signs of shrinkage.  (and if there's one thing I excel at, it's shrinking all cotton).  Whatever it is, it's soft, washes and dries like a dream and feels cool and comfy.


The second one I made is DBP that I had in my stash from the same Sew Sew English order as the feathers print I used for the Agnes.  I loved this print so much and was going to make a Patterns for Pirates Sunshine dress.  I had planned to do a sleeve hack and got everything cut out and sewn up.  I don't know what happened along the way, but disaster ensued.  Ok.  I know full well what happened with the sleeves.  Like a complete dolt, I had forgotten to change the armscye to accommodate sleeves and couldn't move my arms. Rookie mistake there.  I know better!  So no worries, I'd make it sleeveless like the pattern... except things went south from there.  My bodice was way larger on one side than the other throughout the shoulder.    My bodice was also hella crooked in length.  As in a good 1 1/2" out from one side to the other.  AGGGHHHHHH.  I called it quits at that point.  I mean really.  There's a line that has to be drawn in the sand as to what you can selvedge and what you can't and this was it.  But I was so sad about the fabric.  I was able to cut on the cross grain (thank you gods of four way stretch!) and rescue just enough fabric from the skirt.  So while the fabric wasn't destined to become the dress I dreamed I'd wear all fall long, it did become my very favourite tank top of the summer and I'm ok with that!


I'm thinking I might still make a few more Lago Tanks if I have the chance even though summer is fast coming to an end.  I think they'd make the perfect layering piece for fall.

So there you go.  Two awesome patterns to fill your warm weather wardrobe with! Now I'm off to go have a cup of tea and find my fuzzy slippers because damn it's chilly tonight!

Saturday, August 11, 2018

2018 Outfit Along

Waters Tee and Lander Shorts


I can't believe that I actually managed to get my outfit done in time for the 2018 Outfit Along done.  I was sure that this year was going to be a bust, but by some sort of OAL miracle, I finished up the morning of the final day!


For those of you that may not know what the Outfit Along is, it is an annual event taking place on Ravelry in the Untangling Knots group.  Knitwear designer Andi Satterlund and Lauren of the famed Lladybird co-host the "along".  The goal is to knit a piece and sew a piece so that you end up with a complete outfit at the end of the two months.  There are official patterns each year, but participants are free to choose whichever patterns they want.  The outfit along is truly my very favourite "along" and I look forward to it every year.

This year's official patterns were the Waters Tee by Andi and the Lander Pants by True Bias and I decided to both.  Waters is a very simple top down knit tee that has a scoop back and almost boat neck front. I'm sure that the Lander Pants need no introduction.  I may, in fact, be the last person in the world to sew them up.  They've been out for ages now and are a high waisted, button fly, wide legged pant with three different length options.


While the Waters was a super simple pattern it took me what felt like forever to knit.  I think the combination of miles of stockinette stitch on tiny needles and fingering yarn slowed me down.  Combine that with my distinct lack of knitting mojo and I really didn't think I'd get finished within the two months of the challenge.  In fact had I not had a sudden short-lived burst of motivation in the last two weeks of the Outfit Along, I can guarantee that my top would not have been finished in time. (the mojo has once again disappeared, and I'm struggling to pick up my needles for any reason right now).  The Lander Pants sat waiting because to be honest the thought of having to go through the fitting of pants was really not what one could call enticing.  Pants.  Ugh...

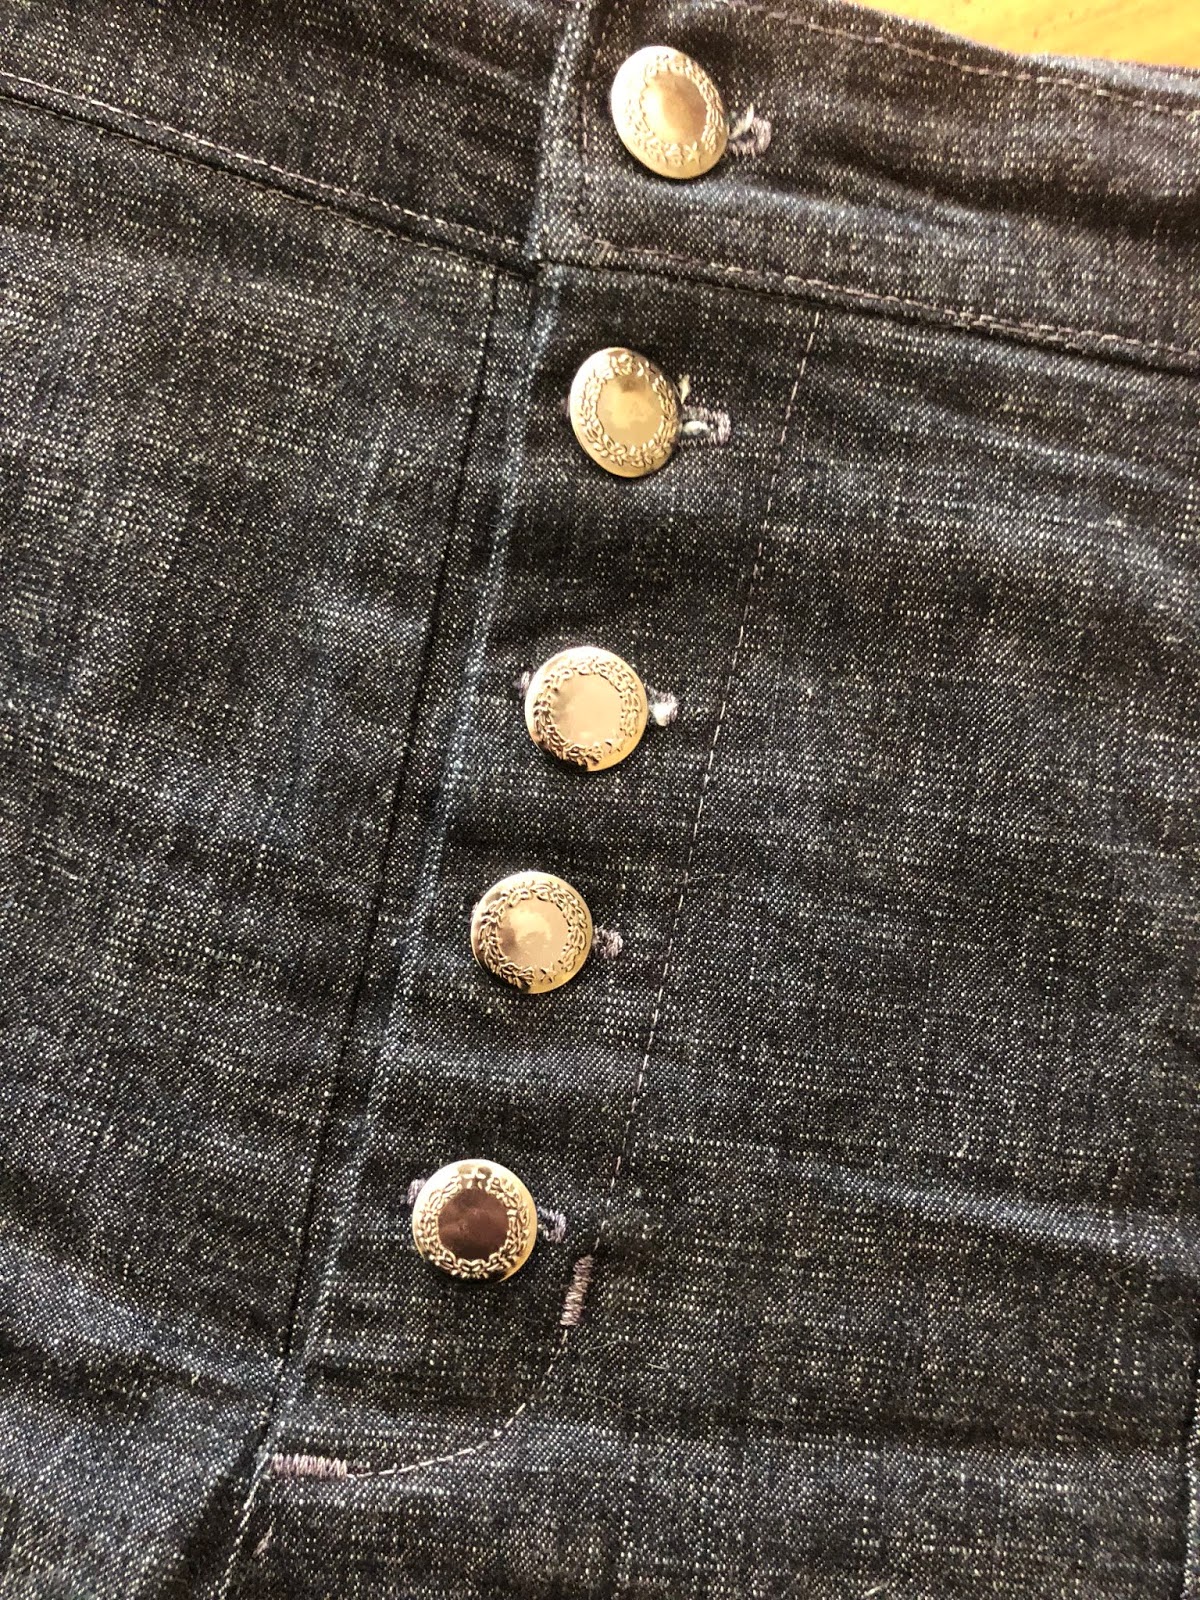
Everyone has what seems to be some serious Lander love going on.  I definitely did not.  In fact I dubbed my the "No Love Landers" and thought I'd never wear them.  However, now that they're done and I have had some distance from sewing them, it turns out I'm wearing them quite a bit.  Fitting quickly became a nightmare - I clearly have no clue what size I really am when it comes to pants, because I am fairly certain I started out two sizes too big.  Of course I followed the steps according to the instructions which meant all the fancy bits like top stitching and the buttonholes and bar tacks for the fly were already done before I sewed up the side seams only to have the shorts fall straight off when I tried them on.  I was pretty peeved with myself for the rookie mistake and was determined I was going to get them to at least sort of passably fit before throwing my hands up in defeat and wasting all the effort of my top stitching not too mention my fabric.  I took a good inch and a half beyond the already allowed 1" side seam at the hips, about another 3/4" at the waist on either side, then took in the back center seam tapering from the original seam to a decrease of an 1 1/4" at centre back.  Then I shaved off a good 5/8" from the height in the back.  I still need to wear a belt with them or they're not staying up, but given how often I've worn them this week, maybe they deserve some love after all.


Waters is pretty good fit wise.  As it turns out I like to wear it backwards favouring the scoop neck in the front rather than the back.  Its kind of nice to choose whichever way I feel like wearing it depending on my mood.  I think I could have done with a few less waist decreases and a bit more length, but at the point I cast off I was just  happy to have it done on time.  I can live with the not re-doing the waist decreases, but I may at some point down the road add a bit of length to my tee to make it more comfortable for me.  It's not enough to keep me from wearing it  so we'll see.  I'd have to actually find my knitting mojo first.

Waters Tee and Landers Shorts


Wednesday, July 25, 2018

So I Made A Swimsuit!


I know. I know.  I was supposed to work on finishing up my Eve Dress and my Outfit Along outfit, but oooooh!  Shiny things.  I am a magpie.

I've actually been hording my swimsuit fabric for approximately four or five summers now with the intention of making a suit. I've also been amassing swimsuit patterns like nobody's business.  I don't really know what's been holding me back.  I did make a swimsuit years ago without so much as batting an eye.  It was a Kwik Sew pattern.  I remember buying the pattern and fabric and then sewing it up.  No fear, no hesitation, just doing it.

I've come to the conclusion that my hesitation was based on a fear of sorts,  and that fear was founded on the basis of nothing.  I blame the internet.  While it has great resources that are very useful, it also contributes to hesitation and worry with the deluge of warnings, "Don't do this, don't do that, swimsuits are scary..." on and on.  Before the dawn of the internet, we saw a pattern we liked, we bought the fabric and we sewed it up.

Anyway, I digress.  Let me start again.  So I made a swimsuit.  Helping get me to the starting point on my suit was listening to the Love to Sew Podcast about sewing swimwear which served as a good pep talk and that the Curvy Sewing Collective's Challenge for the #curvyyearofsewing for July and August is, of course, swimwear and bodysuits and I do love a challenge.  I was frustrated with the RTW suits I owned already and I loathe swimsuit shopping with all my being. It was definitely time to make my own. My first choice was the Mama Roxy from Made for Mermaids and it's everything I could want in a swimsuit.  Good coverage and cute and modern but at the same time feels just a bit retro with the wide straps.

First off, let's talk about fit. This suit? It fits.  Better than any RTW suit I've owned in the span of forever.  It wasn't without some effort mind you.  I cannot even begin to tell you how many times I altered the swim bottoms to get a good fit.  Taking a bit in on the side seams, putting the elastic in.  Nope.  Take the elastic out.  Take a bit more in.  Put the elastic back in.  Put the elastic in the waist.  Nope.  Take the elastic out.  Shave a bit off the back that was coming up far higher than any high waisted short should ever come.  Put the elastic back in.  Crap.  Still not enough.  Take the elastic out. Take out more height.  Put the elastic back in.  Rinse and repeat. A lot of my time spent could have been avoided had I not been so concerned about not over fitting the first time around, but I chose to do it in baby steps, so my seam ripper and I ended up with a lot of time together.  They're still not perfect, but you know what?  They are darn well close. I can make some little adjustments on the next pair and they'll be even better for me.


The top on the other hand?  Easy Peasy, lemon squeezy.  I added two inches of length (It's meant for a 8" side waist length, hello long waisted me) and sewed it up. No fuss. No muss.  It fits like a dream.  Except the inner elastic for the shelf bra - should have checked where that one should go more carefully.  Next time I'll move it up 1 1/2" so it actually sits under the bustline where it should instead of hanging out where it is.  Not going to take the suit apart for that thanks anyways.

Next lets talk about the practical applications of this suit.  I spent a good hour in the pool with Baby Boy testing it out.  Playing, swimming laps, doing a bit of a work out (the boys are slave drivers!  Baby Boy was my "coach", Little Man sat on the deck, note pad in hand and was my "ref" keeping track of my form and performance in the pool).  The suit held up just fine through it's paces.  No shifting about.  No straps slipping off my shoulders.  No bottoms falling off when I jumped.  (Don't laugh. That happened with a RTW pair about two weeks ago. Jumped in the pool and the bottoms didn't come with me.  Thank the good Lord it was in the privacy of my own back yard!!!)

Lastly, let's talk about body positivity for just a moment.  It took a huge leap of faith to put pictures up online of myself in a swimsuit.  You may have seen them already - I posted on Instagram and a couple of sewing groups I'm in on Facebook.  I had some serious reservations about doing so, remembering that "Cake with Cashmerette" all came about after she posted something about swimwear on her Instagram account.  I know there is nastiness out there and I'm not sure I could be so open minded about something like that as Jenny is.  At times I've not got the thickest of skin when it comes to hurtful comments.  But then I thought about it some more and thought I'm damn proud of my swimsuit.  I feel like a million bucks wearing it, and darn it all, if you don't like it scroll past.  Maybe it helps someone else out there to feel good about themselves no matter what size they're wearing.  Maybe we don't need to just post bathing suit selfies if we're a size six.  The whole reason I was finally inspired to start making my suit was that all over my Facebook and Instagram feed photos of ladies looking fabulous in their hand made suits were popping up every where.  Slim ladies, curvy ladies, young ladies, older ladies.  What resonated most was they all looked great and they all looked happy and confident in their suits.  After posting I couldn't believe the comments and love my photos got. It was to the point of overwhelming!  Just shy of 1000 people took time to either click a button or comment, each one of them positive and supportive.  So a huge thank you to all those out there who helped boost my confidence and make me feel great!!


I'll hopefully be back next week with a finished Outfit Along project to tell you about.  No promises - I've just finally assemble the pattern pieces for my Lander Shorts and I've still got quite a bit of knitting left to do on my Waters Tee - but I'm going to do my best to get it done!  Right now though, I'm going to go put on my awesome new swimsuit and jump in the pool!


Monday, July 09, 2018

Plitvice

It's been super hot here lately with day time temperatures in the +30 range - temps on Saturday were even hotter in the mid 40s with the humidex - so I've been trying to beat the heat by either being in the swimming pool with the boys or by hiding in the basement.  We don't have a/c in our house, and we've got fans in every room upstairs working double time, but the basement is always cool.  I should really spend the time down there sorting through toys and clutter and cleaning it up, but instead I seem to be ignoring the housework and gravitating towards my sewing room (which also is in dire need of a thorough sorting and cleaning).  Big surprise there.  LOL.

I saw this online one day on Pinterest and thought it pretty fitting. ;)
All that being said, hiding from the heat and not working anymore has given me a bit more sewing time lately.  So here I am with my third post in a row about a new Itch to Stitch pattern that I tested over the last couple of weeks. Today's top is the Plitvice Top*, a sweet little cowl neck tee that once again can be made either casual or dressy depending on the fabric you choose.

Let me just caution you here on fabric choice a bit!  You will want to follow the fabric suggestions fairly carefully when it comes to amount of stretch and drape.  I first chose to make one out of what was advertised as "Hacci" sweater knit.  Now I don't know about you, but I've never met a hacci that wasn't drapey and the one I bought was no exception... until I washed it.  I don't know what kind of fabric it really was but it managed to lose most of it's softness and most of its drape.  To make matters worse it smelled like some sort of ghastly petroleum product when wet.  I don't know why I still went ahead with sewing the top.  Suffice it to say, that particular disaster will not see the light of day any time soon.

I was feeling a bit discouraged at that point, but I forged on and rummaged through my stash trying to find something better to use.  What I finally chose was a drapey jersey blend that I had purchased from Blended Threads a couple of years ago and had sewed up into the most horrendous dress ever.  (You never saw that one either - the style, fit and every other aspect were ALL wrong so it's sat hiding on a shelf in my sewing room for the duration)  The skirt alone had enough fabric for my Plitvice pattern pieces, and the ditzy floral print looks so much better as a top, than a dress!  The gathers fall in soft, gentle waves and the cowl drapes gracefully just as one would hope with a top like this!  Win, win for me!  I got a nice new top and got rid of the dress of shame! I love when I can repurpose something so that it doesn't go to waste!


Like the previous two new releases (Nottingham and Crystal Cove) that I've tested for Itch to Stitch, Plitvice was quick to sew up.  The cowl neckline is finished off so nicely compared to a few other cowl neck patterns I've done in the past and it was really simple to get that nice finish on it!


I think I may try another, grading up at the bust but I've not decided yet - for this one I did a straight 18 down to the waist then from waist to hip graded down to the 16.  I also added 1 3/4" on the lengthen/shorten line as I seem to  have to do with all patterns no matter what brand.  I always tend to think that my height is in my legs, but it turns out maybe not because I've noticed a lot of patterns from other designers have an average 8" side waist length - I measured the other day and mine comes up at 10 1/4" - not wonder everything always turns out so short waisted on me.  Full disclosure - I haven't actually measured the ITS patterns to see what the standard side waist length is, nor have I ever asked Kennis... I should do that out of curiousity's sake! That's a pretty hefty difference and a good reminder that even if a pattern is drafted for someone that is 5'6" (which I am just shy of) we are all proportioned uniquely.  But really it's just another good example of why you should take up sewing your own clothes, I'd say!


I have to laugh at this photo - I wanted to show the back of the top and I forgot I don't have long hair anymore.  There's no need to lift a tonne of hair up and out of the way for the garment to be seen and yet I still automatically do it.  Same if I need to get help zipping the back of a dress.  LOL.  Someday I'll get used to this short hair business I guess!

I definitely recommend adding this one to your rotation of quick to sew summer patterns!  If you head on over to the Itch to Stitch site the pattern is on sale for the release week - and as always, Kennis offers a volume discount, so you can save even more if there's a couple a patterns you have your eye on!

Next up in craftiness and avoiding housework/heat, I think I may finish my SOI Eve dress and then really get cracking on my Untangling Knots 2018 OAL outfit.  I'm really missing my knitting mojo so am nowhere near where I'd like to be with my top and I've not got any further than printing out the pattern for my shorts.  But we'll see - I tend to make a crafty plan then get easily distracted.  Ooooh!  Look at the new shiny thing...


Tuesday, June 12, 2018

Crystal Cove

So after dipping my toes in the water of pattern testing again with Nottingham a few weeks ago, I jumped headlong into applying to test another new pattern from Itch to Stitch* without hesitation.  Normally I would probably avoid tops like the Crystal Cove Cami - spaghetti straps, fitted bust, flowy from the bust down.  Too many fit issues, too much chance of it becoming tent like.  But knowing how Kennis designs her patterns and knowing how well those patterns fit me pretty much "straight out of the package" I was pretty excited to give it a go.

It didn't disappoint.  The straps don't feel flimsy and with her pattern offering different cup sizes to choose from the bust fitting wasn't an issue either. The loose lower bodice feels shaped, not tent-y at all and the back cross over detail is so much fun!

My only discovery was that lightweight fabric and 50km/hr wind gusts combined with a flowy bodice can add up to a rather revealing flashing incident.  It's a good thing that I had my inaugural wearing of my cami at home in the privacy of my out in the country, well treed property away from innocent bystanders who would've been treated to the bottom of my top billowing right up over my face.  So, if you, like myself, have a propensity for wearing the most inappropriate garments for windy days (which you'd think living on the prairies where 99.9% of the days do seem to be windy I'd have learned a lesson or two by now almost 47 years into life), let me suggest taking a few stitches somewhere along the back to tack that crossover down a bit.

I chose to make both my versions from rayon and they're comfy and cool for hot days!  I had  also bought a cotton lawn on the way home from work on Friday evening, eager to sew up a third version.  Then as I was under stitching my Poppy print top, the Pfaff seized up again.  Not even a full two weeks since it came back from repair, and barely any sewing done in those two weeks.  I was so incredibly upset that I had wasted my money on a repair that did nothing and to had to pull out the good for nothing Singer Advance again.  Sewing with it is so terrible - you can't get an even tension, it puckers seams, it skips stitches.  No matter what you do it's a nightmare to use.  Needless to say the third version will have to wait until I can get my Pfaff 1221 fixed again or get a new machine.


Anyway enough about my machine trials and tribulations and back to the good stuff... the pattern! I will warn you to be careful when cutting out if you use rayon or any other shifty fabric.  Also make sure to stay stitch right away to avoid any stretching.  On my first one (the bicycle print) I made the mistake of not having the tension quite right on my just back from the repair shop Pfaff and ended up having my armscye stretch out like a beast.  I had to do some fancy maneuvering to get that sucker back into shape and get it to match up with the facings.  All was well in the end, but there was some gnashing of teeth along the way.


I did add a bit of length to the bodice and am happy I did.  It feels like it sits at the right spot for both my body shape, long waistedness (not sure that's actually a word! LOL)  and my own preferences, but that was the only change to the pattern I made, which is impressive.  Is it any wonder I gravitate towards the Itch to Stitch Patterns with so few alterations necessary?


I feel like this pattern can be one that you'll really be able to stretch your pattern buying dollar with too because there's so many ways to change it up.  Some of the testers used lace or other trims along the hem line.  Other's did ruffles.  I was thinking of doing double spaghetti straps on the "now has to wait" cotton lawn one.  You can make it super casual or quirky to wear with shorts (I'm wearing my Liana Jeans shorts) like my bicycle print version.  Or you can make it date night dressy with a more feminine print like my poppies one, or elegant with a fancier fabric.  So many options!  You can head on over to the Itch to Stitch site and grab the pattern on sale right now and don't forget to check out all the tester versions while you're there.


Thursday, May 17, 2018

Nottingham

I've got a brand new pattern I want to tell you about today!!  It's the just released Nottingham Top from Itch to Stitch Designs*!

Kennis Wong, the designer behind ITS has quite the selection of patterns now and I've been fortunate to test several of them for her!  Since going back to work last year though, I've not felt able to give a test pattern the attention it requires.  I felt it would be too overwhelming and the pressure to finish would be too difficult.  I've really missed it, but knew it was for the best to take a step back. But then she posted a testing call for the Nottingham recently and I decided to apply.  It's a great top, looks far more complicated than it is, and knowing the Itch to Stitch patterns as I do, I figured it would be a breeze to sew up.  Kennis does such a great job of the instructions, paying really close attention to all the fine details, I knew that even if it was complicated I'd still be able to manage without getting overwhelmed.

I'm happy to say I was 100% correct about her instructions and pattern.  I was so very wrong about the sewing it up though.  At least my first attempt... and it was all my fault. I bought a drapey rayon blend solid the other day for just the purpose of testing.  It was a gorgeous peacock blue.  I got it all cut out after much cursing and swearing and trying to keep it from sliding right off the dining room table and set to work sewing.

All was going swimmingly well until I tried it on.  I'd added my customary length that I always add to my ITS patterns and guess what.  With the drape of the fabric and the  pattern itself my top was precisely the 1 1/4" that I'd added too long.  Not only that, but it turned out that my fabric, while having exactly the prescribed lengthwise and crosswise stretch, had absolutely pitiful recovery. Such a pretty blue.  But such a weird length...


Not to be deterred, I figured no big deal.  I do like my tops a bit longer anyways.  So I soldiered on.  But then part way through my workhorse, dependable, ancient Pfaff simply stopped working.  It just seized up and refused to do a thing mid stitch.  I assumed a bent needle.  So I wrestled the needle out and nope.  It was still straight.  Misaligned bobbin?  Nope.  All good there.  I tried a few more things than went outside in a mad panic to find my husband who can fix anything and wailed that I needed his help.  He dropped what he was doing and came in the house to see what could be done and to give him credit he tried.  We thought it was fixed and then it seized up AGAIN at which point he advised that I should probably just take it to the repair shop and get it fixed properly.  Which left me with the misery that is the Walmart purchased Singer Advance that functions only slightly better than a paperweight.  Oh how I despise using that machine.  But desperate times call for desperate measures and thankfully other than the knot and hems, I could use my overlocker for the majority of the sewing.

I finished up the peacock blue and it was so stretched out and wobbly looking from fighting with the Singer, that I thought I'd pop it in the washer and drier and tighten it all up again.  DISASTER.  It shrunk up first of all. Not a bad thing given its extra length, but beyond that it revealed that I had totally cut it off grain so the seams were twisting like crazy.  It's like I'd never cut out a pattern before.  Geez Louise.

The next day I regrouped, took out the extra length I'd added to the pattern pieces, dug out a floral double brushed poly and got it cut out.  Sewing it took less time than the cutting out I think despite using the beastly Singer  although I did it in a few chunks over the course of the evening and by the time I went to bed I had my new version done.  I love it!  It's everything I hoped it would be and now I need more fabric to make a solid black one.  And then I have some grey sweater knit that would be perfect for the long sleeve version. And then...

Yes.  This is one of those tops that it's going to become a go to.  It's so easy - once you do the knot part, it's just a simple teeshirt and don't worry about that knot.  The instructions walk you through it with detailed diagrams, and there's notches on the pattern to line everything up easily so you can't go wrong.  The kind of pattern that practically sews itself it goes together so well.   Just look at the details of the knot and those flutter sleeves.  I think it goes perfectly with my Blended Threads Double Brushed Poly that I bought last summer and had no idea what to make with.


Congratulations, Kennis, on yet another amazing design!!!  If you want to grab your own copy, head on over to the Itch to Stitch website!  If you hurry, you can get the pattern on sale until May 23rd.  I highly recommend this one!!! (and by the way, if you have your heart set on any other Itch to Stitch patterns, don't forget you can use the bundle discounts for a great deal on everything in your cart while you're at it!)


Tuesday, May 01, 2018

Well That Escalated Quickly!

After knitting six pairs of socks over the course of the last year for other people I felt the urge to knit a pair for me so towards mid March I succumbed to that urge, grabbed the skein of sparkly stripey sock yarn (Plymouth Stiletto) and finally cast on a pair of Zigzagular socks, which is a free pattern on Ravelry and I highly recommend!  These socks, between the stripes and the simple, but interesting pattern, pretty much knit themselves!  Only change I made was to do an afterthought heel to accommodate the continuity of the stripes!


The whole time I was knitting my sparkly socks, Baby Boy was having serious sock envy.  He desperately wanted a pair of stripey socks of his own.  If he could've had sparkles it would've been even more perfect.  I knew I didn't have enough left over yarn from my socks though and he didn't want to wait for new yarn, so I let him pick out of my stash.  He chose an ancient ball of Fortissima Colori Socka for his and I used Joeli's Tiny Treads Basic Top Down pattern.  I should have knit up a size.  They will probably fit him for all of five minutes.  But he wears them all the time so at least he's getting use out of them while he can.


Once his socks were on the needles of course Little Man had a need for stripey socks too.  Unfortunately there was nothing to his liking in the sock yarn bin, so I logged onto Webs and let him pick out some yarn for himself. He chose Sirdar's Sole to Sole in the Jungle Fever colourway.  Bonus for me, it was super inexpensive!  I didn't really follow a pattern this time so much as cast on in between Baby Boy's size and my size and then knit until it fit.  Although darn his little hide, I think his feet are bigger than I assumed, because they seem a touch snug.  Again I used an afterthought heel to keep those stripes going nicely.


I'm not sure how me wanting a pair of stripey socks escalated so quickly to everyone needing a pair of stripey socks, but that's just how things roll sometimes and that's how I ended up knitting three pairs of socks in a total of eight weeks.  Not bad if I do say so myself!

Speaking of hand knit socks, I've decided to partake in Me Made May once again this year.  Last year I took the year off because I couldn't think of a challenge given that I pretty much wear me made every day all year round at this point.  But after listening to Zoe of the So, Zo blog (and the mastermind behind Me Made May) on the Love to Sew Podcast last week I thought that maybe I could find a challenge for myself after all.  I have well over a dozen pairs of hand knit socks that have been languishing in my drawer since I went back to work.  I wasn't wearing them during the week because I didn't want to "ruin" them in my work boots, and on weekends I'm usually barefoot around the house or would just grab my sport socks if I was headed out anywhere.  I decided that it's high time I enjoy those hand knit socks once again, so my challenge for Me Made May is to wear hand knit socks five days a week at work.  (I'm not wearing them on the weekends because there's no snow on the ground anymore, which means no socks thanks!)  I'm not committing myself to documenting them daily - I'm just going to go with the flow on this one, but I'll let you know at some point how my challenge is going or went.   How about you?  Are you Me Made May-ing this year?  What is your own challenge?
SaveSave

Sunday, April 22, 2018

The Jessi Hoodie

Ages ago - I feel like maybe as far back as late fall - one of the sewing groups I belong to on Facebook was hosting a sew along for the Jessi Hoodie by CoEmi.  I snapped up the pattern, bought the paper needed to print it off (It's a European pattern so required A4 - I made do with 8 1/2 x 14 " to accommodate the extra length needed and it worked just fine), printed and then assembled it all in short order.  Then proceeded to have zero time to sit down and trace the pattern out, add seam allowances and cut fabric out, let alone sew it up.  So it sat in a big pile on top of my desk until the beginning of March.

I've seen this pattern everywhere on Facebook for months now. It seems like ALL the custom fabric group sewists are especially crazy about it.  I really liked the look of it and thought it would be perfect for work, so I finally dragged my roll of tracing paper out and set to the business of tracing and adding seam allowances to all the bits and bobs.  It really wasn't an onerous task and now that it's done and I'm so happy with how it turned out I wonder why on earth I waited so long, other than time was, as always, at a premium.

I decided that my peached herringbone jersey from Blended Thread Fabrics would be great for the main fabric and instead of buying a co-ordinate for the rest, I decided to make do by utilizing as much of the charcoal Fabric Snob jersey from my ill fated New Horizons Vermont cardi that I'd made earlier in the year. (You never saw that one.  It was a complete fit disaster on me.  I don't know why I strayed from my beloved Blackwood Cardi in the first place).  So the cowl contrast was cut from the back of the cardi, the front side panels from the cardi fronts.  I cut the cuffs off and used them as is, and did the same with the cardi bottom band, so cuffs and band weren't exactly as the pattern measures, but did the trick nicely. I was pleased that the only "waste" left over from the cardi was the front bands which were so bizarrely stretched out of shape they were garbage anyway, and the sleeves, which I'll save for contrast on something for the little boys.


I have really loved wearing this top and reach for it so very often on cooler days, so I thought I'd make another version.  This time I used a panel from the custom print company, Midnight Mountain Fabrics which is located in the city. Being from the flat as flat can be prairies, I've always been drawn to the mountains. Some might even call it obsessed with them. I love their majesty, ruggedness and beauty, so I couldn't resist the panel when the pre-order went up a few months ago.  I combined it again with a jersey solid from The Fabric Snob.  This time since I was starting out from scratch I used the pattern pieces for the cuffs and measurements for the bottom band.  I like the bottom band's width, but the cuffs feel just a bit too long and too snug for my liking.  I'd probably like just an extra quarter of an inch width and a 1/4 of an inch shorter for my personal preference.  I'm not sure if it's the difference in fabric, or if I totally used the wrong seam allowance (How on earth do you do that when you're the one that added the seam allowance in the first place...The mind.  It boggles sometimes! LOL), but this one turned out really relaxed and verging on baggy.  I've taken it in some on the side seams and will wait until it's gone through the wash a couple of times in case it shrinks then I may leave it in it's still "relaxed fit" state, or may take it in more - I just feel that the minute I take it in, is the minute that it's going to shrink like a beast in the wash and I'm going to be living in a world of so much regret.  So for the time being it stays as is.


I used the "BIG Jessi" pattern. (Wow!  Not sure how I feel about the naming of the pattern - thanks for pointing out the obvious there CoEmi, because we larger ladies might not realize we're bigger than your regular pattern size range already.  But whatever.  Slight annoyance aside, I wasn't going to let myself be put off by that.  Maybe it's a translation thing.  I don't know.) As for the nitty gritty pattern details, the fit is pretty good (if you follow your seam allowance choice you made...), and it's a nice flattering design.  It has one heck of a huge cowl - if you feel the need to hide your head in a shell like a turtle, this is your pattern. LOL!


Or if you'd rather, there's a nice big hood option as well. You also have options to put in pockets (I didn't bother) and if you're a nursing mama, the pattern tells you how to add hidden zippers along the princess seam lines to make it breastfeeding friendly. Certainly not a feature I'd need anymore, but might be quite handy for others.  I like that you can mix and match fabrics and that it's a perfect way to use those fun custom print panels that are all over the internet that I seem to be acquiring but haven't previously had a hot clue what to do with.

I'm am pretty much delighted with both my versions and am currently pondering if I should make a third version, but this time with french terry and just a regular jewel neckline instead of hood or cowl.  Although, the weather has been glorious, so maybe I should just turn my thoughts to spring sewing instead... we shall see!

Monday, April 16, 2018

Ooops! I Did It Again...

So.  It happened.  I didn't mean for it to happen, but there you have it.  I had some jersey in my stash begging to be sewn up and really, I should have grabbed a different pattern, because I think it is likely just a teensy bit possible that one should branch out and sew something different once in a while.  However, these days sewing time is limited and the pattern was sitting right there on top of the pile of patterns and Oooops!  I did it again.  I further added to my already overly extensive Molly Top collection.

I can't even say anything about it because once you've sewn something ten or eleven times and you've talked about it eight or nine times previously there's just not a whole lot left to say.

So lets talk about these recent fabric choices instead.

The first one is an oh so very soft poly/rayon/spandex jersey from The Fabric Snob.  It's drapey and did I mention oh so soft?  I did my short sleeved, v-neck mod for my Molly because it's currently my favourite way to sew it up.  (admittedly because for whatever reason I can easily sew a v-neck shaped band on a neckline, whereas doing a regular one I seem to manage to mess up every single time.WHY?!?! Its like the fact I can't make Kraft Dinner.  Or Jello.  I don't know... I'm just weird that way I guess.)

Sew Over It Molly Top


The second one is a jersey of unknown specification that I snagged a year or more ago out of the clearance bin at Fabricland.  It has Llamas on it.  You know I couldn't leave it behind.  But there is precisely no drape to it and somewhat less stretch than desired.  Plus there's just something about wearing an entire tee covered in Llamas (or maybe they're Alpacas - I'll have to check out their ears and decide from there I guess) that felt just a little bit too quirky.  But it does make one heck of a fine pyjama top.  And if you've got a top?  Well, quite frankly you might as well make bottoms (I used the Halla Patterns sleep shorts pattern  and they took all of ten minutes to whip up by the by).  So win win!  I got to use my llama/alpaca fabric, I got to sew another Molly top, and I have new summer pyjammies!

Sew Over It Molly Top

Now I'm going to try and take a bit of a break from Molly for a while, but honestly? I really can't make any promises...


Sunday, March 18, 2018

I'm So Magical I'm a Freaking Unicorn

A couple weeks ago I started listening to a new to me podcast, the Prairie Girls Knit and Spin, which I highly recommend - Danie and Susie are great together and I've thoroughly enjoyed the episodes I've listened to so far.  Anyway, in the first episode I caught, Danie was talking about spinning a sweater's quantity of yarn and then knitting a sweater from it.  The comment that she was so magical she was a freaking unicorn popped up and I've decided to adopt it because it is just so perfect for so very many situations that pop up in life.

Need that gearbox right now?  Here it is... I'm magical.  I'm a freaking unicorn.  You enjoyed that roast beef dinner with the impeccably puffed up Yorkshire puddings...  I'm magical.  I'm a freaking unicorn.  Spin some yarn and make something with it?  HELL YESSSSSS!  I'm most definitely a magical freaking unicorn.  See?  So perfectly fitting for so many things.

So, as you all know I started spinning in July of 2016 when my husband surprised me for my birthday with a day long private lesson with a master spinner and my choice of spinning wheel.  Over the course of time, I've spun a decent amount of yarn, but I'd not actually knit with any of it.  I wasn't sure what to knit or where to start.  Every now and again I'd take all the skeins out and admire my handy work, but that was as far as I got with them.

Then a couple of weekends ago I suddenly realized I had the perfect pattern in my queue to use up some of my early handspun.  In fact one of the yarns was my very first "on my own without an instructor sitting with me" yarn that I spun in the days after I brought my Ashford Kiwi 2 home with me.   The other yarn I spun and plied a few months later over the Christmas holidays, just before I started back to work.


The difference in the two yarns is amazing.  I can really see my progression, although both are pretty wonky.  Uneven, overspun, thin and corkscrewey in some places and underspun and thick as your thumb in others.  But they are mine, made with my own two hands and I love them.


The pattern I picked was a simple pair of fingerless gloves that I thought would be perfect for this time of year.  I had to fiddle with the pattern because my yarn definitely knit up at a much, much larger gauge than the Breton Mitts pattern called for.  I increased the needle size and then decreased my cast on considerably and adjusted the rows to fit my hands.

My mitts are thick and cozy and a bit bullet proof, the fabric is so dense, but I didn't want to go up yet another needle size from the three or four sizes I'd already gone up by, because then the thin bits got too thin.  Regardless of their wonkiness and bullet proofness, I adore these mitts and I wear them every morning while I'm waiting for the truck and more importantly the steering wheel to warm up when I'm driving to work.

And I can tell you that knitting something from yarn I made myself is pretty darn magical.  I'm a freaking unicorn.


Tuesday, February 27, 2018

#SMYLY2018


I wasn't going to participate in this "Sewing Makes You Love Yourself" challenge figuring I had nothing to say really, but as it turns out, I do have something to say.  Perhaps more for myself than anyone, but it's something I often think about, so here goes.  It's going to be a long one, so you may want to grab a cup of tea and a snack before you start reading...

When I was about five my Dad helped me thread a needle while my Mom was busy at the sewing machine and then helped me as I haphazardly sewed a sleeping bag for my barbie doll.  A few years later my mom helped me sew a stuffed creature of my own design on her sewing machine. A few more years after that I took home-ec in grade nine and made possibly the most hideous pair of stirrup pants ever to grace a body.  Too short, the zipper poked out funny, the stirrups themselves were wonky and uncomfortable.  As much as I'd loved my few little sewing projects that fell in between the barbie sleeping bag and the stirrup pants I HATED that home-ec class with a fiery heat of a thousand burning suns.  I also hated everything about grade nine.  Especially the school, that on the first day of grade nine, the guidance counsellor gave an uplifting (note extremely heavy sarcasm here) speech on how more than half of us wouldn't make it to grade 12.  I needed out and I had a plan.

To go to a different school I needed to take something not offered in my school division.  Dad taught Metals and Aerospace, so that was my first request.  No go.  Dad wasn't having any part of that suggestion.  Next I suggested Power Mechanics.  That was a flat out no as well.  I moved onto the next available option, Woodworking.  Nope, nope and nope.  Now don't get too upset about me being denied these courses.  Dad had some pretty valid reasons.  I was a complete disaster when it came to shops class in junior high.  It was amazing that I got out with all my limbs and digits in tact.  There was absolutely no way Dad was going to be comfortable with me using machinery that could possibly maim me.  So out of sheer desperation I tossed out the one last option I had at my disposal. Could I please take Fashion Technology and Pattern Design?  Yes.  It was a go.  (My poor Dad.  After all his trying to protect me from harm, a few months into my first year in the program I managed to sew right through my finger on an industrial sewing machine and needed to be taken to the local clinic by the school secretary in case I needed a tetanus shot.  So much for his theory that I'd be safe!  ha ha!). So really sewing at the beginning was simply just a means to an end.  A last ditch effort in a desperate plea to get out of going to the school I was in.  I had no idea it would become what it is today to me.

Right out of high school I didn't do a whole lot of sewing, just the odd thing here or there, until my daughter was born in '92.  Suddenly the sewing bug bit hard and I was obsessed with sewing all the clothes for the kids.  Then in '97 I suddenly found myself as a single mom of three young kids, stressed out, struggling to make ends meet, no self confidence and feeling lost.  I got a second part time job at the fabric store to supplement my part time bakery job and found my sanity along with it.  I kept the demons at bay by shopping the clearance section and using my staff discount and then sitting down in my sewing room after the kids went to sleep, into the wee hours of the night, stitching my troubles away for a few hours at a time.  I took in sewing as a third job, making dance costumes and mending along with whatever else came my way.  Then a few years later I moved to the city, tried to make my marriage work and sewing went back to being a passing hobby only done on the odd occasion until word got out that I sewed and suddenly I was making dance costumes again.  It was my gateway back.

My crafting - be it sewing or knitting (and now spinning) has always been my coping mechanism when things are rough.  It took me as a desperate 14 year old to a new school. It saw me through the first and then second and final ugly breakdown of my first marriage.  It gave me a way to help put food on the table and pay the bills.  When my last pregnancy ended in a miscarriage that left my heart and hopes shattered I sat hand stitching the binding on a quilt, each tiny stitch easing a tiny bit of the pain and sadness away.

Its been a huge part of happiness in my life too.  Stitching my first ever quilt when I was expecting Little Man, sewing a Teletubby "Po" for N when he was three because he dearly loved Po and I couldn't afford to buy him one, sewing so many clothes for the little boys and all the sewing I did for the older ones when they were young, making gifts and quilts for my loved ones and more recently over the last few years, sewing my wedding dress and the explosion of sewing for myself that has led to having an almost completely self sewn wardrobe except for my jeans that I wear to work every day. (No way I'm putting the effort into making jeans that might get grease on them!).  My husband gets it.  He also enables the purchase of patterns and fabric and never complains when the dishes sit unwashed in the sink or the laundry is threatening to take over the basement because I've been down in the sewing room.

But there's more to it than just that.  Sewing, and the community that goes along with it has given me the confidence to feel good about myself.  I think the change of tide all started a few years ago with the whole "Cake with Cashmerette" experience, although to be brutally honest I was more than a bit hypocritical.  I couldn't stand the thought of society daring to try to make someone feel less worthy or beautiful based on their size and more so to have the absolute gall to think they had any right to comment, yet I would catch myself looking in the mirror and berating myself for how I looked. Then feeling like crap because I certainly wouldn't tolerate anyone else treating another human being like that and yet I was doing it to myself.   So it didn't really take complete hold until last spring when I sewed the Penny Dress and had the "it's the pants, change the damn pants" idea from Stasia Savasuk hit home full bore.

I have the ability to change the damn pants.  I can make whatever I want and have it fit however I want.  It also means I can say to hell with society's notion of sizing.  So what if my measurements fall into a size 20, an x-large, a 2XL or a large?  Am I comfortable in what I'm wearing?  Do I feel good about it when I look in the mirror?  Is the important thing the sense of pride and happiness I feel when I put on a dress or top or whatever I made that fits me? Absolutely.

I can't tell you how much I used to hate shopping for clothes.  Nothing could put me feeling lower faster than a shirt that didn't fit, was too tight or too short.  Or dresses that I either couldn't get out of without the jaws of life because they were fitted in all the wrong places or tent like because the next size up was graded up comically huge.  Wondering what the hell was wrong with my lumpy bumpy self that I couldn't look good in anything I tried on.  All that is in the past.  Sure I still have my "Ugh.  Why are my jeans so damn tight today?" moments. But it's just a moment.  It's not a continuous stream of negative self talk going through my head.


For my project I was planning to sew a new dress this past weekend, but then I made the Halla Patterns Cozy Wrap Sweater last week.  It's totally out of my comfort zone as of late.  I seem to be more about greys, and muted colours, blending in rather than standing out.  Even my florals tend to be on the monochromatic side of things.  Don't get me wrong.  I do love a good bright floral for a summer dress, but was totally unsure and self conscious about a top.


So I posted a picture of myself on the Halla Patterns Facebook group.  I had hard hat hair, I was tired, it had been a very long day, but it proved the whole supportive sewing community point so well that I decided this had to be my SMYLY project.  I received so many encouraging and supportive comments from group members (and found out there happens to be a lot of Halla Pattern enthusiasts that are also spinning enthusiasts!!!!  These ARE definitely my people!!!).  Instead of feeling self conscious about my bright floral print, I am going to wear it with pride and if those little nigglingly self doubts creep into my head, I'm going to squash them and remember all the kind words of the group members.


If you've made it this far, thank you for reading! I'd also like to end with a big thank you to Athina Kakou, Hattie van der Krohn, and Lisa Kisch for hosting #SMYLY2018 as well as a huge thanks to all those that shared their stories throughout the last few months. There have been so many heartfelt reasons why we sew and it's been incredibly touching and inspiring to hear them.

Saturday, February 24, 2018

It's All About Comfort

It's been cold a lot here lately.  Even when we have a ridiculously warm temperature in the forecast it'll go something like this, "Thursday's high -3C... with a windchill making it feel like -35C"  What?!?!  Why can't we have anything nice??? Quit playing with us, Mother Nature.  At this point it's just rude.

So along with cold comes a great need for cozy, comfortable clothes.  I'm all about jerseys and pontes these days!  I had some quilted jersey from Blended Threads that I wanted to use for possibly another Grainline Linden, but then one of the Facebook groups I belong too was planning a sew along for the Hey June Halifax Hoodie.  Since I have a Linden already, I thought I'd branch out.  I made view E of the Halifax, but lengthened it significantly (too much maybe?), because while I really loved the cowl neckline and the interest of the front diagonal seams there is no way that I'm doing a hi-low hem.  I really can't stand them at all on me.  It just always feels weird, so I spend all day tugging at the front of my top and feeling awkward.  LOL

I'm pretty happy with my Halifax although I've discovered that the quilted jersey collects lint like a beast (as does the ponte that I used along with it) and it also seems like it's going to have a tendency to pill a bit.  I also feel that the black is a bit strong (does that even make sense?) and wish I'd gone with a charcoal instead, but I was using up stash so, whatever.  It's cozy and comfy and so I'm perfectly fine with its couple of downsides.


After all was said and done, I still had a bit of Ponte left in the stash and a hankering for another Linden, because I absolutely adore the striped floral one I made at new years.  I went hunting through my stash of leftover bits and bobs for the sleeves and settled on quilted jersey left over from my last year's Jasper Hoodie.

I'm super happy with how it turned out and again, other than the lint collecting factor of the ponte, this was a complete wardrobe win for me.


My final make is a bit of a dud.  I think I mentioned how my husband bought me a Silhouette Cameo for Christmas - best new toy ever - and I wanted to try doing a shirt with a logo on it.  I had bought a light grey tee from Walmart for the purpose, but it was ridiculous on me. First off the fit was weird.  Next problem it was tissue paper thin.  Nope. Nope. Nope.  So $5 worth of poly blend jersey from Fabricland and my "TNT" Molly Top pattern seemed the best route to go.  The saying, "Don't Make Me Use My Hockey Mom Voice" is a reference to the fact that one of the other team moms and myself are sort of a bit ... ahem... infamous for our loud cheering.

Now before you start thinking we're that kind of obnoxious hockey mom, we're definitely not.  We cheer everyone on for pretty much everything. You're skating?  We're going to cheer.  Your stick touched the puck?  Cheer.  Got a goal? We're hooting and hollering like a couple of lunatics.  So we are super encouraging to our little players, but just happen to be a bit loud whilst doing it.  I blame it on my years in cadets as a teenager, calling the squadron out onto the parade square and giving drill commands.  That whole comes from the diaphragm, not the throat thing apparently stuck and I am just loud.  Can't help it.  LOL

The tee is fine.  Except it was like Goldilocks and the freaking bears with that neckband.  The first one was TOOOOOOO big.  The second one was TOOOOOOO small.  The third one?  Well it's ok. Certainly not just right, because in the meantime all the ripping out and re-doing stretched the heck out of the neckline.  Then I actually burnt the fabric a tiny bit right in the front trying to beat the darn thing into submission. (Hello polyester!).  So it's not great, but it'll do.  Then there's the logo.  I think my placement is a touch off.  Maybe a bit lower? Maybe more line spacing? Maybe a bigger font?  I've no hot clue.  I just know it looks off to me.


In amongst the sewing, I've also been knitting, spinning, playing with the cutting machine and generally avoiding dishes, laundry and other sundry housework when I'm not at work or the rink...