Showing posts with label diapers. Show all posts

Sunday, February 10, 2013

Have Wet Bag Will Travel

A wet bag is a great idea. When Baby Boy was in cloth diapers I kept intending to make some to have on hand, but I kept forgetting (no idea why, just did) so there were a few times when I was stuffing a wet diaper in my my bag hoping no nastiness would leak out during the rest of outing. Other times plastic bags sufficed, but I think I would have liked a wet bag. Now that both LTM and Baby Boy are potty trained I should still should have at least one or two for those rare accidents when we're out and about. It'd also be handy for wet swimsuits!

When I set about making a gift for a cloth diapering mama friend of mine's new baby I started with the obvious choice. I made her little munchkin one of my one size pocket diapers. I hummed and hawed as to what to send with it. Finally settling on a Snappy Wipe To Go - an awesome little PUL outer washcloth designed by my friend Christine. (These little cloths are great. Took me all of about 15 minutes the other morning to make one for the boys' lunch bag before we headed into the city for the day. Go check it out. I highly recommend it!)

Then I thought why not make it a whole "diaper change to go" package and include a wet bag. There's loads of tutorials online, but I decided to do my own version, mostly because I didn't feel like spending all my precious crafty time searching google for exactly what I wanted.

Photobucket Pictures, Images and Photos
O/S Pocket Diaper, Snappy Wipe to Go (pardon it's wrinkles my iron died mid project) and wet bag

So here it is! Grab your supplies, and get sewing! It'll whip up in no time! I'll give you two versions for the hanging loop. The first one will have snaps, the second one will be a plain loop. I'll also show you two different bottoms for your bag! Hey! And guess what. Because I'm doing two variations after I'm done today's tutorial I'll finally have a wet bag for my very own! Wheee!

WET BAG SUPPLY LIST

Ballpoint needle
Polyester thread
Sewing machine
Polyresin snaps / snap pliers (optional)
Iron - low setting, no steam
1 zipper (at least 23" length - longer is ok, you can trim it down to fit)
1 piece main colour PUL cut to measure 13 1/2" tall x 10" wide
1 piece main colour PUL cut to measure 7 1/2" tall x 10" wide
1 piece contrast PUL cut to measure 6 1/2" tall x 10" wide
2 pieces contrast PUL cut to measure 2 1/2" tall x 4 1/2" wide (version A snapped loop only)
1 piece contrast PUL cut to measure 2 1/2" tall x 8" wide (version B non-snapping loop only)

NOTES:

1) Just a quick note about dimensions of the front pieces. This is a great stash buster project so feel free to make your contrast piece narrower if you'd like to suit your fabric. (Remember, a narrower contrast would also change the placement of the zipper closer to the top of the bag.) Just simply adjust the bottom main portion to accommodate the smaller contrast. Your contrast and main pieces need to equal the height of your longer back piece. Have fun and get creative!

2) Pins and PUL are not friends. Pins will leave holes that can lead to leaking. If you feel you need to use pins go ahead, just keep them within the seam allowance!

3) Some PUL can be "sticky". If you find this to be a problem you can try a few tricks. Try dusting your PUL with baby powder, using a layer of tissue paper (just tear it off when you're finished), or use a Teflon foot if you have one (I've never done any of these although it was close with my elephant PUL. Fortunately the green wasn't sticky so I just flipped everything over and sewed with that side facing up and everything went fine!)

Photobucket Pictures, Images and Photos
You should have a collection of pieces that look something like this!

INSTRUCTIONS

Step 1 Version A - Preparing the Snap Loop

Fold one 2 1/2" end to the wrong side of fabric by 1/4" then fold 1/2" in down each long side of loop piece to meet in the centre. Next fold entire strip in half so that you have a long, narrow strip. Carefully press using an iron, on a low setting with no steam. Edge stitch down each long side. Repeat for second loop piece. Apply snaps to finished end according to manufacture's instructions so that the caps face the outside and the socket and snap face inside(the ends that have raw edges will be sewn into the side seam of your wet bag so no need to finish them). Snap the two strips together, align the raw edges and baste together if desired. Set aside.

Photobucket Pictures, Images and Photos
Preparing the snapped loop

Photobucket Pictures, Images and Photos
Two halves of snapped loop ready to go

Step 1 Version B - Preparing the Plain Loop

Fold 1/2" in down each long side of loop piece to meet in the centre. Next fold entire strip in half so that you have a long, narrow strip. Carefully press using an iron, on a low setting with no steam. Edge stitch down each long side. Fold strip in half so that raw edges on the narrow end line up. Baste if desired and set aside.
Photobucket Pictures, Images and Photos
Plain loop ready to go

Step 2 - Preparing the Bag Front

In this step you will insert the zipper. This is likely the trickiest part of making your wet bag!

If you need to cut down a larger zipper, simply stitch and backstitch across the zipper tape at the measurement you require, then trim excess leaving a slight surplus. (Note : this works for light nylon or plastic zippers. I wouldn't try with heavy plastic or metals zippers. You will break your needle. Trust me on this.)

Place the right side of the zipper tape face down so that the edge of the tape aligns with the edge of the shorter main colour PUL piece. Stitch carefully close to the zipper teeth using a zipper foot on your machine. Flip zipper tape and seam allowance of PUL to the inside. Lightly press - remember to use a low setting and no steam if using your iron - or finger press, then topstitch. Repeat process for the contrast PUL piece. Baste down the sides of the PUL where the zipper ends. Your front piece is now complete. (*just another quick note - it really doesn't matter which side your zipper opens from. I inadvertently did one of each, but I think if you're planning on hanging your bag on a hook, the opening would be better on the opposite side from the loop like in the elephant bag)

Photobucket Pictures, Images and Photos
Attaching the zipper

Photobucket Pictures, Images and Photos
Edgestitch on the right side

Photobucket Pictures, Images and Photos
This is what it should look like

Next baste your prepared loop so that the raw edges align with the long edge of your newly finished front approximately 1 1/2" from top of contrast portion of front, right sides together, with the loop pointing towards the centre of the front piece. Baste.

Photobucket Pictures, Images and Photos
Basting the loop onto the front piece

Step 3 - Assembly of the Bag

Open zipper partially. (This is so you can turn your bag right side out - you do not want to forget this step. It will lead to frustration and the need for your stitch ripper)

Place prepared front and remaining PUL piece right sides together. Stitch around all four sides using a 1/2" seam allowance. Reach into the bag through the open zipper and flip your bag right side out. You're done! Wasn't that easy?

Photobucket Pictures, Images and Photos
Stitch around the entire outside of the bag but make sure you've left the zipper partially open before you start

Photobucket Pictures, Images and Photos
Handy dandy wet bag all finished

Variation

If you want to get fancy on the bottom of your bag let's do something with those corners to create a flat bottom! With your bag still inside out, pinch the corner together, lining up the seam allowances, to form a triangle. Measure 1 1/2" from the edge and draw a line across from side to side. Stitch along the line and trim excess. Repeat for other corner. Now turn your bag right side out. You're finished!

Photobucket Pictures, Images and Photos
Pinch the corners together and mark 1 1/2" from edge then draw a line from side to side forming a triangle

Photobucket Pictures, Images and Photos
Stitch along the line and trim excess

Photobucket Pictures, Images and Photos
Voila! Finished!

Now, quick! Go stash it in the diaper bag or your purse so that you don't get stuck at Kindermusik class gingerly stuffing a very wet, slightly dirty diaper into your purse while you hope nothing leaks onto your wallet, keys or gum. Or maybe those sorts of things only happen to me...





Thursday, July 19, 2012

It's All About Sewing These Days

First up I should mention the amendment to my blog name. When I started out it was all about knitting. I, of course, was sewing, cooking and baking back then too, but just didn't really talk about it too much. It feels silly to have a title proclaiming knitting when lately I write more about other things. So thus the wee amendment. ;)

So... Or sew as the case may be... I've been sewing up a storm over the last week or two. It all started out with, you guessed it! Some diapers! We had a minor incident awhile ago in which an innocent dog was briefly blamed for a nasty mess on the dining room floor that is until it quickly became obvious that the wee boy pointing in horror at the mess, saying "Doggy poop" over and over was in fact unaware the mess had come from him and the diaper he'd managed to undo (while still fully clothed - it's a rare talent I know...). Anyways enough rambling. I decided at that moment all Velcro close diapers were to be banished to the deep, dark depths of the closet and from that moment on only snap close diapers would be used (which incidentally the naked little streak that just ran past makes me suspect snaps might not be 100% toddler proof either.)

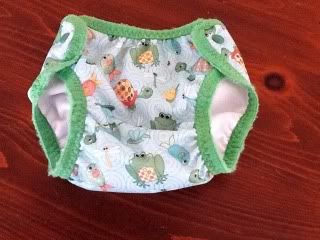
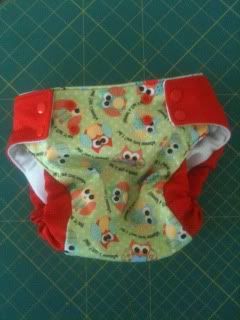
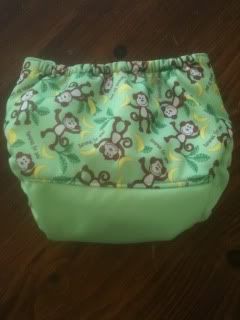
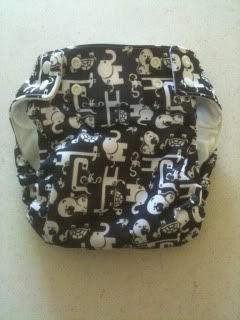
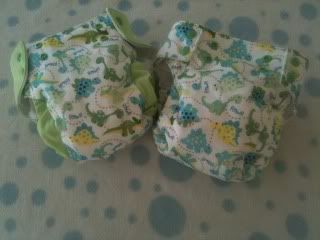
To make my long story short suddenly our diaper stash was a bit skimpy without the offending Velcro closing ones, so I made a couple of my usual pocket diapers.

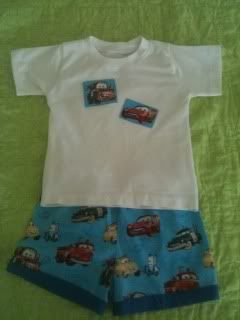
It's been super duper hot here lately and with no a/c in our house the boys needed some really light weight pjs. The first pair are the summer installment of daddy/son matching jammies I think (BF)G would most likely disown me if I posted a pic of him in his jammies and the boys didn't feel like cooperating so you get an unmodelled pic (with LTM's "Douglas" horse that he said really needed to be in the picture) The bottoms were made from fabric I bought about 15 years ago and the boys tops are cut from a $5 size 2XL tee from Walmart (way cheaper than buying a half metre of knit at my local fabric store!)

The second pair bottoms are from fabric that (BF)G's niece had in her stash and didn't need anymore, LTM's top made from an old too short to be decent tee of mine with an appliqué accent and Baby Boy's from stash fabric with a freezer paper stenciled accent. I think they turned out pretty cute and I love using up odds and ends!


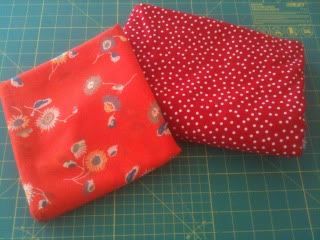
I also am part way through a blouse for me, and have two pretty new fabrics begging to be made into something for me all me! The orange floral wants to be a Collette Pattern's Sorbetto Top and the red polka dot is destined to be Sew Weekly's MTL Day After Day Dress. Many thanks to my Mom for the birthday money that resulted in this fabric buying spree!

I've also amassed all my supplies to make my baby crazy Baby Boy a Waldorf inspired doll. I may be crazy. I was confused by step two of making the head...

I guess it hasn't been all about sewing. I've done some knitting too. I finally frogged back a few rows on the Clapotis I started back on January of 2010, figured out where I am and replaced all the stitch markers that were removed by a small boy pulling the needle out (about a year ago!). As well I am working on a secret project for Christmas. Look at me so ahead of the game! Ha ha!

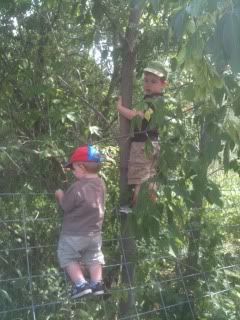
Enough of my musings... The little ones are getting restless! Time to get these monkeys outside to play!

Thursday, June 28, 2012

Busy Times

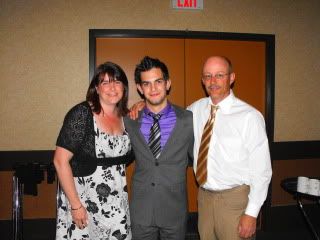
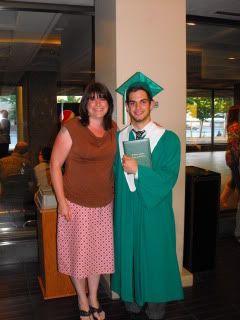
The last few weeks have gone by in a blur of running into the city for doctor appointments and errands, racing against the clock to get a little garden in that we'd hoped to do earlier but had no time for, and N's high school graduation!

I can't believe he's done school! Not sure actually how it happened so fast, but it did. What seems such a short time ago he was terrified of going to kindergarten and would make a run in the opposite direction the minute I got him out of the car at the school. Or if he got to the doors without incident the teacher would have to pry his little hands off of the death grip he had on me. His homemade Telletubby Poe hid in his little red backpack every day for the first few months (you know, because Poe might have been lonely if he'd stayed home by himself).

Growing up. It happens so fast!


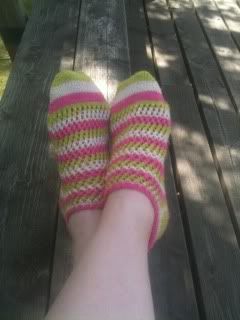
In amongst all the running about and excitement I did manage to get some serious craftiness in! In knitting news, I finished a pair of socks. They're just a quick, simple pair of ankle socks, using some yarn I've had in my stash for several years now. The thing I like the best about them, however, is the fact that they are my very own, very first ever pattern. I'm working on getting the pattern ready with the help of a good friend, but in the meantime I'd like to show them off to you!

My "Follow The Leader" socks!


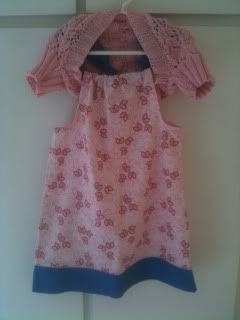
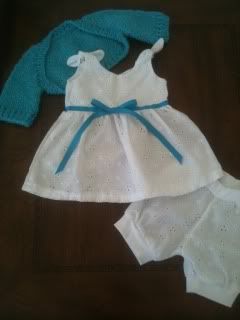
I also got a few gifts completely finished! The Confection Shrug for a friend's baby girl due soon and the Victorian Lace Shrug for a "birthday swap" I'm in right now. I made an Itty Bitty Baby Dress and a pair of matching bloomers to go with the Confection Shrug. For The larger shrug I made a simple pillowcase dress using the tutorial on Prudent Baby's site.


I've been sewing like a crazy lady too lately! A couple necessities for the boys...

Some new pajamas!


Some new shorts!


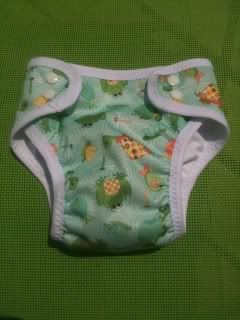
A couple new swim diapers (the first using the Aquarius Swim Diaper pattern and the second, which I like much better, my own design) and pocket diapers for Baby Boy!


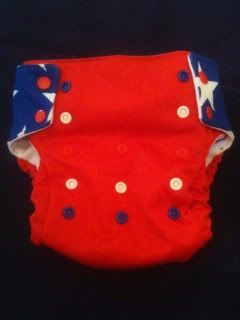
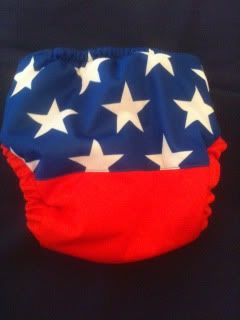
And a surprise "4th of July" diaper for a friend's little fellow! (the little guy's three year old brother has dubbed it the "Captain America" diaper)!


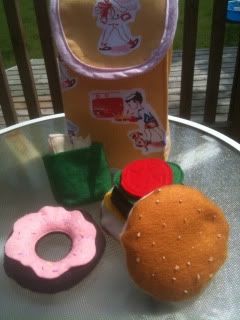
I had some fun making a felt "lunch" and a cotton lined lunch bag to put it in for my little birthday swapee that I made the shrug and pillowcase dress for.


I also did some sewing for me!! Suddenly it occurred to me I had nothing to wear to N's grad dinner. I really hate shopping for clothes for me and I had a good length of a beautiful linen print a friend had sent in a swap last winter sitting in my stash. Using A Simplicity pattern I already had I made a new dress. I love it! It felt sophisticated enough for a banquet, but comfortable enough that I wasn't feeling awkward sitting through an eternity of long winded speeches and not great food.

My dress!


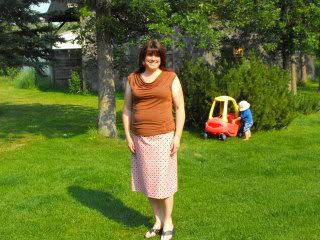
Feeling bold from my dress success I whipped out another pattern from my stash and set to work on a sun dress. Let's just say pride does go before a fall. The bodice was bikini worthy skimpy on top, suck in your gut fitted through the midriff and absolute-bloomin'-lutely perfect through the skirt. It's now a skirt. Full stop. I hate wasting fabric, not to mention the time wasted putting the whole thing together, but the dress would have hidden in the back corner of my closet, whereas the skirt was worn to N's convocation last night!


So, as you can see there's been lots going on here chez Prairie Girl! Busy times indeed! Next event up is Little Toddler Man's 3rd and my 41st birthday in a week's time. I love sharing a birthday with my little man! He's an amazing birthday present in himself and I'm guaranteed cake. What else could anyone ask for?