Friday, June 06, 2014

Blue Birds of Happiness

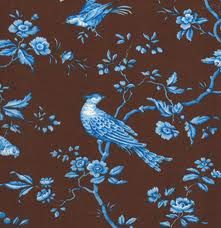
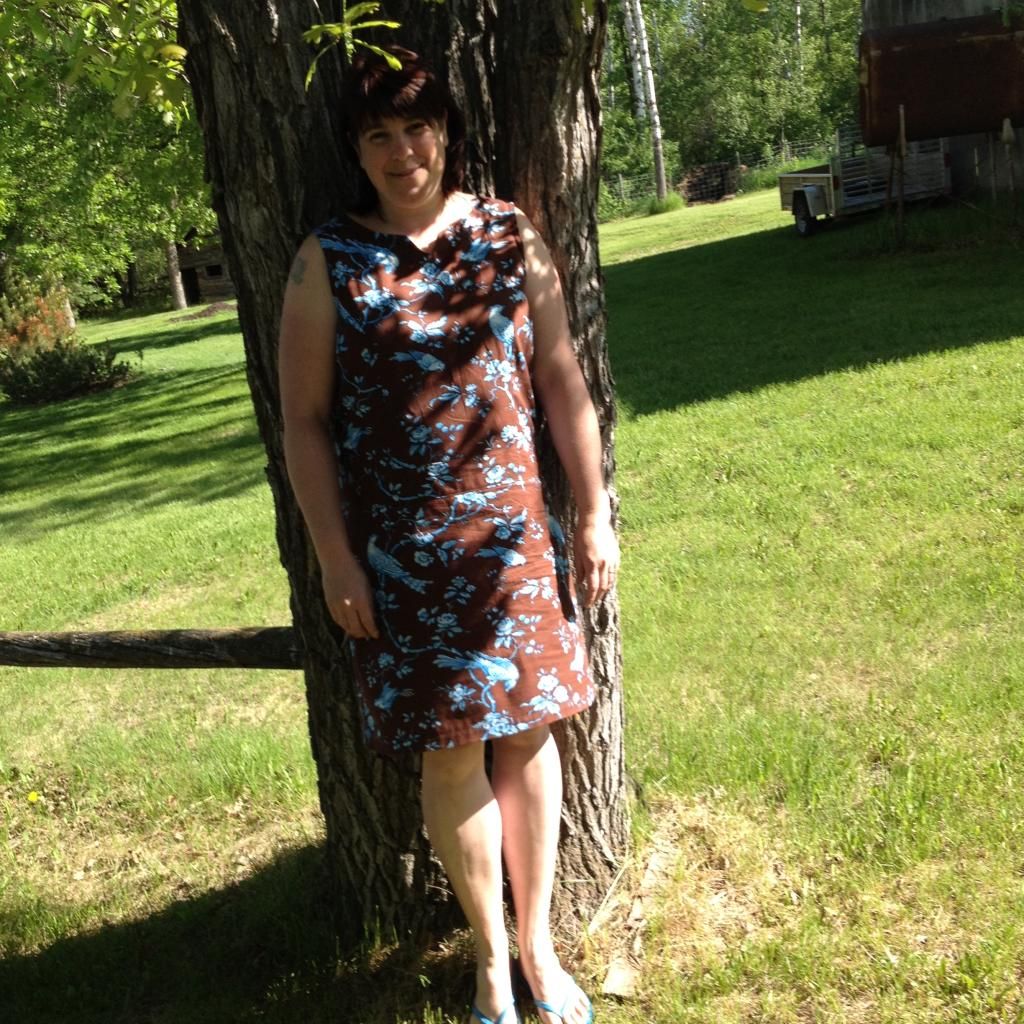
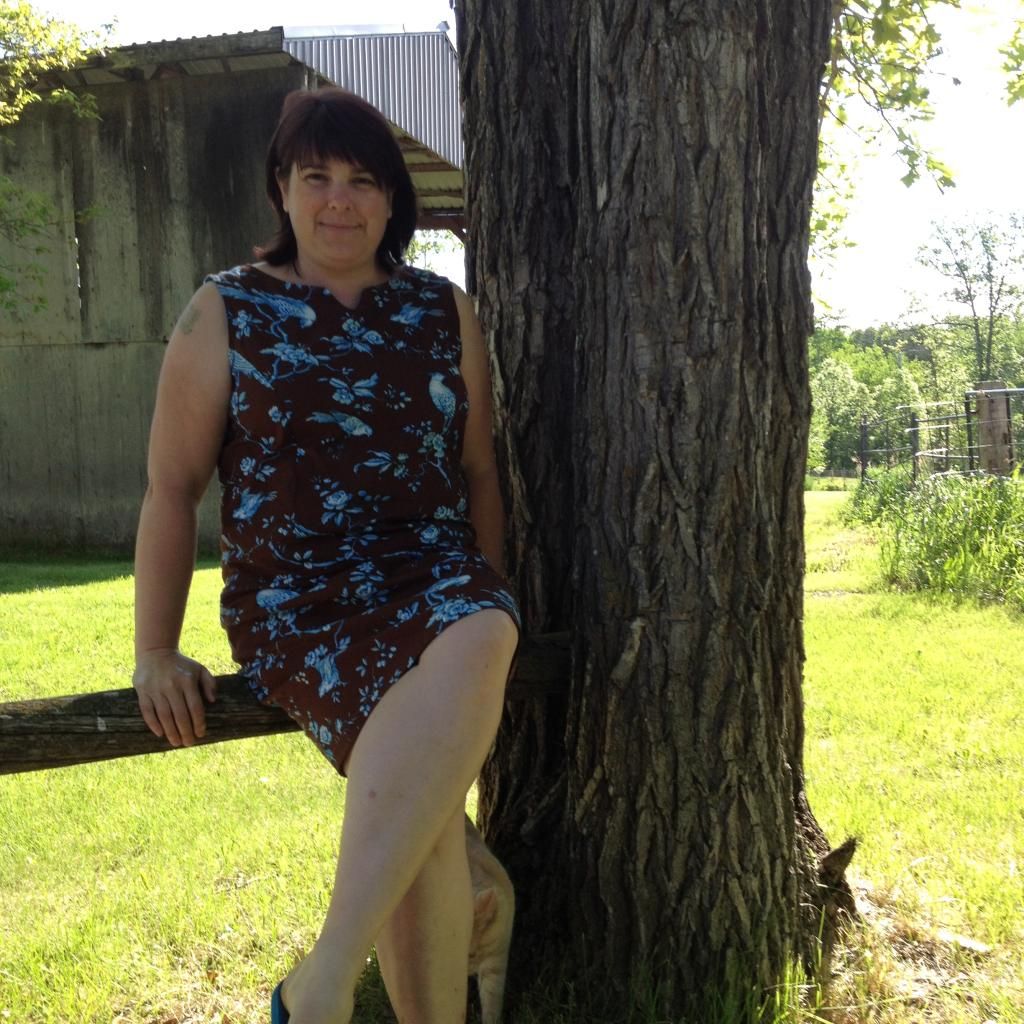
Last summer when I was ordering fabric for my Jamie Dress, I found Jennifer Paganelli's West Indies collection and fell head over heels for Matilda in Cocoa. The birds were too pretty to pass up so I ordered 2 1/2 yds. I had no idea what I'd make with the large overall print. Initially I had thought perhaps another School House Tunic. Maybe a Torii Tunic? Or a skirt? I knew to really let the fabric shine I would require a pattern with simple, understated lines. Nothing fancy or finicky. I mulled over possibilities throughout the winter, unable to decide until suddenly, a few weeks ago, I remembered a pattern I had picked up on sale at some point last year. Sis Boom's Rebecca Shift. It fit the bill perfectly!

For a PDF pattern, you just can't beat the Sis Boom patterns.  I could go on and on about them. Seriously! First off I hate having to print off a gazillion pages only to find out that for my size half of them get cut away. The beauty with Sis Boom? You're given a table that tells you exactly what pages you need for your size. And with a pattern like Rebecca that you may want to "Frankenpattern" using different sizes she breaks down the pagination for each of the components. LOVE this feature!!!!!

And I may have grumbled, muttered, cursed on more than one occasion about my dislike of the pasting together and cutting of pattern pieces. But let me tell you, these are the stuff pattern putting together dreams are made of. It doesn't matter if preschoolers have "helped" by rearranging my pages from one end of the house to the other. I can easily tell which piece belongs where with the shaded sections that clearly not only tell me what they should be joined to but show exactly how much they should overlap each other. I can't even begin to describe how much quicker and easier this is than trying to match up tiny bulls eyes or little dots like some other PDFs utilize.  Anyways enough gushing about the pattern. I actually have gone on and on so it would seem.

So let's get down to the nitty gritty. It turns out I am sort of a weird combo of sizes. I should have "frankenpatterned" (she explains how), but I didn't. I should've made a muslin, but I didn't.  I should've, maybe once, in the sewing of the dress, glanced at the instructions and not gone off memory from when I had taken a brief look at them a few weeks ago, but I didn't.  What I did do was sew a perfectly lovely dress for someone definitely not my size or shape. Thank heavens it was on the too big side of not fitting instead of the too small.


So me and my trusty sidekick the seam ripper had an epic rendezvous. Princess seams taken in, armscye reduced, zipper removed, back seam taken in to the proper width (could've avoided that one if I'd bothered to read...), side seams of the skirt portion taken in, taken in again, - what the heck... where did the saddlebags come from??? - and taken in a final time. Done!


The dress is on the roomy side still, but it's a comfy roomy not a "who's dress did you borrow because it totally doesn't fit you" roomy. I can definitely live with it and it will be perfect for those hot humid days of summer when I just want something easy to pull on! Plus the blue birds? They just make me happy!

Friday, May 30, 2014

Super Heroes Need Pyjamas Too

I've been doing some sewing lately for the the little boys. Spring always means new pyjama time for them and this year it seemed especially important to get going on it when Little Man tried on his spring jammies and they were very much capris length instead of long pants.

I had made Baby Boy a couple pairs of bottoms from Fishsticks Design's Pajama Party pattern back in the winter, but hadn't got around to making tops for them. The one pair I had already decided to do the matching top, but the other pair I wasn't sure. I'd picked up the Richard Scary Busytown remnant during a buy 1 get 2 free sale before Christmas and knew there wasn't much left after the pants for any sort of top. I did entertain the notion of a tee in a matching colour, but a matching colour seemed to elusive in both fabric or store bought tee. After far too many weeks months of deliberation I finally settled on a simple collarless button down top (similar in style to the one Little Man is wearing in the photo) in the green that I used as contrast cuffs for the pants and used the remaining scraps of Busytown for the contrast on the top. I then had a problem choosing button colour, so went with one of each for a fun change from the usual, or as Baby Boy would say the "usable" way. (he has a few words he still says a bit muddled up).

Little Man's pjs presented a whole other issue in that a) my Fishstick's pattern only goes up to size five (and a tiny size five it seems to be or at least for my giant boys) and b) when I bought the fabric last fall, I bought 1 1/2 yards online figuring that would be plenty for him. Oooops! He's had a bit of a growth spurt in height obviously and I was hard pressed to squeeze a size six onto the fabric. Directional prints are my nemesis! Size six was not going to be nearly long enough either so hello wide cuffs! His pattern is a 1970's Simplicity pattern that has been my go to for the last twenty years or so for boys size 6-8.

 photo AD27C25B-85D9-40F1-96BD-E8EB54CA7128.jpg
Stylin' in their new PJs

 photo FA1724D6-E807-42B0-81C1-B570582AE8D0.jpg
Tired and not feeling like posing -
the front is similar to Little Man's digger jammies
and has one red, one yellow and one blue button.

The boys were pretty darn pleased with having new jammies for spring, but little did they know they were in for a HUGE surprise in the pyjama department! My little men are super hero obsessed. Little Man can pretty much tell you anything you want to know about any given Justice League member and then some. They both regularly, (as in 99% of the time), wear capes as a part of their normal day to day attire. Little Man often even wears his batman mask or sunglasses to preschool. Luckily he has understanding teachers that don't mind a pint sized superhero in their midst.

I had noticed on the calendar that preschool was going to be having "Super Hero Day" on the last
Wednesday in May, so I set to work. Plotting and planning all in secret. I had planned to make pyjamas that could be worn as costumes for both boys. I couldn't, after all, just make Little Man a set and leave out Baby Boy. Finding fabric proved to be challenging as it always seems to be when I have something specific in mind.  Baby Boy's red and Little Man's dark green jersey came from a sale bin at Fabricland in the city, and the light green was procured via two 5xl muscle shirts from the men's section of Walmart as was the yellow (except they only had that in a 2xl - which luckily provided plenty of fabric for Baby Boy).

As an aside, I often look to the men's department when I'm in need of knit fabrics for the boys! You can get a whole lot of fabric in a 5xl! Next time you wander through a department store take a look. You never know what you'll find on the clearance table that could become your next sewing project! I recently snagged two long sleeved 5xl shirts for a grand total of $6!! Men's, by the way, are almost always quite a bit cheaper than ladies.

Anyways, back to super heroes! Covert operations went into full swing last week, the moment the boys went to bed for the night. By Tuesday night as I put the finishing touches on their costumes/pyjamas I was so excited I wasn't sure I'd be able to get to sleep. I think drawing out the symbols possibly took longer than actually sewing or stencilling them on, but it was well worth every minute I put into it. The boys were thrilled with the end result and so surprised! They wore them all day Wednesday and then I had to wash them so they could wear them to bed last night. I think their masks have come off only when they've been sleeping. I couldn't be happier!
 photo E434FCDC-B693-4F7D-87FA-AA6F3B294532.jpg
Green Lantern and The Flash all set for "Super Hero Day"

 photo 1B0EC038-A19D-43EA-8F24-A2D286A94CD2.jpg
Sometimes a super hero just needs to a break from saving the world
and have a little cuddle with his kitten

 photo B9967696-E145-4290-A4DD-AFC2DD96BBC0.jpg
… or gather dandelions
(ha! I just noticed the furry little kitten paw at the bottom of the photo)

 photo FA2243E7-1963-4728-8C50-E5961057CFB2.jpg
… or play at the park

I probably need to sew them a few more pairs each to have them set for the hot summer nights, but for now these will do while I take a break and do a bit of sewing for myself. I have a few Sis Boom patterns in the works at the moment and also want to get a few tees and skirts made for myself.


Friday, May 09, 2014

Some New Bags!

As you probably have realized I'm a bit of a fanatic when it comes to making bags. I have an entire corner of my closet full. Silly thing is, most of the time I use the same one for months on end. It doesn't actually even occur to me, usually, to switch bags. Crazy.

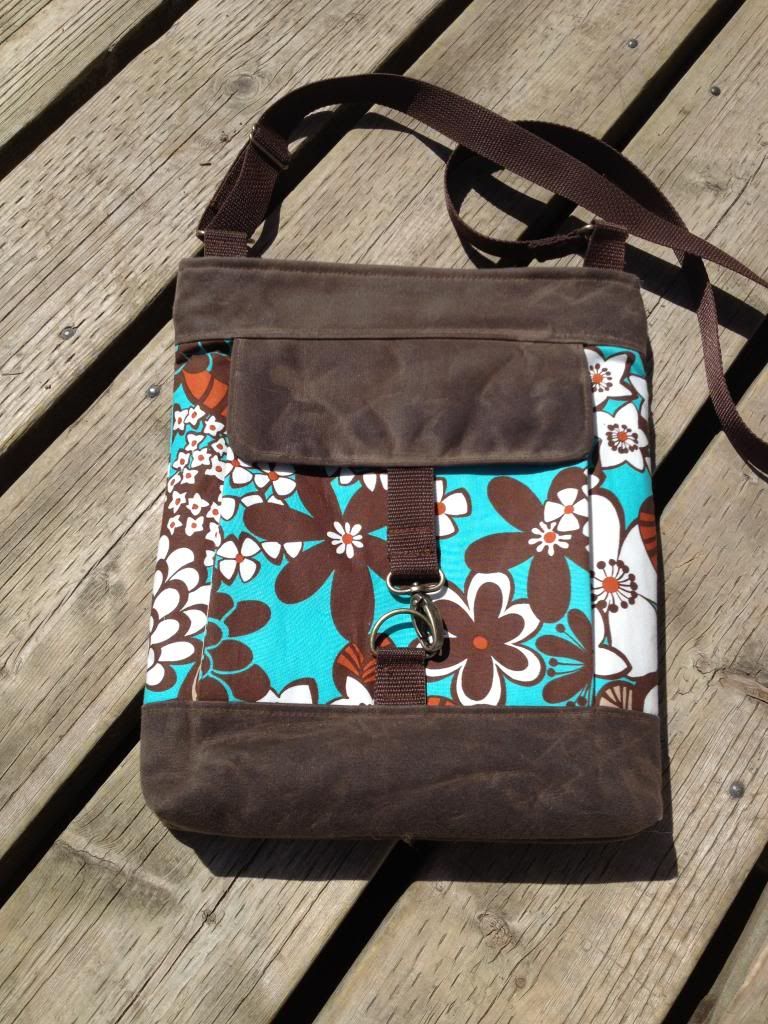
So today's first bag is the one I mentioned in my last posting. I've just finished it up and while I love the concept and the pattern is really well written, I feel kind of "meh" about the whole thing. The pattern is Betz White's Metro Hipster Bag.  It's a great cross-body bag that has a roomy "bellows" pocket on the front and a padded pocket on the inside that fits an iPad. The outside base, pocket flap and top trim as well as the zipper panel is made using waxed canvas.

I'd never used waxed canvas before, but was intrigued and quite excited to give it a try. Sadly, my machine did not share my enthusiasm and refused to sew nicely on it. The thing with waxed canvas is you really need to be committed to what you are sewing because if you have to stitch rip, those rogue stitches will haunt you forever by way of the very visible holes they leave in the fabric. Of course I managed to make a billion mistakes on my bag, so I'll get to be annoyed with myself every time I use my bag from here on in.

I don't know exactly what my issue was. I swear it was though I've never sewn before I was that clueless. It's by no fault of the pattern. Betz, as always, is very thorough in her instructions and all the diagrams were very clear. I was just out to lunch on this one.

Hopefully I'll grow to like it more with time. I think it'll be a great "out and about" bag for me. I'll just have to learn to ignore the wonky top stitching and sort of mismatched side seam on the one side and the fact I hate the lining fabric I used (just a boring beige heavy cotton I had in my stash).


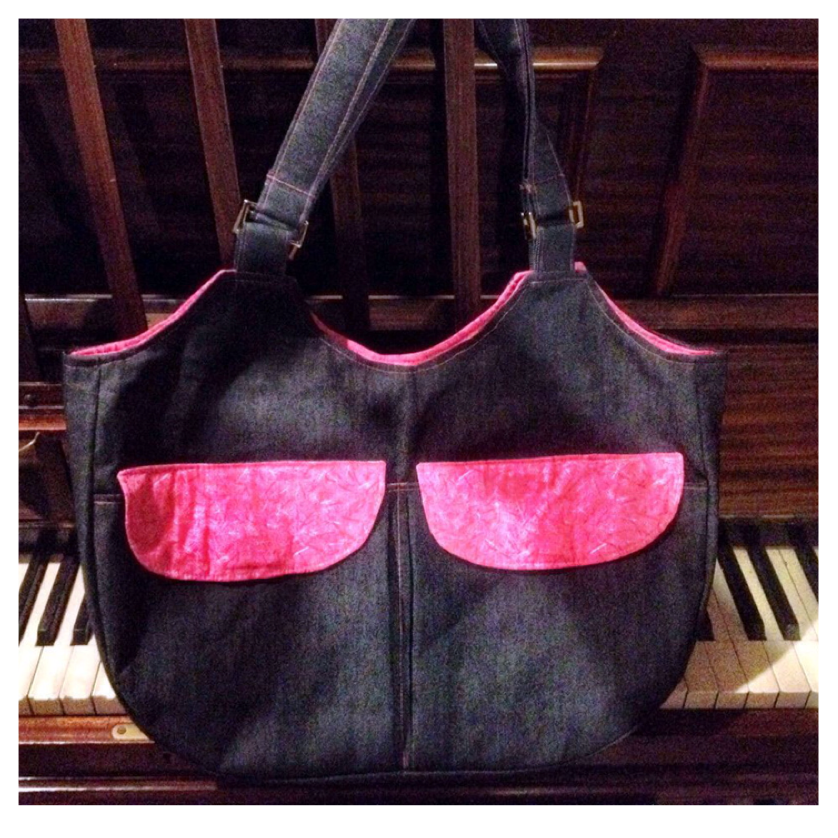
My other bag is one I did as a test for Anna of Charmed Liebling. I did my version of her Pink Peony Bag quite some time ago then actually forgot about it. (Told you I have a lot of bags!!) It was a nice surprise when she emailed to say that the pattern had been released on the Sew Mama Sew website! It's a great little clutch for spring with either a shoulder strap or a wristlet strap. Best thing is her free pattern is super easy and designed for a beginner sewist.


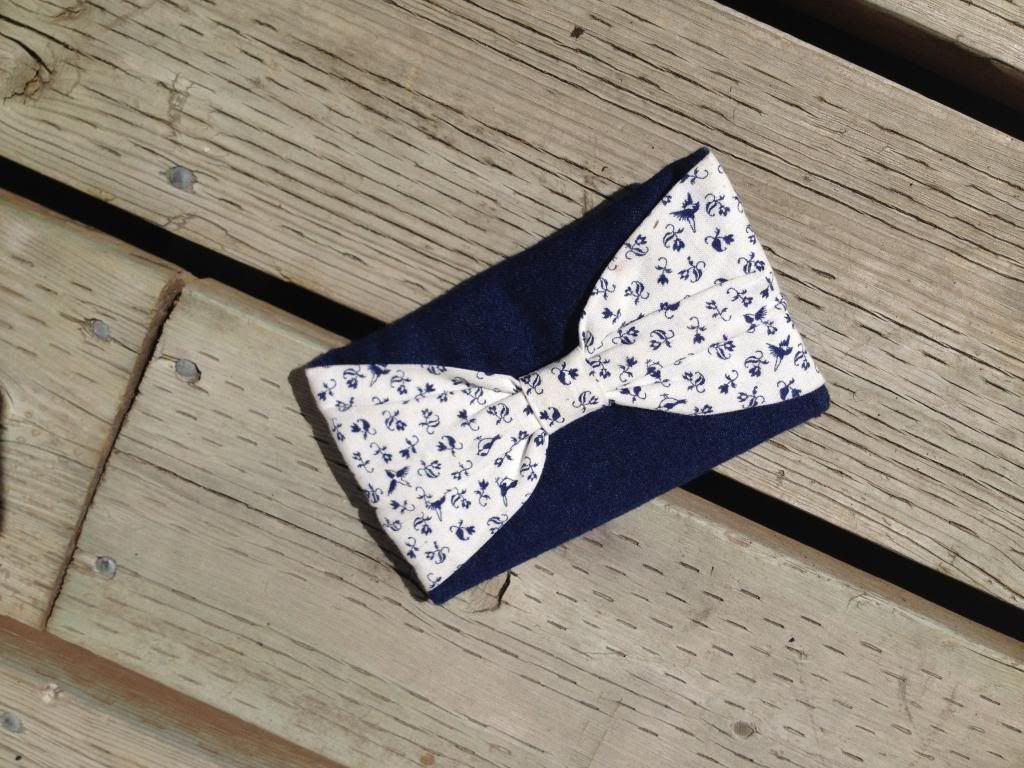
I made my version with a denim outer and quilt cotton lining. I love the little birds on the lining fabric. So much so that right after finishing up my bag for Anna I made myself a Bowie cel phone case using the same fabrics (which I use all the time making it more surprising that I forgot about my clutch in the corner of my closet!)


So I think between my Necessary Clutch Wallet that I made last week, my Metro Hipster of this week and my Pink Peony and Bowie of a few months ago I should pretty much be completely set for bags for spring...


Monday, May 05, 2014

Selfish Sewing Week

Last week was Selfish Sewing Week in blogland. It also happened to coincide perfectly with a sew along in a Facebook Group I'm in. It was fate.

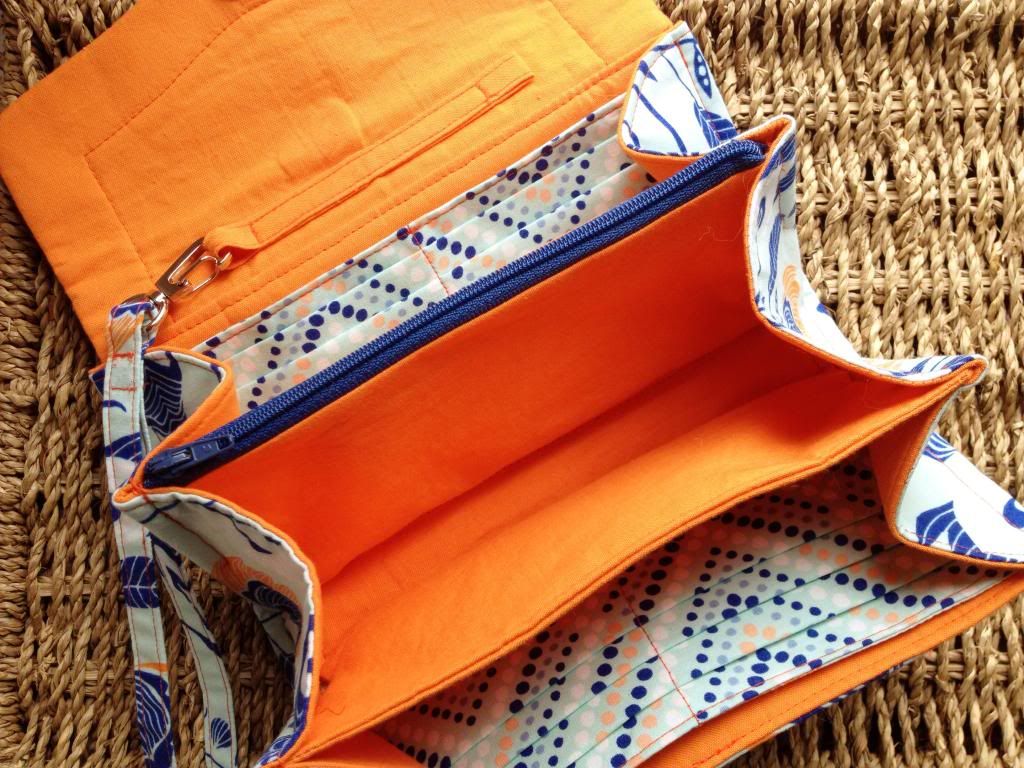
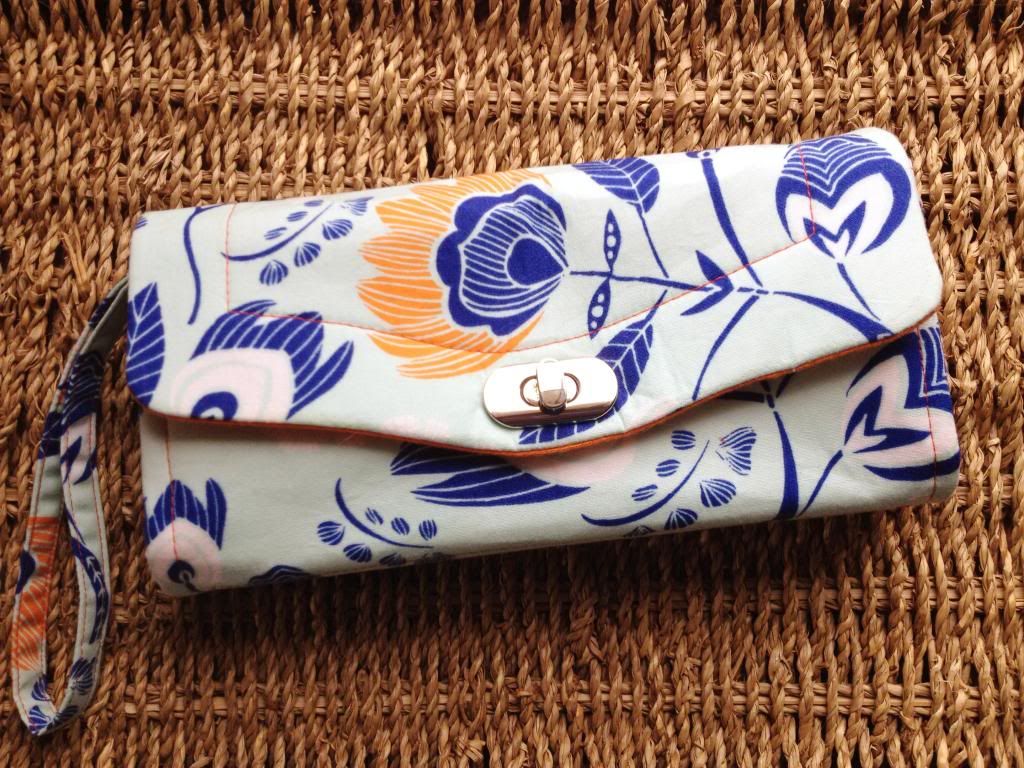
Remember when the dog ate my wallet ? I'd solved that particular mishap with a new wallet - The Necessary Clutch Wallet by Janelle of Emmaline Bags. I really love the wallet. It's everything I hoped for and more. It really is as roomy as Mary Poppins carpet bag. I can fit just about all but the kitchen sink in it. But as luck would have it, a couple months ago, it fell on hard times. Nothing so drastic as being eaten (thank goodness or the dog would have had her bags packed and looking for a new home), but rather an egg. A very large, very messy egg was accidentally broken all over my NCW. All over the truck too for that matter, but really I was more concerned with the wallet. I have my priorities after all. Anyways, I needed to wash my wallet, but felt it best that I make a new one first before popping the original in the machine. (I can justify almost anything, don't you think?)

So I started the search for fabric finally settling on some beauties - that just so happened to be on sale - from Bobbie Lou's Fabric Factory. I've ordered from Chelsea before and have always been really happy with her selection, prices and top notch customer service. I really do recommend her shop. And oh dear me! Someone hide my credit card. I went to make sure I had her shop URL correct for you and spied three fat quarters I think I can't possibly live without just on the first page alone. I may have a problem... Anyways, I'm getting off track. I chose Floras Oasis and Windmarks Mirage by Leah Duncan for Art Gallery Fabrics. I decided to pair them with a bright orange solid quilt cotton  that was in my stash and I adore the result!!!

I really did think that the purse flap was going to be the death of me! I took a good hour trying to get the outside edge of my flap trim absolutely perfect. And failed. Then decided to try it the alternate way so ripped it all out and redid it. And failed. Finally got it done and realized the orange trim that I thought would look so fantastic didn't. It just looked weird the way it was covering the flower. So I took it all apart again. Fused some stabilizer on the lining, some fleece on the other piece, sewed them together, turned, ironed and top stitched. Yay! Sweet, sweet success!

Then I started inserting the locking clasp. Why do these darn things torment me so? Seriously! The last time nearly drove me to drink and this time was no different. Between dropping it, glue side down (of course) on my fabric, having my little guys wandering off with bits and pieces, and me crawling around under my desk trying to locate roll away screws... Well. It finally got put in (a bit crooked, I think) . Then I took a break. I think maybe I panic when it comes to cutting a hole in my wallet, then I stress out and it all goes downhill from there. I must learn to be zen like. Ohmmmmmmmm.


I did add one extra modification, (besides the removal of the decorative strip on the front flap) to my wallet that I really wished I had done on my first one. Using Janelle's tutorial on her blog I made a wristlet strap. I'm so happy I took the few minutes extra to do that step. It makes the NCW even more practical when it can be used "hands free".  (I bought my locking clasp as well as a swivel snap hook from Emmaline Bags, which has become the only place I purchase bag making hardware from.)


Now that I have a pretty new wallet, I set my sights on a pretty new bag. I didn't get it finished in time for Selfish Sewing Week, but hopefully I'll get time to finish it over the next few days so I can let you know what I think of the pattern I am using for it!

Saturday, May 03, 2014

Preparation - Or That's My Story

I'm preparing for next winter. I've just cast off another pair of socks this week because all my hand knit socks seem to be wearing out at the same time.  Holes and thin spots abound lately.

Of course I am fully capable of darning my socks.  Although I hate doing it and have seriously considered taking all my holey socks to Mom and begging or bribing her to darn them for me. However, I'm sure she has her own knitting she'd rather be doing than fixing my tattered knitting and of course there's also that whole "teach a man to fish" theory. So I've sucked it up, followed some tutorials and YouTube videos and been doing it myself.

But I digress. I'm forgetting I just told you I have to knit new socks because I'm at risk of having cold toes if I don't prepare for winter ahead of time. I guess the fact that I can fix my socks sort of the negates the whole need thing doesn't it? Hmmmm.

Well then. Preparation. That's my story and I'm sticking to it! It's all about being prepared. It's nothing to do with the fact I'm completely and totally addicted to doing colour work knitting. Nope. Nothing at all...

I have to tell you about the latest pair, Water For The Elephants, by designer Rose Hiver, who found inspiration for her socks in the novel Water for the Elephants by Sara Gruen (which I read and thoroughly enjoyed!). This is my second pair of socks from Rose Hiver. My first pair were my Butterflies are Free that I knit earlier in the year. Rose's patterns are wonderful to work from. So clearly written and beautiful designs. She makes colour work seem easy!

I do a few modifications for fit for myself - using a 2.5 mm needle and 64 stitches for a cuff then increasing to the 72 stitches the pattern calls for and switching to 2.75 mm needles for the colour work. I then switch back down to a 2.5 mm for the heels and then back up to the 2.75 mm again for the foot until the end of the colour work. Once I'm back to a single colour on the toes I decrease down to 64 stitches again and use the 2.5 mm working until the decreases until I have 16 stitches left at which point I graft them and call it a day.

Its been a trial and error method of finding the right fit. When I knit my Butterflies are Free I did a gauge swatch, which I think safe to say I've never done for socks before. I was really happy I had as my socks would have never fit if I hadn't known to go up a needle size for the colour work. I quickly realized the toe was too wide and long as written so ripped back and changed on my first sock I had knit. It was worth it to go the extra mile and have a pair that fit perfectly!  I have been using the same yarn, Sisu, that Ram Wools Co-op in the city sells, for my colour work so that took all the guess work out of the second pair!

Unblocked and fresh off the needles!
Back to my Water For the Elephants. I wasn't sure I was sold on my colour choice. In fact a few times I did consider ripping them out and abandoning them until I could get a colour combo I liked better, but the colour has definitely grown on me and now that they are finished all misgivings have been forgotten. I absolutely LOVE these socks.

My "pretties"

I enjoyed knitting them (and Butterflies are Free) so much I am contemplating casting on Fireweeds, yet another gorgeous design from Rose, as we speak. You know, for winter preparation reasons of course...


Thursday, April 03, 2014

Snuggly and Soft : How to Make a Rag Quilt

Possibly one of the easiest methods of making a quilt is to make a rag quilt. It's perfect for a beginning quilt project. All it consists of is making "flannel sandwiches" and then stitching them together. The biggest part of the job is probably choosing your fabric then cutting it out.

Baby Boy's Quilt - Was he really that small?
I made a rag quilt for Baby Boy when he was a baby. I had taken part in a flannel swap with my Summer Mama's group on Ravelry - it was in amongst all of our charm square swaps that provided the fabric for my Friendship Quilt. Somewhere along the line we'd decided to deviate from our usual swap of 5" cotton squares to 8" flannel. I used the more masculine looking prints and had saved the more feminine ones for a future project. Needing a baby gift for a friend of (BF)G's, I decided a girly rag quilt would be just the thing. They are so snuggly and soft, not too mention very easy to wash. Plus they get softer and snugglier with each washing!

I sorted out all my remaining 8" squares as well as cut some more from remnants I had left in my stash, then hit the fabric store for the backing flannel. I was able to make use of cotton quilt batt I had left in my stash from my other quilts. (A rag quilt can really be a way to make use of the leftover bits!)

There's loads of tutorials and patterns out there for how to make a rag quilt, and I'm sure they're all pretty much the same, but I thought I'd give you my quick and easy take on making one.

FLANNEL RAG QUILT FOR BABY

Gather your materials together.  If you cut carefully you should be able to get five squares out of an 8" strip of flannel, but you will want to make sure you leave yourself extra length to straighten the edge. Do NOT pre-wash your flannel. (I know it seems an odd thing to not preshrink, especially flannel, but trust me on this one!) 25 8" squares will produce an approximately (depending on shrinkage) 36" square quilt once finished. 

Step One - Prepare your fabrics by cutting :

25 x 8" squares of assorted prints or solids flannel (pick whatever suits your fancy for the quilt top)
25 x 8" squares of either print or solid flannel (all of one fabric for backing)
25 x 6.5" squares of cotton quilt batt

Step Two - Make a flannel sandwich :

Take one backing square and lay it wrong side up, making sure that if you are using a directional print you have it facing the way you would like it.  Then place a cotton batt square in the middle of your backing square, finally put the top on your sandwich right side facing up.  Once you have made all 25 of your sandwiches you will be ready to start sewing.

Make a sandwich
You will simply sew an X across each of your 25 flannel sandwiches. Your blocks are now quilted and ready to go.

Sewing the X

What the quilted sandwiches should look like 

Step Three - Deciding on placement :

Once you are done sewing all 25 flannel sandwiches you are ready to determine your placement of each.  I find the easiest way to do this is to clear a space on your floor so you have room and just set the blocks out in rows of five. Then you can start playing with the arrangement. Move your squares about until you have it the way you like it. There is no right or wrong way to go here, just be mindful of your direction of your squares if you have a directional print at all. When you have your arrangement the way you'd like it, stack your blocks in piles with the first on the row being the top of the pile and the last being on the bottom. It also helps to take a photo of your arrangement in case your blocks get mixed up between arranging them and sewing them together. Ahem. Not that something like that would ever happen to me. Ahem.

Determining placement
(with the help of my trusty assistant, Fluffy)

Step Four - Assembly :

You will now sew each of the blocks together by placing them WRONG sides together and using a 1/2" seam allowance. To keep things nicely lined up you will want to use pins in this step. Flannel can shift and slip, especially when things get bulky. (A walking foot can be useful here if you have one). Sew them into strips of five blocks each. Once all your blocks are sewn you will have five strips that need to be attached.

Next you will sew your strips together to form the quilt. Place your top and second strips WRONG sides together matching seams and pinning carefully. Then sew the entire length of the strip using a 1/2" seam allowance. Next place your second and third strips WRONG sides together and stitch. Continue in this manner until all five strips have been sewn to the previous one. Your final part of this step is to stitch 1/2" from the edge around the entire perimeter of your quilt.  You're almost done now!


Stitching the strips of blocks together
Step Five - Finishing :

Here comes the time consuming part.  You are going to carefully snip all your seam allowances and the entire outside edge of the quilt. A pair of spring loaded scissors are really helpful with this and taking little breaks along the way will make life a lot easier and your hand a whole lot less sore.  Be very careful not to cut through any of your stitching when cutting the seam allowances.
Carefully snip seam allowances
This is what it will look like

Your final step in making your rag quilt is to wash and dry it. Do NOT simply throw it in your washing machine for this important first washing. You will regret it and it may result in the need for a repair man. It is going to produce an unbelievable amount of lint that your home machine likely cannot handle. 

You have two options here. Go to your local laundromat or if that isn't feasible pop the quilt in a zippered duvet cover and wash it in your machine. At least that way the lint is contained, although you will be picking lint out of the duvet cover from here to eternity. Better that then your washing machine! (Once your quilt has been washed and dried for the first time it will be perfectly fine to wash with your regular laundry without risk of doom.)

Trim any long threads you may have missed, shake out the quilt to dislodge any remaining lint and then sit back and admire your snuggly, soft quilt.  You're done. Don't those now fluffy seam allowances look great? Wasn't that easy? 

A close up of the now softly frayed seam allowances
Ready to gift!


Tuesday, March 25, 2014

Cowls, Cowls Everywhere...

I think I've mentioned in previous posts about my new found love of cowls. They're so easy to make, and easy to wear.  I've knit seven in the last 12 months. I thought it was more, but I just went back and counted through my Ravelry project pages and there's only seven. Seven doesn't seem bad at all. Maybe I don't have a problem after all.

My latest one that I just cast off was the Lonicera Cowl from The Sexy Knitter. I knit it as part of a KAL for Sarah Wilson's group. It's a fun knit with a fairly easily remembered lace pattern. Sarah gives a couple of options in yarn weight and size too, so it's quite versatile. 

I chose to knit mine as the short version in a worsted weight, using Araucania Nature Wool in a blue green colour. It's actually the same yarn I used for my Hetty Cardigan that I knit last fall.   


It was a fairly quick knit all in all. It did take me about a month, but that was mainly because I am working on a large test project for Jenni Lansing Designs and as such have only worked on the cowl sporadically in order to try and get the test knit done on time.  

Since winter is still seemingly still going strong we'll have to see if any more cowls jump out at me to be knit. I could very well end up like Bartholomew and his 500 hats only with cowls instead of headwear at the rate I'm going!

I've also done a few other quick projects - I knit a wee baby gift and a couple sewn birthday gifts as well as a new cardi for me, but those will have to wait for another day… I hear Baby Boy rummaging around in the fridge and that never bodes well...


Thursday, February 20, 2014

Fifty Below

I'm really excited to be presenting a new original design to you today! I gave you a sneak peak in my last post, but I'll give you all the details now that I've launched my pattern into the world via Ravelry!

It's been such a long cold winter this year. Here on the prairies we've had relentless bitterly cold temperatures and windchills.  Hats, mitts, cowls or scarves have been a constant necessity just for survival outdoors.

I've found, this year, that I really like wearing (and knitting) cowls! They're so easy to pop over your head and go without the worry of ends dangling in the way or slip sliding off your neck like a scarf can. They're also really quick to knit, which in my books is always a bonus!

So without further ado, here is Fifty Below, a simple design born in the days when the windchill had the temperatures diving down to the fifty below range!

Fifty Below is a warm cowl that is knit flat, then seamed. It can showcase a special yarn or add a pop of colour in an easy to memorize cable panel up centre front. Perfect for those days when the temperature drops and the windchill is biting!


The cowl will knit up nicely in any worsted weight yarn so it is a great mix and match stash buster project as well! 

Gauge is not terribly important to this project as long as you are satisfied with the fabric you are creating, but please keep in mind that a different gauge from that listed could affect size and/or yardage needed.


You can download the Fifty Below pattern(for free), then grab your needles and yarn. You'll be ready in no time to bundle up and head outside to enjoy the rest of winter knowing you'll be cozy in your cowl when the mercury plummets!

Wednesday, February 19, 2014

Getting Things Done

I had a few things on the go in my project bag (I say bag, but really I mean bags). My Butterflies are Free colour work socks I was talking about in my last post as well as the cowl I was working on, plus a vest - the Montague Vest from New England Knits - that I started early last spring.

I have been getting things done. Happily checking those projects off my list.

First up, my socks. Oh how I love these socks. Is it wrong to be so proud of them? I feel like quite a grown up knitter with them. Of course mostly because of the fact they are colourwork (and they fit!!!!!), but also because they do fit because I was a "big girl knitter" and instead of huffily ignoring the fact my first sock didn't fit quite right, I decided to do something about it. (Plus of course I'd already been a "big girl knitter" and ripped back to fix the mistake earlier on in my first sock!)

I ended up modifying my socks that were too wide and too long in the toe by ripping back several rows into the colourwork (a whole butterfly worth) and ending the colourwork there. I then switched to smaller needles, decreased by eight stitches evenly around and continued the toe from my usual 64 stitches decreasing down to 20 stitches and binding them off with a kitchener stitch. Perfect fit. I can't believe that I knit an entire pair of socks in under two weeks. Amazing!!! I need to start wearing them more before sock season ends! I also need (yes, it's a NEED not a want) to knit another pair of colourwork socks. I need to knit Water for the Elephants. So strong is my obsession with them, I was tempted to cast on in pure wool rather than wait until I had a wool nylon blend. Thankfully a friend talked me down off that crazy ledge by reminding me how often I would need to darn socks that didn't have nylon reinforcement. Phew. Glad I dodged that one!


Next up I have to tell you about my cowl! It's my own design and I'm pretty proud of it too! (I'll be publishing the pattern on Ravelry very soon!) I used Patons Classic for the main colour and then added a pop of colour to the neutral brown by using some gorgeous handspun that a friend had given me a few years ago. Just the thing to get a gal through the doldrums of what feels like a never ending winter. I'll tell you more about it in it's own post tomorrow likely!


My final project I want to tell you about has been a veritable thorn in my side for far too long. This pattern is starting to rate right up there with the blasted Lopi Sweater of Doom. Nothing went right on this thing. I started out with great gusto last March. Swatched and all. Except my gauge swatch lied, as they will sometimes do. A small four inch gauge seemed perfect. A whole vest worth and that yarn grew like a bad weed. As soon as it got wet it went from hip length to almost knee length. Heck! The armholes alone stretched just about to my waist. I immediately ripped back and reknit to a better length. But that wasn't the end of the problems. I knit the front edging and suddenly my vest pulled up so high in the front it was as though it was cropped. Agggh. Ripped that out and picked up more stitches along the edges, used bigger needles and hoped for the best. As you can see in the picture it's still pulling up, but no where near as badly as before. The vest has sat in my project bag for months waiting for me to darn in the ends and do something with the armholes. The pattern doesn't do anything with them, but left as is, I think it looked like I'd simply forgotten to knit something. Bare bones edges on armholes are not attractive in the least. They look sloppy and unfinished. At least the way I knit them anyways!

It was driving me nuts. Every single time I opened up my projects page on Ravelry I was taunted by it's unfinished self sitting right at the top of the page. I finally couldn't stand it any longer. Something had to be done. I dragged it out of the depths of the closet the other night and knit an edging on the armhole while I watched a movie. Disaster struck again. At least this time it was only three rows and 37 stitches of garter stitches worth of disaster. It was too tiny. I almost couldn't squeeze my arm in. So frustrating. I was determined though and last night I conquered it. Larger needle, more stitches (hmmmm… anyone else sense a theme here?) and it was much better. I darned in the ends this afternoon, put it on and had Little Man snap some photos on my phone - he's 4 1/2 so I made him stand on a chair for a slightly more flattering angle but that unfortunately doesn't help the blurriness that occurred as a result of him impatiently humouring me when he'd rather be playing lego, but you can get the idea anyways! I got immense satisfaction when I marked it as complete it scooted way down on my Ravelry project page. So far down that I don't even have to see it unless I scroll way down.


As I mentioned I'll try to be back tomorrow with some more details about the cowl and a link to the pattern for you.

Friday, February 07, 2014

All About Socks

First let me tell you I only wear socks when absolutely necessary. I will wear sandals and flip flops for as long as I possibly can. Pretty much from snow melt to snow fall. Well ok, maybe I'm not quite that opposed to socks. That would be nuts! In all reality I would say +5C is about my cut off temp where I give in and wear socks and am quite happy to do so. But not store bought socks. Woe is me if I have to resort to that particular torture for my tootsies!

So knitting socks is always pretty high on my queue of must knit projects. As much as I don't like wearing socks I LOVE knitting them. There is nothing so cozy or cheering as a newly cast off pair of socks.

I just finished a pair of simple socks last week.  They're just ribs and cables. Nothing fancy or fussy about them. I really like them though. The ribbing makes them fit perfectly, they don't even come off when I take my boots off. (Bonus points for that! I loathe taking my boot off and having to hop around on a bare foot trying to avoid the ice cold snow that's invariably been tracked in).

Photobucket Pictures, Images and Photos
Pretty in Pink!
I knit these socks two at a time using the magic loop method, which is a thing of beauty in itself. No dreaded second sock syndrome possible with that. Once you're done, you're done. I had some trials at the beginning though and almost resorted to doing them one at a time. No matter what I did I kept ending up with a massive tangle of yarn and needle cable. Frustrated beyond belief, I finally gave up, cast on one sock and started in. Ten rows later I decided I was not going to be beaten by a bit of string and sticks, so set sock one aside, cast on sock two, worked ten rows and put them both on my circular. I was off to the races. Thankfully. Or I'd still likely be working on my Rib and Cable socks instead of already working on my second Butterflies are Free sock! I did do a few minor modifications to the pattern - my usual short row heel and my usual toe, but other than that I knit them as written.

Photobucket Pictures, Images and Photos
Just starting...
ACK!!!! Mistake!
Ooooh Pretty!
Can I wear just one?
I've been itching to try colour work socks. I find the stranded knitting to be so much fun and oh so addictive. I always want to knit "just one more round" to see the picture appear before my eyes. I felt that I had lots of practice after knitting my Lilac Mittens, G's Moulin Rouge Mittens and Mom's Lotus Mittens, so felt it was time to take the leap into socks (see what I did there? LeapSocks? ha ha!).  A friend of mine recently completed a pair of Fireweeds for our colour work KAL in our Ravelry group and they were so beautiful it made me want to cast on even more! A quick stop in at the yarn store in the city on Friday and I was ready to go. I had decided on the yarn I wanted, Sisu, which is a Norwegian wool/nylon blend that should be fairly hard wearing and is really reasonably priced (less than $5 a ball!) so had done a gauge swatch the night before on some leftover Sisu I had in my stash. I'm glad I did. I never swatch for socks, but with the stranded knitting I was an entire stitch off. Eeek!

I cast on my first sock Friday evening and grafted the toe yesterday. Six days! For an entire sock! Did I mention it's addictive? I spent far too many late nights knitting "just one more round" and then Baby Boy was up at 5am yesterday so I took advantage while he quietly watched Kipper on Netflix to finish the toe.  I even had a disaster that I had to  rip back - late one evening as I tried on my sock to admire it, I realized at the start of my knitting that evening I had made a mistake. A very noticeable on the front of the sock can't ignore kind of mistake and had to rip back 15 rows. OUCH! But I put in a lifeline and had at it and I'm glad I made the effort!  Last night I cast on the second sock and so far, it too, has been flying off the needles! I hope by next weekend to have my second pair of socks for 2014 ready to wear! And then I really want to cast on another pair of colourwork socks.  Remember last post I was saying I couldn't decide between butterflies or Water for the Elephants? Well. I just can't seem to get those elephants out of my head...

 photo 2E6EE306-8DAA-42E2-A3EF-018EF3D1DADF.png
Working away on my second sock!
When I'm not working on my sock, which is only when knitting time doesn't lend itself well to chart reading (car knitting, when I'm keeping watch over the boys in the tub, or watching a tv show that's too intense for knitting concentration) I've been knitting a cowl that I'm in the process of writing a pattern for.

One of these days I need to set down the needles and get back to the sewing machine, but for now with all this cold weather we've had this winter it's all knitting all the time it would seem!

How about you? Is there something you gravitate towards when the mercury plummets?

Sunday, January 26, 2014

Greyson - 3.0

I love how much my kids like hand knits! It's such a pleasure to knit for such an appreciative crowd.

My most recent finished project was a long requested sweater for Little Man. He was quite envious of Baby Boy's Greyson that I knit in the summer and felt quite left out that he didn't have a mama knit pullover for himself. When I was in the thick of the holiday crafting I promised that in the new year when I could get to the yarn shop in the city I would get the yarn for his.

I really love Julia Stanfield's patterns. They really are my first choice when I start thinking about knits for the little ones. This is actually my seventh project from her Little Rascals E-book. Besides the two other Greyson (both for Baby Boy last year - the first one met with a tragic incident involving the wool chewing dog) I've also knit two Hotshots and two doll sized Hotshots. Her patterns are well written, practical but cute and quick as a wink to knit given their top down seamless construction.

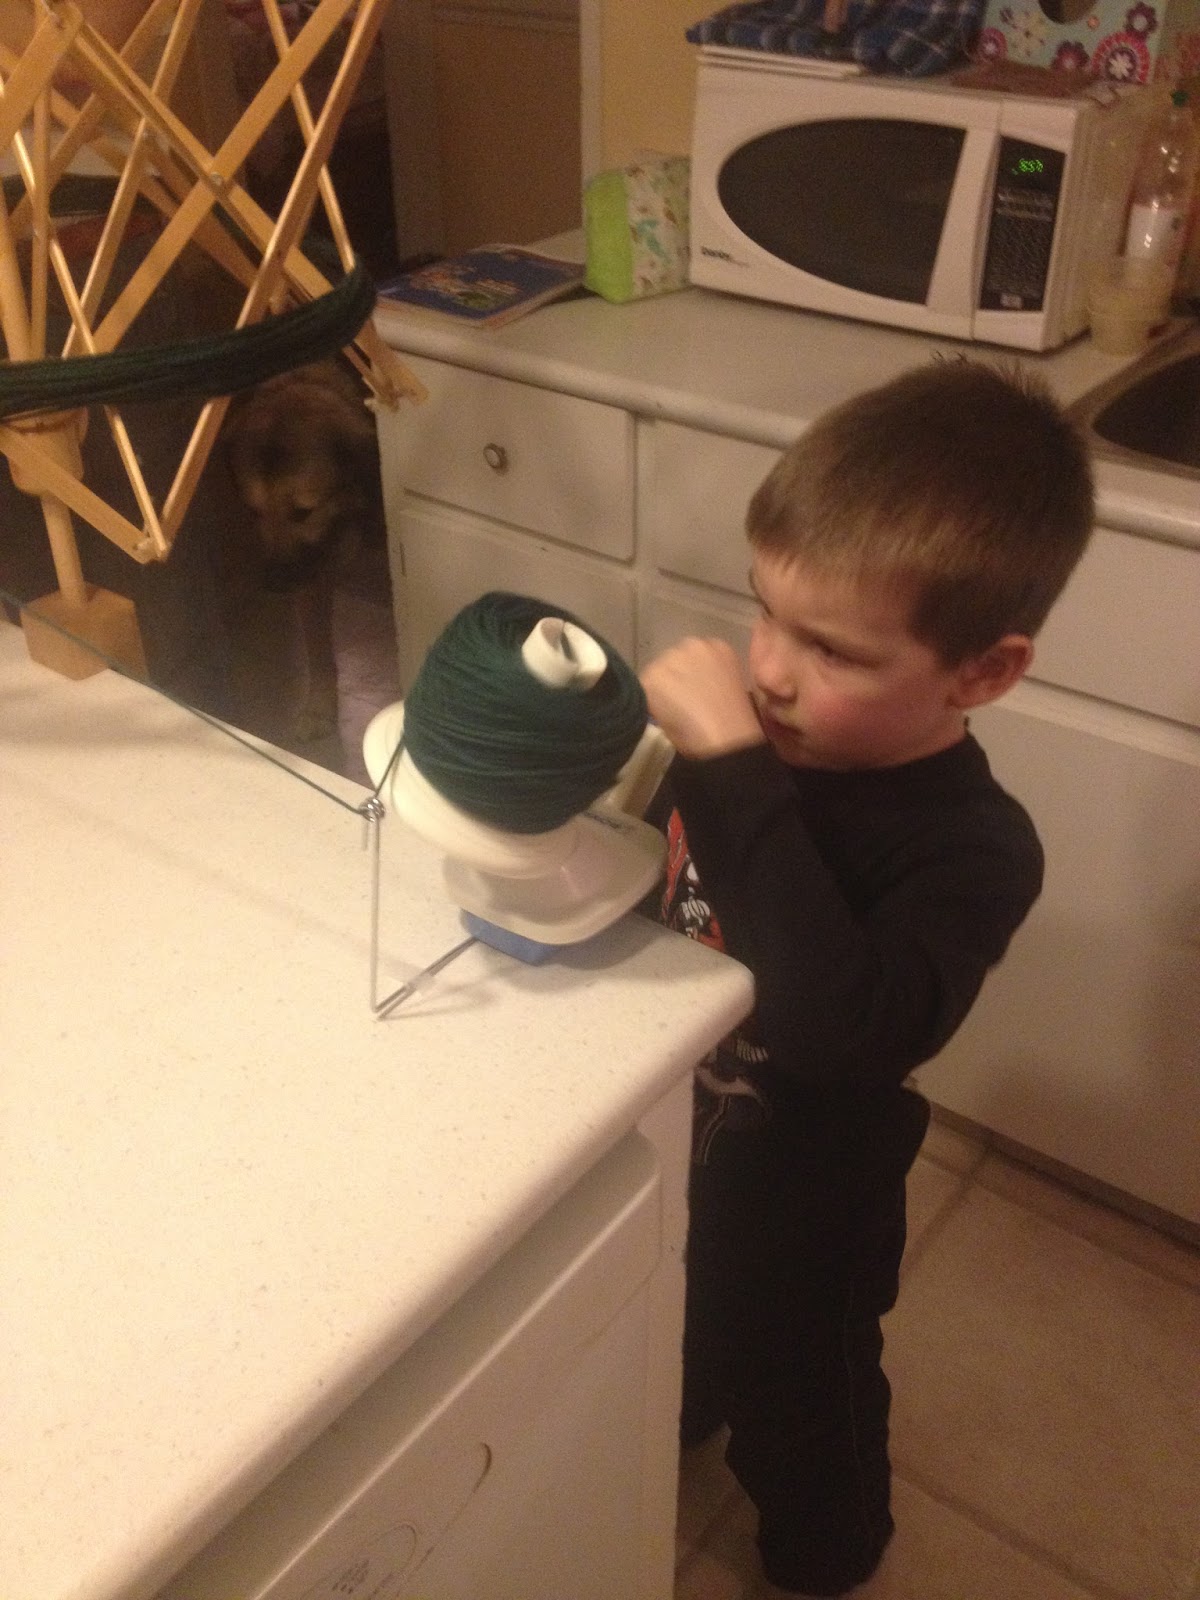
I picked up the yarn on the 10th, got Little Man to wind it on the 11th and cast on the 12th. I cast off exactly one week later and Little Man was able to wear it to school last Monday morning. Instant gratification. You just can't beat it!

Winding his wool  - Very serious work!

Little Man has some pretty high (unrealistic) expectations for this mama's knitting abilities. At one point we had the following conversation when I pulled out my knitting to work a few rounds during a rare quiet moment in the afternoon:

Douglas:  is that my sweater, Mommy? Is it almost done? Can I try it on?   
Me: oh sweetie, it’s not ready yet. It’ll take me at least a couple of days… 
Douglas: (with tragic desperation in his voice) NOOOOOOOOOOOOOOOOOOOOOO! Don’t say a couple of days! I wanted you to be done it today! I need it!  
Me: but I just started it last night…
So the pressure was on. No lazing about on this one. Little Man is a harsh task master. Thank goodness it was a quick knit. I'm not sure how things would've gone if it wasn't. I suspect a fair amount of moaning and distress. The way he was going about you would think the poor lad had to walk about naked normally. I assure you that isn't the case - he has enough clothes for about half a dozen four year olds, he just didn't have a v-neck pullover exactly like his brother's.

He was so happy when I cast off and had to try it on the second I finished weaving in the final end
of yarn.  He wore it the rest of Sunday, Monday to school and a handful more times in the last week.  Good thing it's knit in my "go to for kid knits" Berroco Vintage, which is easy care machine wash.

Greyson 3.0 - in action
I've got a few other things on the needles right now that I can focus on now that Greyson is finished. I've been working on a pair of simple rib and cable socks from veteran sock designer Nancy Bush and have blocked and washed my gauge swatch for Braid Hills, a beautiful intricately cabled cardi by Scottish designer, Kate Davies. I am working up my nerve to dive into that one - I will admit looking ahead at the pattern has me a bit intimidated.  Beyond that I'm obsessing over a pair of colour work socks.  I can't decide between Water for the Elephants or Butterflies are Free (both by Rose Hiver), but a trip to the yarn shop is in my future next week when I'm in the city. Maybe I'll decide when I see what colour selection they have in stock. I just know that one of these designs will be knit, by me, starting next weekend.

How about you?  Anything you're dying to get started on?

Monday, January 20, 2014

Wear All The Wool

We've had some pretty cold days here on the prairies this winter, which has made me want to knit all things and wear all the wool.  But it's ok. I'm a knitter. I'm expected to wear all the wool. Or, at least, I assume I am.

Last spring, my friend Sally sent me some beautiful hand spun yarn. I had over 300yds of DK weight loveliness to use, but no idea what to use it on. I didn't want to waste it on something not worthy of hand spun so it waited, tucked away in the drawer, until such time as I found a pattern that I deemed to be the right one.

Of course I found a pattern I loved right when I was in the middle of holiday crafting, but I was good. I waited until after Christmas to even wind my wool so I wouldn't be tempted to cast on.

On December 28th, as the beginnings of a blizzard swirled outside the window, I hunkered down, cozy and warm inside and cast on my Knotted Pine hat. The instructions say to use a tubular cast on, which would have been grand, except I could not, for the life of me, get it right. I would get about 80 stitches in and completely mess it up. I tried. Oh how I tried. I restarted six times. Then I gave up. I realized I could keep restarting and never get my hat actually started or I could cast on with a different method and actually have a new hat sometime within this lifetime. Five minutes after making the decision I was well on my way.

I really enjoyed the pattern with its unique construction; it utilizes short rows on the ribbed band so it doesn't bunch up at the back and is knit straight up then the crown is shaped with a few quick stitches after it has been grafted together. There is also enough going on in the pattern that there's no chance of losing interest before it's finished!

Once I'd completed the hat I realized two things. A) I had no mittens to match and B) I had plenty of yarn left over. Hmmmmm. What's a knitter to do? As the temperatures plummeted to a forecast of almost -50C with the windchill I cast on using Ann Budd's basic mitten pattern. I used a contrast cuff as I wasn't sure how far my yarn would stretch and knit the mitten using a half twist stockinette stitch and a column of honeycomb stitch to mimic the Knotted Pine hat. I'm still debating if I should knit liners for the mittens for extra warmth. I'm thinking something in alpaca or an alpaca blend would be soft and toasty warm.

After casting off my mittens I still had yarn left over, and alas, how is one to wear all the wool if one does not own a matching cowl? I'm all about cowls this year it would seem. (Last year was small triangular shawls. What can I say? I'm fickle.)

I knew my yarn wouldn't be enough for an entire cowl, but I wanted to showcase it somehow, so simple striping wouldn't suffice. I also wanted to have it match the hat and mitts in pattern as well as yarn. I cast on, and started knitting. I used Tincanknits Oats (that I'd knit for N for Christmas) as inspiration - I liked the simplicity of how it had just a small section of garter stitch running up the front rather than an all over pattern and once again used half twist stockinette and honeycombs to tie it all together.

I'm really pleased with how my set turned out. It's cozy and warm not to mention kind of fun that I actually match when I'm wearing all the wool!


Thursday, January 16, 2014

Better Late Than Never : A Holiday Crafting Round Up

I've been meaning to get to this post since Christmas, but just haven't had the time yet. The little boys have been plagued with illness after illness since Christmas - colds, stomach bugs, ear infections, even a trip to the ER to celebrate the New Year. It's been insane. However, better late than never, I'm finally sitting down to do a round up of the holiday crafting of 2013.

This year I was determined to accomplish two things. Increase the amount of handmade gifts and to not have a major meltdown as a result of it.  I'm thrilled to tell you I succeeded on both accounts.  Not one single tearful, gnashing of teeth, toddler worthy tantrum and over thirty crafts made for gifting.  I was the queen of calm this year. I actually enjoyed the gift making.  Really enjoyed it.

So, without further ado, here's what I was up to during my absence from the blogging world.

"Accessories"

I went a little mad with the accessories this year.  Hats and mitts and scarves oh my!  My favourite, I think, are the Lotus Mittens I knit for Mom.  She almost didn't get them.  I was sorely tempted to keep them all for myself.  Such a pretty pattern! Oh! But I also loved Salt, the cowl I knit for J's girlfriend M and then there was the Give 'em the Slip Mitts I knit for Little Man's preschool teacher.  He chose the pattern and the yarn for them and the purple Cafe au Lait mitts I knit for his other teacher. I also knit a pair of Cafe au Lait for M's stocking. J had requested an Inishmore Cap like I'd made for N last year - little did he know I'd been planning it all along! It's a great look for my big boys!  I also knit a Fisher Cable Hat for G's boyfriend B's stocking. I had a slight issue with that one. Something went a bit wrong with the decreases and in the end I ripped back and reworked them using a online decrease calculator instead of how it was written and I couldn't be happier. It looked much more hat like and much less tea cozy like.  A few other things that made their way into Christmas stockings were Amaranth, a headband I knit in linen, and Boot Candy boot toppers for G, a neck warmer using the Oats pattern for N and a simple garter edged toque for M. Phew. I think that covers the accessories...


"Dancing Queens"

I decided early on this year that I really wanted to make dance bags for three of our little nieces who all take dance classes and G had already asked for a new dance bag on her Christmas wish list so it was just a matter of deciding what design to make.

I had found the idea for the bag online, but of course decided I couldn't leave well enough alone and did my own thing.  Two of the nieces are highland dancers so ghillies were a must on their bags.  The third takes tap, but unfortunately my drawing abilities did not extend as far as tap shoes - they just looked weird, so I went with ballet slippers instead. The bags are lined with an 8" zippered pocket in the lining on one side and two gathered, elasticized slip pockets the width of the opposite side on the highland dance ones and on the ballet one has pleated slip pockets instead.  I decided to do tie handles so that the girls could adjust the length if necessary. A magnetic snap closure finishes each of them off. I knit each little girl a pair of legwarmers to go with their bag, using Beanstalks for the two highland ones and Zeg Warmers for the ballet one.  All yarns were hand dyed Patons Classic.

G's dance bag happens to be my latest test bag for Anna of Charmed Liebling. When Anna sent me the test request I knew right away it was a perfect dance bag. Roomy, lots of pockets and stylish. I'm really happy with how my Rhine Valley Bag turned out - and if you'd like to make one for yourself hop on over to Anna's site for more information.

"Pyjama Party"

Using a few old patterns I created to sets of pjs for gifting.  The first set was matching Christmas Eve pjs for the little boys. I used an old Simplicity pattern for the flannel bottoms and an old Kwik Sew t-shirt pattern for the fleece tops that I appliquéd the bear shape onto to complete the look. The boys were so excited when I surprised them with them.  Little Man was especially appreciative, telling me over and over how much he liked them and how soft they were.

The second set were again made using the same pattern for the little bottoms, but this time I modified to add a contrast cuff.  (BF)G's were made using another Simplicity pattern.  I took the easy route with the tops, choosing to purchase three black t-shirts and one orange one that I cut the sleeve extensions from and attached to the black ones. These pyjamas were a birthday gift for (BF)G, who's birthday happens to fall right after Christmas.

"Perhaps With A Bag to Put Them In"

I love that J's Christmas wish list had two requests that were handmade. One was that he wanted a set of dice for Dungeons and Dragons "perhaps with a hand knit bag to put them in" (the other was the Inishmore Cap) - it made this crafty mama's heart sing to read that I tell you!  So I knit him a little dice pouch one evening while I watched the old classic "White Christmas".

Months ago I'd found the "Bowie Case" pattern on my favourite bag making site, Emmeline Bags. The pattern isn't by Janelle, but by a German designer, pattydo. Janelle sells it  in her shop though and had high praise for the cute little cel phone clutch it makes, so I purchased it with the intention of making G and J's girlfriend M one for each of their stockings. I love this little bag, although it was a bit crazy as the instructions are in a German (with English subtitles) video.  It went smoothly until I was trying to put it all together in the final step. Trying to watch where I was to do the folds, while reading subtitles all the while the video kept pausing and having to load because of a dodgy internet connection. Oh boy! But the end result is adorable.  I so want one for myself!

Our youngest niece doesn't dance yet - she's just three - but I assume she gets dragged along to her fair share of dance classes and competitions, so I thought I'd make her the Playdate Back Pack from Fishsticks designs so she can take along some toys or books with her.  A overwhelmingly pink, girly Barbie one (I'm so not used to overly girly anymore in this house being surrounded by menfolk! ha ha!). I think she liked it.  She wore it most of the evening, Christmas Eve, after opening it.

"Santa"

Every year Santa brings an new ornament in the kids' stockings.  This year I just couldn't find any that I liked. And given I was filling seven stockings now with the addition to our family of B (G's boyfriend) and M (J's girlfriend) I was having a really hard time finding a theme with that many different choices. So I decided to put my crafty little self to work and make them.  I adore these little felt Santas and really loved making them. So much fun!


So there you have it. The round up! I may have left a thing or two off the list, but I think that's pretty much it for Christmas (and one birthday) 2013 crafting.  I'm still so pleased with how everything worked out and how much I enjoyed the process.  I'm already plotting and planning for next year, but for now, I've been enjoying doing a few projects for myself.  It was brutally cold for a spell causing me to feel the urge to knit all things. I'll have to tell you about that another day though.

Tuesday, December 10, 2013

Sustenance is Necessary...

I've been quiet for a little while now. Even Mom commented on my blogging silence. It's just I've been so busy with my crafting that I haven't had time to post - ssssshhhhh! Top secret! Can't tell you about anything I've been working until after Christmas, but I can tell you I just put the finishing touches on gift number 17 this morning!

I'm hoping this means that I will complete the last few gifts in plenty of time before Christmas is upon us so that this year, instead of having a crazed lunatic marathon of crafting and melting down on December 23rd like I did last year, I can just relax and enjoy the time with my family during this festive season.

Of course with all this craftiness, sustenance is necessary. Tasty, tasty sustenance.  And do I have a recipe to share with you!

I met my friend, Betty, years ago, when we both had little kids and were muddling our way through early motherhood in those first few years. I remember Betty always bringing awesome treats when it was her turn to bring snack for playgroup! Over the years due to various reasons we lost touch and then several years ago picked up our friendship through the magic of Facebook.  We live several hours apart so we haven't had an opportunity for coffee dates or in person visits yet, but we do keep in touch via the net regularly.

The last few weeks she's been posting photos of delicious looking treats on Facebook, including whipped shortbread. I had a pound of butter in the fridge that was relentless in its calling of my name, just begging to be used. So a quick message to Betty and I had the recipe in my hands.

Yesterday was shortbread day. Tomorrow maybe shortbread day again. Perhaps the next day after that.  I can't see these lasting around here very long! These are delicate, melt in your mouth, morsels from heaven. Yum. Yum.

Photobucket Pictures, Images and Photos
Happy Holidays!

So here's the recipe! (Don't worry, I'm not divulging any ancient secret recipe here although it's tried and true, she's been using it for over twenty-five years for her own family - Betty told me to go ahead and share it with everyone! )

Betty's Whipped Shortbread

1/2 cup corn starch
3 cups flour
1 lb butter, softened
1 cup powdered sugar
1 tsp vanilla
Pinch of salt

Heat oven to 350F/175C

Combine flour and cornstarch in a bowl and set aside.

Whip butter until fluffy then add powdered sugar. Whip again and add vanilla and salt when it looks creamed like whipped cream. Add the flour mixture a half cup or so at a time, whipping in between each addition.

(Betty says if you have a kitchen aid mixer use paddle attachment and at the end give it one good whip for 30 seconds. I don't, but found my electric hand mixer worked just fine!)

Spoon onto cookie sheets garnish. Betty's were so pretty - she used glacé cherries, cutting red ones into a small dot and the green ones lengthwise to make it look like holly! So festive! I didn't have cherries, so I just used colored sugar.

Bake for 6-10 minutes (start checking at about six minutes). Shortbread is done once the bottom is delicately browned. Cool on racks, then make yourself a cuppa, sit down, put on some festive tunes, relax and enjoy the season (and your shortbread)!