Thursday, February 20, 2014

Fifty Below

I'm really excited to be presenting a new original design to you today! I gave you a sneak peak in my last post, but I'll give you all the details now that I've launched my pattern into the world via Ravelry!

It's been such a long cold winter this year. Here on the prairies we've had relentless bitterly cold temperatures and windchills.  Hats, mitts, cowls or scarves have been a constant necessity just for survival outdoors.

I've found, this year, that I really like wearing (and knitting) cowls! They're so easy to pop over your head and go without the worry of ends dangling in the way or slip sliding off your neck like a scarf can. They're also really quick to knit, which in my books is always a bonus!

So without further ado, here is Fifty Below, a simple design born in the days when the windchill had the temperatures diving down to the fifty below range!

Fifty Below is a warm cowl that is knit flat, then seamed. It can showcase a special yarn or add a pop of colour in an easy to memorize cable panel up centre front. Perfect for those days when the temperature drops and the windchill is biting!


The cowl will knit up nicely in any worsted weight yarn so it is a great mix and match stash buster project as well! 

Gauge is not terribly important to this project as long as you are satisfied with the fabric you are creating, but please keep in mind that a different gauge from that listed could affect size and/or yardage needed.


You can download the Fifty Below pattern(for free), then grab your needles and yarn. You'll be ready in no time to bundle up and head outside to enjoy the rest of winter knowing you'll be cozy in your cowl when the mercury plummets!

Wednesday, February 19, 2014

Getting Things Done

I had a few things on the go in my project bag (I say bag, but really I mean bags). My Butterflies are Free colour work socks I was talking about in my last post as well as the cowl I was working on, plus a vest - the Montague Vest from New England Knits - that I started early last spring.

I have been getting things done. Happily checking those projects off my list.

First up, my socks. Oh how I love these socks. Is it wrong to be so proud of them? I feel like quite a grown up knitter with them. Of course mostly because of the fact they are colourwork (and they fit!!!!!), but also because they do fit because I was a "big girl knitter" and instead of huffily ignoring the fact my first sock didn't fit quite right, I decided to do something about it. (Plus of course I'd already been a "big girl knitter" and ripped back to fix the mistake earlier on in my first sock!)

I ended up modifying my socks that were too wide and too long in the toe by ripping back several rows into the colourwork (a whole butterfly worth) and ending the colourwork there. I then switched to smaller needles, decreased by eight stitches evenly around and continued the toe from my usual 64 stitches decreasing down to 20 stitches and binding them off with a kitchener stitch. Perfect fit. I can't believe that I knit an entire pair of socks in under two weeks. Amazing!!! I need to start wearing them more before sock season ends! I also need (yes, it's a NEED not a want) to knit another pair of colourwork socks. I need to knit Water for the Elephants. So strong is my obsession with them, I was tempted to cast on in pure wool rather than wait until I had a wool nylon blend. Thankfully a friend talked me down off that crazy ledge by reminding me how often I would need to darn socks that didn't have nylon reinforcement. Phew. Glad I dodged that one!


Next up I have to tell you about my cowl! It's my own design and I'm pretty proud of it too! (I'll be publishing the pattern on Ravelry very soon!) I used Patons Classic for the main colour and then added a pop of colour to the neutral brown by using some gorgeous handspun that a friend had given me a few years ago. Just the thing to get a gal through the doldrums of what feels like a never ending winter. I'll tell you more about it in it's own post tomorrow likely!


My final project I want to tell you about has been a veritable thorn in my side for far too long. This pattern is starting to rate right up there with the blasted Lopi Sweater of Doom. Nothing went right on this thing. I started out with great gusto last March. Swatched and all. Except my gauge swatch lied, as they will sometimes do. A small four inch gauge seemed perfect. A whole vest worth and that yarn grew like a bad weed. As soon as it got wet it went from hip length to almost knee length. Heck! The armholes alone stretched just about to my waist. I immediately ripped back and reknit to a better length. But that wasn't the end of the problems. I knit the front edging and suddenly my vest pulled up so high in the front it was as though it was cropped. Agggh. Ripped that out and picked up more stitches along the edges, used bigger needles and hoped for the best. As you can see in the picture it's still pulling up, but no where near as badly as before. The vest has sat in my project bag for months waiting for me to darn in the ends and do something with the armholes. The pattern doesn't do anything with them, but left as is, I think it looked like I'd simply forgotten to knit something. Bare bones edges on armholes are not attractive in the least. They look sloppy and unfinished. At least the way I knit them anyways!

It was driving me nuts. Every single time I opened up my projects page on Ravelry I was taunted by it's unfinished self sitting right at the top of the page. I finally couldn't stand it any longer. Something had to be done. I dragged it out of the depths of the closet the other night and knit an edging on the armhole while I watched a movie. Disaster struck again. At least this time it was only three rows and 37 stitches of garter stitches worth of disaster. It was too tiny. I almost couldn't squeeze my arm in. So frustrating. I was determined though and last night I conquered it. Larger needle, more stitches (hmmmm… anyone else sense a theme here?) and it was much better. I darned in the ends this afternoon, put it on and had Little Man snap some photos on my phone - he's 4 1/2 so I made him stand on a chair for a slightly more flattering angle but that unfortunately doesn't help the blurriness that occurred as a result of him impatiently humouring me when he'd rather be playing lego, but you can get the idea anyways! I got immense satisfaction when I marked it as complete it scooted way down on my Ravelry project page. So far down that I don't even have to see it unless I scroll way down.


As I mentioned I'll try to be back tomorrow with some more details about the cowl and a link to the pattern for you.

Friday, February 07, 2014

All About Socks

First let me tell you I only wear socks when absolutely necessary. I will wear sandals and flip flops for as long as I possibly can. Pretty much from snow melt to snow fall. Well ok, maybe I'm not quite that opposed to socks. That would be nuts! In all reality I would say +5C is about my cut off temp where I give in and wear socks and am quite happy to do so. But not store bought socks. Woe is me if I have to resort to that particular torture for my tootsies!

So knitting socks is always pretty high on my queue of must knit projects. As much as I don't like wearing socks I LOVE knitting them. There is nothing so cozy or cheering as a newly cast off pair of socks.

I just finished a pair of simple socks last week.  They're just ribs and cables. Nothing fancy or fussy about them. I really like them though. The ribbing makes them fit perfectly, they don't even come off when I take my boots off. (Bonus points for that! I loathe taking my boot off and having to hop around on a bare foot trying to avoid the ice cold snow that's invariably been tracked in).

Photobucket Pictures, Images and Photos
Pretty in Pink!
I knit these socks two at a time using the magic loop method, which is a thing of beauty in itself. No dreaded second sock syndrome possible with that. Once you're done, you're done. I had some trials at the beginning though and almost resorted to doing them one at a time. No matter what I did I kept ending up with a massive tangle of yarn and needle cable. Frustrated beyond belief, I finally gave up, cast on one sock and started in. Ten rows later I decided I was not going to be beaten by a bit of string and sticks, so set sock one aside, cast on sock two, worked ten rows and put them both on my circular. I was off to the races. Thankfully. Or I'd still likely be working on my Rib and Cable socks instead of already working on my second Butterflies are Free sock! I did do a few minor modifications to the pattern - my usual short row heel and my usual toe, but other than that I knit them as written.

Photobucket Pictures, Images and Photos
Just starting...
ACK!!!! Mistake!
Ooooh Pretty!
Can I wear just one?
I've been itching to try colour work socks. I find the stranded knitting to be so much fun and oh so addictive. I always want to knit "just one more round" to see the picture appear before my eyes. I felt that I had lots of practice after knitting my Lilac Mittens, G's Moulin Rouge Mittens and Mom's Lotus Mittens, so felt it was time to take the leap into socks (see what I did there? LeapSocks? ha ha!).  A friend of mine recently completed a pair of Fireweeds for our colour work KAL in our Ravelry group and they were so beautiful it made me want to cast on even more! A quick stop in at the yarn store in the city on Friday and I was ready to go. I had decided on the yarn I wanted, Sisu, which is a Norwegian wool/nylon blend that should be fairly hard wearing and is really reasonably priced (less than $5 a ball!) so had done a gauge swatch the night before on some leftover Sisu I had in my stash. I'm glad I did. I never swatch for socks, but with the stranded knitting I was an entire stitch off. Eeek!

I cast on my first sock Friday evening and grafted the toe yesterday. Six days! For an entire sock! Did I mention it's addictive? I spent far too many late nights knitting "just one more round" and then Baby Boy was up at 5am yesterday so I took advantage while he quietly watched Kipper on Netflix to finish the toe.  I even had a disaster that I had to  rip back - late one evening as I tried on my sock to admire it, I realized at the start of my knitting that evening I had made a mistake. A very noticeable on the front of the sock can't ignore kind of mistake and had to rip back 15 rows. OUCH! But I put in a lifeline and had at it and I'm glad I made the effort!  Last night I cast on the second sock and so far, it too, has been flying off the needles! I hope by next weekend to have my second pair of socks for 2014 ready to wear! And then I really want to cast on another pair of colourwork socks.  Remember last post I was saying I couldn't decide between butterflies or Water for the Elephants? Well. I just can't seem to get those elephants out of my head...

 photo 2E6EE306-8DAA-42E2-A3EF-018EF3D1DADF.png
Working away on my second sock!
When I'm not working on my sock, which is only when knitting time doesn't lend itself well to chart reading (car knitting, when I'm keeping watch over the boys in the tub, or watching a tv show that's too intense for knitting concentration) I've been knitting a cowl that I'm in the process of writing a pattern for.

One of these days I need to set down the needles and get back to the sewing machine, but for now with all this cold weather we've had this winter it's all knitting all the time it would seem!

How about you? Is there something you gravitate towards when the mercury plummets?

Sunday, January 26, 2014

Greyson - 3.0

I love how much my kids like hand knits! It's such a pleasure to knit for such an appreciative crowd.

My most recent finished project was a long requested sweater for Little Man. He was quite envious of Baby Boy's Greyson that I knit in the summer and felt quite left out that he didn't have a mama knit pullover for himself. When I was in the thick of the holiday crafting I promised that in the new year when I could get to the yarn shop in the city I would get the yarn for his.

I really love Julia Stanfield's patterns. They really are my first choice when I start thinking about knits for the little ones. This is actually my seventh project from her Little Rascals E-book. Besides the two other Greyson (both for Baby Boy last year - the first one met with a tragic incident involving the wool chewing dog) I've also knit two Hotshots and two doll sized Hotshots. Her patterns are well written, practical but cute and quick as a wink to knit given their top down seamless construction.

I picked up the yarn on the 10th, got Little Man to wind it on the 11th and cast on the 12th. I cast off exactly one week later and Little Man was able to wear it to school last Monday morning. Instant gratification. You just can't beat it!

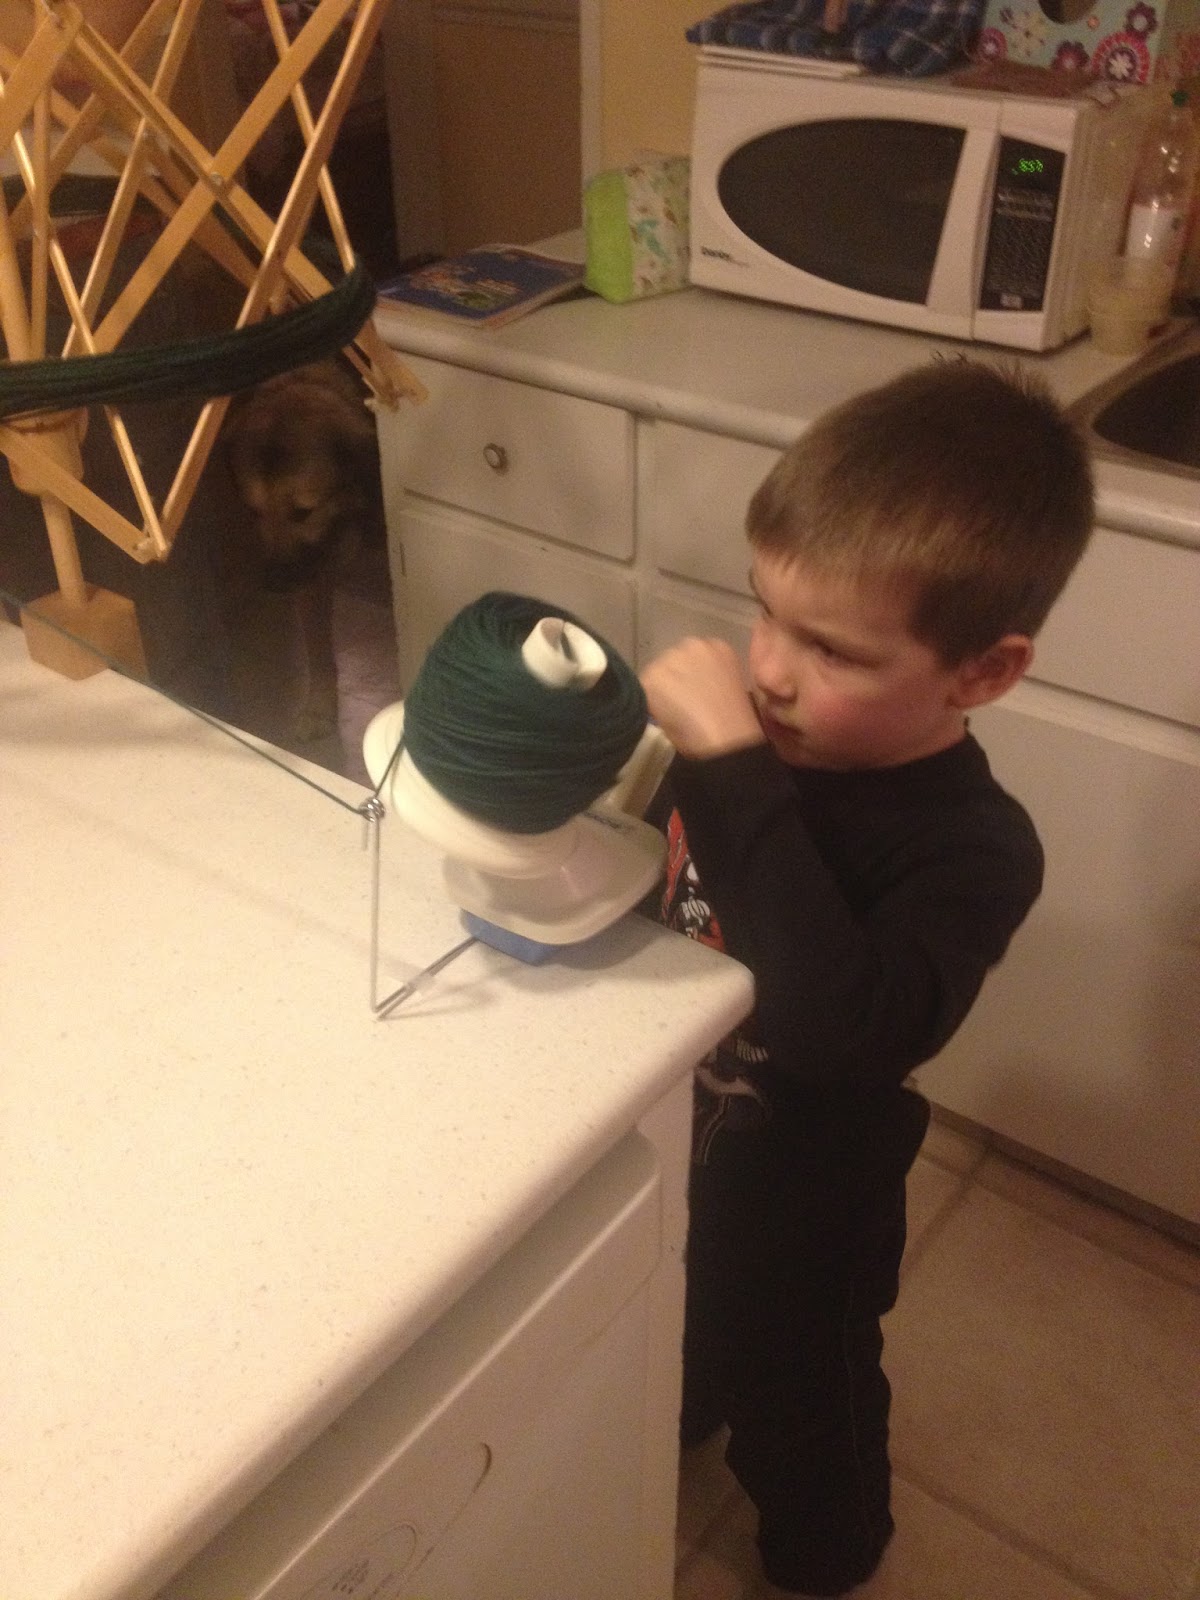
Winding his wool  - Very serious work!

Little Man has some pretty high (unrealistic) expectations for this mama's knitting abilities. At one point we had the following conversation when I pulled out my knitting to work a few rounds during a rare quiet moment in the afternoon:

Douglas:  is that my sweater, Mommy? Is it almost done? Can I try it on?   
Me: oh sweetie, it’s not ready yet. It’ll take me at least a couple of days… 
Douglas: (with tragic desperation in his voice) NOOOOOOOOOOOOOOOOOOOOOO! Don’t say a couple of days! I wanted you to be done it today! I need it!  
Me: but I just started it last night…
So the pressure was on. No lazing about on this one. Little Man is a harsh task master. Thank goodness it was a quick knit. I'm not sure how things would've gone if it wasn't. I suspect a fair amount of moaning and distress. The way he was going about you would think the poor lad had to walk about naked normally. I assure you that isn't the case - he has enough clothes for about half a dozen four year olds, he just didn't have a v-neck pullover exactly like his brother's.

He was so happy when I cast off and had to try it on the second I finished weaving in the final end
of yarn.  He wore it the rest of Sunday, Monday to school and a handful more times in the last week.  Good thing it's knit in my "go to for kid knits" Berroco Vintage, which is easy care machine wash.

Greyson 3.0 - in action
I've got a few other things on the needles right now that I can focus on now that Greyson is finished. I've been working on a pair of simple rib and cable socks from veteran sock designer Nancy Bush and have blocked and washed my gauge swatch for Braid Hills, a beautiful intricately cabled cardi by Scottish designer, Kate Davies. I am working up my nerve to dive into that one - I will admit looking ahead at the pattern has me a bit intimidated.  Beyond that I'm obsessing over a pair of colour work socks.  I can't decide between Water for the Elephants or Butterflies are Free (both by Rose Hiver), but a trip to the yarn shop is in my future next week when I'm in the city. Maybe I'll decide when I see what colour selection they have in stock. I just know that one of these designs will be knit, by me, starting next weekend.

How about you?  Anything you're dying to get started on?

Monday, January 20, 2014

Wear All The Wool

We've had some pretty cold days here on the prairies this winter, which has made me want to knit all things and wear all the wool.  But it's ok. I'm a knitter. I'm expected to wear all the wool. Or, at least, I assume I am.

Last spring, my friend Sally sent me some beautiful hand spun yarn. I had over 300yds of DK weight loveliness to use, but no idea what to use it on. I didn't want to waste it on something not worthy of hand spun so it waited, tucked away in the drawer, until such time as I found a pattern that I deemed to be the right one.

Of course I found a pattern I loved right when I was in the middle of holiday crafting, but I was good. I waited until after Christmas to even wind my wool so I wouldn't be tempted to cast on.

On December 28th, as the beginnings of a blizzard swirled outside the window, I hunkered down, cozy and warm inside and cast on my Knotted Pine hat. The instructions say to use a tubular cast on, which would have been grand, except I could not, for the life of me, get it right. I would get about 80 stitches in and completely mess it up. I tried. Oh how I tried. I restarted six times. Then I gave up. I realized I could keep restarting and never get my hat actually started or I could cast on with a different method and actually have a new hat sometime within this lifetime. Five minutes after making the decision I was well on my way.

I really enjoyed the pattern with its unique construction; it utilizes short rows on the ribbed band so it doesn't bunch up at the back and is knit straight up then the crown is shaped with a few quick stitches after it has been grafted together. There is also enough going on in the pattern that there's no chance of losing interest before it's finished!

Once I'd completed the hat I realized two things. A) I had no mittens to match and B) I had plenty of yarn left over. Hmmmmm. What's a knitter to do? As the temperatures plummeted to a forecast of almost -50C with the windchill I cast on using Ann Budd's basic mitten pattern. I used a contrast cuff as I wasn't sure how far my yarn would stretch and knit the mitten using a half twist stockinette stitch and a column of honeycomb stitch to mimic the Knotted Pine hat. I'm still debating if I should knit liners for the mittens for extra warmth. I'm thinking something in alpaca or an alpaca blend would be soft and toasty warm.

After casting off my mittens I still had yarn left over, and alas, how is one to wear all the wool if one does not own a matching cowl? I'm all about cowls this year it would seem. (Last year was small triangular shawls. What can I say? I'm fickle.)

I knew my yarn wouldn't be enough for an entire cowl, but I wanted to showcase it somehow, so simple striping wouldn't suffice. I also wanted to have it match the hat and mitts in pattern as well as yarn. I cast on, and started knitting. I used Tincanknits Oats (that I'd knit for N for Christmas) as inspiration - I liked the simplicity of how it had just a small section of garter stitch running up the front rather than an all over pattern and once again used half twist stockinette and honeycombs to tie it all together.

I'm really pleased with how my set turned out. It's cozy and warm not to mention kind of fun that I actually match when I'm wearing all the wool!


Thursday, January 16, 2014

Better Late Than Never : A Holiday Crafting Round Up

I've been meaning to get to this post since Christmas, but just haven't had the time yet. The little boys have been plagued with illness after illness since Christmas - colds, stomach bugs, ear infections, even a trip to the ER to celebrate the New Year. It's been insane. However, better late than never, I'm finally sitting down to do a round up of the holiday crafting of 2013.

This year I was determined to accomplish two things. Increase the amount of handmade gifts and to not have a major meltdown as a result of it.  I'm thrilled to tell you I succeeded on both accounts.  Not one single tearful, gnashing of teeth, toddler worthy tantrum and over thirty crafts made for gifting.  I was the queen of calm this year. I actually enjoyed the gift making.  Really enjoyed it.

So, without further ado, here's what I was up to during my absence from the blogging world.

"Accessories"

I went a little mad with the accessories this year.  Hats and mitts and scarves oh my!  My favourite, I think, are the Lotus Mittens I knit for Mom.  She almost didn't get them.  I was sorely tempted to keep them all for myself.  Such a pretty pattern! Oh! But I also loved Salt, the cowl I knit for J's girlfriend M and then there was the Give 'em the Slip Mitts I knit for Little Man's preschool teacher.  He chose the pattern and the yarn for them and the purple Cafe au Lait mitts I knit for his other teacher. I also knit a pair of Cafe au Lait for M's stocking. J had requested an Inishmore Cap like I'd made for N last year - little did he know I'd been planning it all along! It's a great look for my big boys!  I also knit a Fisher Cable Hat for G's boyfriend B's stocking. I had a slight issue with that one. Something went a bit wrong with the decreases and in the end I ripped back and reworked them using a online decrease calculator instead of how it was written and I couldn't be happier. It looked much more hat like and much less tea cozy like.  A few other things that made their way into Christmas stockings were Amaranth, a headband I knit in linen, and Boot Candy boot toppers for G, a neck warmer using the Oats pattern for N and a simple garter edged toque for M. Phew. I think that covers the accessories...


"Dancing Queens"

I decided early on this year that I really wanted to make dance bags for three of our little nieces who all take dance classes and G had already asked for a new dance bag on her Christmas wish list so it was just a matter of deciding what design to make.

I had found the idea for the bag online, but of course decided I couldn't leave well enough alone and did my own thing.  Two of the nieces are highland dancers so ghillies were a must on their bags.  The third takes tap, but unfortunately my drawing abilities did not extend as far as tap shoes - they just looked weird, so I went with ballet slippers instead. The bags are lined with an 8" zippered pocket in the lining on one side and two gathered, elasticized slip pockets the width of the opposite side on the highland dance ones and on the ballet one has pleated slip pockets instead.  I decided to do tie handles so that the girls could adjust the length if necessary. A magnetic snap closure finishes each of them off. I knit each little girl a pair of legwarmers to go with their bag, using Beanstalks for the two highland ones and Zeg Warmers for the ballet one.  All yarns were hand dyed Patons Classic.

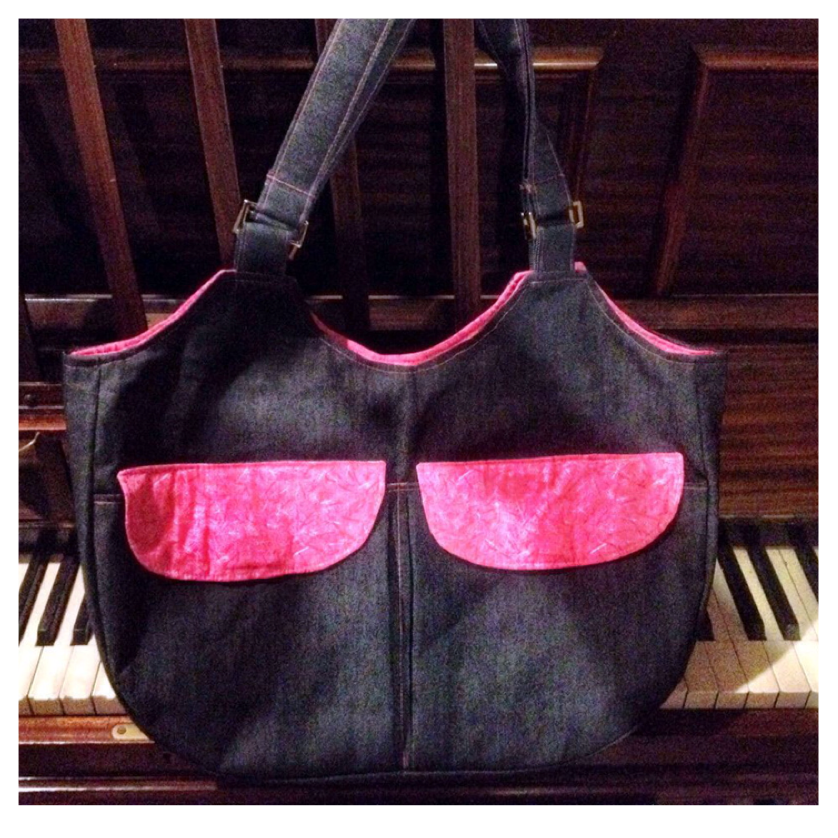
G's dance bag happens to be my latest test bag for Anna of Charmed Liebling. When Anna sent me the test request I knew right away it was a perfect dance bag. Roomy, lots of pockets and stylish. I'm really happy with how my Rhine Valley Bag turned out - and if you'd like to make one for yourself hop on over to Anna's site for more information.

"Pyjama Party"

Using a few old patterns I created to sets of pjs for gifting.  The first set was matching Christmas Eve pjs for the little boys. I used an old Simplicity pattern for the flannel bottoms and an old Kwik Sew t-shirt pattern for the fleece tops that I appliquéd the bear shape onto to complete the look. The boys were so excited when I surprised them with them.  Little Man was especially appreciative, telling me over and over how much he liked them and how soft they were.

The second set were again made using the same pattern for the little bottoms, but this time I modified to add a contrast cuff.  (BF)G's were made using another Simplicity pattern.  I took the easy route with the tops, choosing to purchase three black t-shirts and one orange one that I cut the sleeve extensions from and attached to the black ones. These pyjamas were a birthday gift for (BF)G, who's birthday happens to fall right after Christmas.

"Perhaps With A Bag to Put Them In"

I love that J's Christmas wish list had two requests that were handmade. One was that he wanted a set of dice for Dungeons and Dragons "perhaps with a hand knit bag to put them in" (the other was the Inishmore Cap) - it made this crafty mama's heart sing to read that I tell you!  So I knit him a little dice pouch one evening while I watched the old classic "White Christmas".

Months ago I'd found the "Bowie Case" pattern on my favourite bag making site, Emmeline Bags. The pattern isn't by Janelle, but by a German designer, pattydo. Janelle sells it  in her shop though and had high praise for the cute little cel phone clutch it makes, so I purchased it with the intention of making G and J's girlfriend M one for each of their stockings. I love this little bag, although it was a bit crazy as the instructions are in a German (with English subtitles) video.  It went smoothly until I was trying to put it all together in the final step. Trying to watch where I was to do the folds, while reading subtitles all the while the video kept pausing and having to load because of a dodgy internet connection. Oh boy! But the end result is adorable.  I so want one for myself!

Our youngest niece doesn't dance yet - she's just three - but I assume she gets dragged along to her fair share of dance classes and competitions, so I thought I'd make her the Playdate Back Pack from Fishsticks designs so she can take along some toys or books with her.  A overwhelmingly pink, girly Barbie one (I'm so not used to overly girly anymore in this house being surrounded by menfolk! ha ha!). I think she liked it.  She wore it most of the evening, Christmas Eve, after opening it.

"Santa"

Every year Santa brings an new ornament in the kids' stockings.  This year I just couldn't find any that I liked. And given I was filling seven stockings now with the addition to our family of B (G's boyfriend) and M (J's girlfriend) I was having a really hard time finding a theme with that many different choices. So I decided to put my crafty little self to work and make them.  I adore these little felt Santas and really loved making them. So much fun!


So there you have it. The round up! I may have left a thing or two off the list, but I think that's pretty much it for Christmas (and one birthday) 2013 crafting.  I'm still so pleased with how everything worked out and how much I enjoyed the process.  I'm already plotting and planning for next year, but for now, I've been enjoying doing a few projects for myself.  It was brutally cold for a spell causing me to feel the urge to knit all things. I'll have to tell you about that another day though.


Tuesday, December 10, 2013

Sustenance is Necessary...

I've been quiet for a little while now. Even Mom commented on my blogging silence. It's just I've been so busy with my crafting that I haven't had time to post - ssssshhhhh! Top secret! Can't tell you about anything I've been working until after Christmas, but I can tell you I just put the finishing touches on gift number 17 this morning!

I'm hoping this means that I will complete the last few gifts in plenty of time before Christmas is upon us so that this year, instead of having a crazed lunatic marathon of crafting and melting down on December 23rd like I did last year, I can just relax and enjoy the time with my family during this festive season.

Of course with all this craftiness, sustenance is necessary. Tasty, tasty sustenance.  And do I have a recipe to share with you!

I met my friend, Betty, years ago, when we both had little kids and were muddling our way through early motherhood in those first few years. I remember Betty always bringing awesome treats when it was her turn to bring snack for playgroup! Over the years due to various reasons we lost touch and then several years ago picked up our friendship through the magic of Facebook.  We live several hours apart so we haven't had an opportunity for coffee dates or in person visits yet, but we do keep in touch via the net regularly.

The last few weeks she's been posting photos of delicious looking treats on Facebook, including whipped shortbread. I had a pound of butter in the fridge that was relentless in its calling of my name, just begging to be used. So a quick message to Betty and I had the recipe in my hands.

Yesterday was shortbread day. Tomorrow maybe shortbread day again. Perhaps the next day after that.  I can't see these lasting around here very long! These are delicate, melt in your mouth, morsels from heaven. Yum. Yum.

Photobucket Pictures, Images and Photos
Happy Holidays!

So here's the recipe! (Don't worry, I'm not divulging any ancient secret recipe here although it's tried and true, she's been using it for over twenty-five years for her own family - Betty told me to go ahead and share it with everyone! )

Betty's Whipped Shortbread

1/2 cup corn starch
3 cups flour
1 lb butter, softened
1 cup powdered sugar
1 tsp vanilla
Pinch of salt

Heat oven to 350F/175C

Combine flour and cornstarch in a bowl and set aside.

Whip butter until fluffy then add powdered sugar. Whip again and add vanilla and salt when it looks creamed like whipped cream. Add the flour mixture a half cup or so at a time, whipping in between each addition.

(Betty says if you have a kitchen aid mixer use paddle attachment and at the end give it one good whip for 30 seconds. I don't, but found my electric hand mixer worked just fine!)

Spoon onto cookie sheets garnish. Betty's were so pretty - she used glacé cherries, cutting red ones into a small dot and the green ones lengthwise to make it look like holly! So festive! I didn't have cherries, so I just used colored sugar.

Bake for 6-10 minutes (start checking at about six minutes). Shortbread is done once the bottom is delicately browned. Cool on racks, then make yourself a cuppa, sit down, put on some festive tunes, relax and enjoy the season (and your shortbread)!

Thursday, November 14, 2013

This Bag's Got Bling

A few weeks ago I got an email from Anna over at Charmed Liebling.  I'm always excited to see a message from her appear in my inbox. It means she's been pattern making again and needs testers. I really do love testing for Anna! She's great to work with and has fantastic designs!

This time was no different! As soon as I saw the bag I knew I would say yes, even though this time of year I'm up to my eyeballs in crafting for the holidays. But I even knew exactly what fabric combo I wanted to use, and had almost everything in my stash already. Fate, it was, I tell you. Fate.

The bag went together really quickly despite all the extra details. I love that it has so many pockets both inside and out! My favourites though are the V-shaped front slip pocket and the elasticized pocket on the inside.

My biggest challenge proved to be the rivets. Not the application of them, but the procuring of them. Agh. So frustrating!  As per usual my tiny shop in town had nothing. The fabric store chain in the city had a pitiful selection, not too mention they sell a few packets of rivets but not the tools you need to apply them. Did I mention it was frustrating?

At that point, since I was on a deadline, I chose the ones I thought might work the best. I really wanted plain silver, but none were to be had so my bag's got bling. Sparkly red crystal rivets - the choices were purple, green or red. I thought the red the best option. To apply them I used a combination of my eyelet pliers, an old drum practice pad from when I was learning drumming in 402 Squadron's Pipe and Drum band back as a teenager in the mid-eighties (using it to apply the rivets was probably the most productive use it's ever seen - goodness knows the drum lessons weren't successful!), and random bits and bobs from old eyelet and snap sets until I found one that worked.  After consulting with Janelle of Emmaline Bags I now know that the next time I want rivets I'll go directly to Tandy Leather in the city, they even do online sales! But I was short on time. I should have talked to her first!

My other frustration with my bag was my fabric choice. Velvet and I have never been fond of each other, especially after the tailored velvet highland dance jacket incident of 2009, which saw me, nine months pregnant, sobbing at my machine, coming well and truly unhinged while trying to make a perfectly fitting jacket for G to wear while competing in Canadians a week later - she ended up wearing her old jacket and a borrowed kilt. That particular beast that sent me over the edge is still at the bottom of my bin of "fancy" fabric. But I digress. Suffice it to say velvet is not usually a fabric choice I make willingly.  My other problem was that my wool blend has a bit of stretch to it. Gah!!!! Not a fun combination, although I like the end result. So all's well that ends well.

Anyways, here's my sophisticated wool blend and velvet bag with bling! Perfect for a night out on the town... Or at least I imagine it would be. With (BF)G's work schedule and the little boys, we're not really night out on the town people. We tend more to the hermit/homebody type truth be told, but should the occasion arise  down the road! I will have just the handbag for it!

Photobucket Pictures, Images and Photos
Front view - I LOVE that V slip pocket!

Photobucket Pictures, Images and Photos
Back View - Another pocket!

Photobucket Pictures, Images and Photos
Inside view - look at all those pockets in there!

Photobucket Pictures, Images and Photos
Told you my bag has bling!

If you'd like to make yourself an All Day Out Bag, hop on over to Anna's site, Charmed Liebling. You can purchase the pattern and read more about her design on her blog!

Saturday, November 02, 2013

The Dog Ate My Wallet...

Really. She did. Actually it was a few years ago now that she chewed the corner off of it and it's been a source of embarrassment since. Nothing says classy like a wallet with a big bite out of it. Good grief!

I've been looking for a replacement for a long time, but never found one in the stores that I liked enough. So then last year I started looking at patterns and tutorials, but I always found something I didn't quite like about them. Fast forward to a little while ago when I found the Necessary Clutch Wallet from Emmaline Bags.  I was completely taken with it. Roomy, oodles of spots to put things and it looks darn good as well. I was sold.

It's taken me a little while to sew, mostly because I had to make the boys' knapsacks, my swap gift and the Halloween costumes. It was also a bit daunting to tell you the truth, only because I've never made anything quite like it yet.

The instructions that Janelle provides with the pattern are excellent though. Clear as can be, lots of photos, and really thorough. I was quite impressed.  I had cut out one set of fabric for it, but then going through my cottons fabric bin one night in search of something totally unrelated I came across the left over fabric from my Working Girl Laptop Bag and knew I really wanted to make a black and white wallet instead.

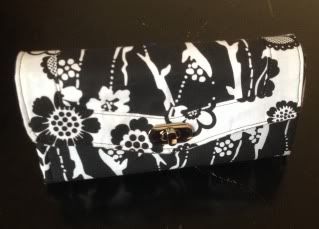
I started out one evening with great gusto. Well, that is until I got to step three where I had to put the locking clasp in. Eeek! Somehow it was more stressful than the one I did on my laptop bag.  I think the instructions should come with the first step of having a stiff drink! Cutting holes in fabric, fumbling with teeny tiny screws that are nearly impossible to find when they fall under the sewing desk, glue running everywhere... Yikes! But I had my trusty assistant Fluffy the kitten to cheer me on in his own special way of climbing on my head or sitting right on top of it all. Maybe stiff drink should also be the final step of that part too.  In the end I managed to conquer the locking clasp and oh what a beauty it is. The screw in plate, despite all my trials and tribulations, makes such a nice professional looking finish.

Look at that locking clasp looking all innocent
and not at all like it almost drove me to drink!
I had a few moments of frustration along the way, but nothing to do with the pattern. I tried several times to put in the card slot section of the wallet. My BFF the stitch ripper was my constant companion. After several tries I gave up. There's only so much I can take in one sitting. After I felt a little less like tossing the whole thing out the window, it occurred to me that maybe I should double check my measurements. Guess what?!? Even though I use a rotary cutter, ruler and mat with grid lines I had somehow cut the whole piece almost a quarter of an inch too narrow. The mind... It boggles. I cut a new set of pieces and lo and behold, problem solved.

I finished my wallet yesterday afternoon and I LOVE it! I transferred everything over from the overstuffed,  chewed up one to my brand spanking new Necessary Clutch and would you believe I have tons of room left in it? It's kind of like Mary Poppins' carpet bag. It doesn't look overly huge until the lamp gets pulled from it.  I won't likely carry that much in it, but nice to know I could easily stash my phone  right in my clutch wallet if I wanted to! I just can't say enough good things about the Necessary Clutch Wallet pattern. 

The Mary Poppins carpet bag of wallets!!
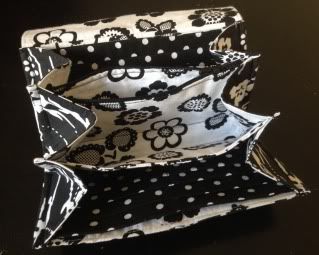
See, what did I tell you?! Look at all that room! There's a slip pocket on either side of each card slot section - which, by the way, has a total of twelve slots - then there's the zip pocket you can see there with the zip opened to give you an idea of size, and lastly a section in the middle that is roomy enough for my cel phone!  But even with all that room inside it all compacts nicely into an "easy to pop into your purse" size!


The Necessary Clutch Wallet
I wonder how many wallets a girl can have? I'm already thinking about that other one that's already cut out...


Thursday, October 31, 2013

Happy Halloween!!

We've been busy getting ready for Halloween for the last few weeks!  On Tuesday night, it was finally time to carve the pumpkins that the boys grew from seeds this year.  They were so eager and had been asking ever since we picked them out of the garden (Ok, flower bed, truth be known, but that's where they grow the best for some reason!) when it would be time to carve them, so you can imagine the excitement in the house the day that Daddy brought them in from the breeze way and set them on the counter for carving to begin!

Photobucket Pictures, Images and Photos
Carving pumpkins they grew themselves!
I had spent the last two weeks making the requested costumes. I thought I was going to get off easily again this year and be able to pull costumes from the costume bin, especially when, for weeks, Little Man told me he wanted to be a pirate. So simple.  He had his pirate costume from his skating show last spring! Whoot!  And then it all became so much more challenging...

He changed his mind. Only a triceratops would do.  No problem! I was going to alter my much used old Butterick pattern and add a tail and quilt a chest plate, but then I pulled the pattern out set to go and found all the major pieces missing - backs and fronts and sleeves. Gone. Bad words were said.  Then a friend told me about the simplicity pattern that I ended up having (BF)G pick up from the fabric store for me and life was good again.  It was perfect. Pretty much what I wanted. Except for a  few things. I changed up the "dino hands" from mitts to mitten covers. Years of experience tells me those costume mitts cause nothing but frustration when trick or treating. So the covers will slip easily over their mittens tonight.  Also, I made the tails detachable. They have a belt that feeds through slits in the side seams and then velcro around their tummies. Pure brilliance on my behalf I thought. Not only easy for sitting en route in their car seats, but for future use. They can use the hands, hats and tails as costumes for play without me having to put on the jumpsuit, take off the jumpsuit, put on the jumpsuit, take off the jumpsuit, put on... well you get the idea. And bonus to the costume making? They counted for Kids Clothing Week Challenge last week - making it my most successful KCWC ever.  Ha ha!!

Photobucket Pictures, Images and Photos
Dinos in our field!
Photobucket Pictures, Images and Photos
And a back view!
After the costumes were finished I had some other halloween sewing to do! When Baby Boy turned one I made all the cousins treat bags for his party using the Fishsticks Designs tutorial. All but the two that were still babies.  So I'm catching up! I made my littlest niece her's and am looking forward to giving it to her tonight when we meet up to go trick or treating!

Photobucket Pictures, Images and Photos

Yesterday I took a notion into my head to put together a little goodie bag for the two nieces we will be with this evening.  Just a fun, non-purely-sugar type treat of fruit snacks and Halloween playdoh tins. But I didn't think to buy those little plastic goodie bags at the store yesterday. So this afternoon I did this:
Photobucket Pictures, Images and Photos
Prepping the goodie bags with freezer paper stencils
Photobucket Pictures, Images and Photos
Fun and festive bags! Meow! 

Lastly, this morning we also had to do something with the tonne of pumpkin seeds we removed from our pumpkins.  I looked online for how to roast them because they've never really turned out well in the past for me.  Turns out I didn't really need to.  I had a resident expert.  Little Man made them in preschool on Monday, so he could tell me what to do.

Here's his instructions:

1) boil in a pot in salty water
2) drain
3) use oil
4) then use seasoning salt - make sure it's seasoning salt - IS THAT SEASONING SALT?!?
- what are you doing putting them in the oven. We did NOT put them in the oven at school. Well... Maybe they put them in the oven while me made slime and I didn't see it... I don't think they go in the oven... WHY ARE YOU PUTTING THEM IN THE OVEN???????

My interpretation:

Bring seeds to a boil in salted water, simmer while getting the dog out of mischief, removing cat from counter, picking up aforementioned slime - so maybe five minutes? Drained them, put them back in the pot and mixed with a little oil, and seasoning salt (yes it definitely was seasoning salt! Yikes!), then onion powder, a sprinkle of soya and Worcestershire sauce and in the oven (at 400F) for about ten minutes. Yum, yum. And the head chef approves so phew! ;)


Photobucket Pictures, Images and Photos
Very tasty! And four year old chef-approved!


So, I think we are all set for Halloween fun! I hope all of you celebrating have a safe and happy Halloween.

Photobucket Pictures, Images and Photos
Happy Halloween!

Sunday, October 13, 2013

A Bevy of Bags

Happy thanksgiving to all my fellow Canadians!  I hope you are having a wonderful weekend full of all good things - food, family, friends. (BF)G and I are certainly enjoying the time with our little men folk (too bad the older kids couldn't be here, but they all had other plans - I'll have to get my invite in sooner next year!).

We have so much to be thankful for. Life is good.

So while I sit back and relax after a rather huge feast of turkey and all the fixings I thought I'd stop by and talk about some of my latest crafty pursuits.

I'm aspiring to be a bag lady these days. No, not the kind that you see pushing shopping carts with all their worldly possessions contained within shopping bags, but the kind that can't stop making bags. I've become quite smitten with making bags. You may have noticed evidence of this obsession withmaking bags  through my posts about my Rose Petal Bag,  Leibling's Bag and then my Working Girl Laptop Bag. I haven't stopped there... Oh no. Not even close to slowing down. So today I want to show you my bevy of bags that I've been madly working on in the last few weeks.

The first ones were out of necessity. Well, not really, I suppose. I could've gone to Walmart and bought a cheap backpack (or as Little Man called it Snackpack), but where's the fun in that? Little Man started preschool last month and he needed a backpack to carry his snack and supplies in (thus the name snackpack) so I picked out a few tutorials and a pattern I had and let him choose the design he wanted.  He chose Birchfabric's Little Hitchhiker's Backpack. I modified a few things to work with the fabrics I had as well as modified the straps to a style I preferred, using the Fishsticks Designs Playdate pattern as a guide, but other than that it was a great little tutorial.  I even made my own piping for it! He was thrilled with it, as was I!

Photobucket Pictures, Images and Photos
Little Man on his first day of preschool
Photobucket Pictures, Images and Photos
The Little Hitchhiker's Backpack
Then suddenly the night before preschool I realized he should probably have a little lunch bag for his snack so it didn't get scattered throughout his snackpack. Again, I modified to fit the fabric I had on hand and made it much smaller since it's only to carry a snack, albeit a big snack - that boy can eat I tell you! I used a tutorial (from Lemon Squeezy Home) that I've used before and whipped in up in about half an hour.

Photobucket Pictures, Images and Photos
The perfect size for a snack
Baby Boy, who is already feeling woefully left out because he can't go to preschool too, was feeling even worse that he didn't have a "knapsnack" as he calls them, of his own, so of course I made him one as well, following the same mods as Little Man's. I think I goofed on the amount of elastic at the top of the bag though and cut too short. I'll probably unpick it and redo it so it sits a little better. Also I placed the snaps a little differently and wish I hadn't, but he was really happy to have it made. He carted it around town with him the other day while we ran errands, with a juice box and a little baggie of goldfish type crackers in it, and felt quite grown up. He is so proud of his big boy knapsnack.

Photobucket Pictures, Images and Photos
The Little Hitchhiker's Backpack - Take 2
Photobucket Pictures, Images and Photos
Going a wandering with his knapsnack on his back
While I was waiting for my magnetic snaps for Baby Boy's bag to arrive in the mail - would you believe that even with shipping it's more economical (and far superior quality) to order from Emmaline Bags than buy locally?? - I made yet another knapsack. This one is for a friend's little fellow who is turning three. Rumor has it the little guy like cars and trucks (hmmmm... I seem to know a few other preschoolers that have a similar fondness for all thing transport or construction...) so I used some left over fabric and some contrast I picked out specially to make Fishstick Designs Playdate Bag.  I also made a car wallet (pattern of my own design) to go inside the play date bag. I really hope he likes his present. I know my guys sure liked it! (I'm definitely putting car wallets on my "make for Christmas" list!)

Photobucket Pictures, Images and Photos
The super fun Playdate Backpack -
 it even has slots for crayons on the inside!
Photobucket Pictures, Images and Photos
Vroom - cars to go
Last, but certainly not least, I've wanted one of those zipped, boxy styled bags for a Work In Progress small knitting bag, so after much perusing of the internet I finally decided on the one for me. I used  Truly Myrtle's tutorial - I love that her's, unlike so many, have no exposed seams. I loathe exposed seams in a bag. They just look so... Exposed. The tutorial is straightforward and simple. Its just that I seemed to suffer from, well, I don't  exactly know what, that made what should have been an easy project into one that refused to co-operate. The brown one - for a friend none the less, was my first attempt. I felt something looked just the tiniest bit off. So I made the second one... And realized as I was sewing the corners that something had gone wrong. I had cut out and sewn the whole thing the wrong way. So much for boxy - it's so streamlined that it barely fits a 50g skein of sock yarn. Sigh.  I decided that hopefully my friend would love the slightly off kilter brown one regardless of it's quirks and I kept the long skinny almost pointless one for myself. Some day I may try this whole thing again. Maybe I'll even get it right.  But in actual fact it's going to be a while before I venture down this particular boxy bag path once more. Twice bitten and all that...

Photobucket Pictures, Images and Photos
WIP Bags
So as you can see I'm all about bags lately. Next up I plan on making myself that Necessary Clutch I've been obsessing about from Emmaline Bags! I have one all cut out and ready to sew, but then I started thinking I liked a different set of fabric in my stash much better so... We'll see which gets made. I'd also like to sew a bag for Purse Palooza 2013 before the end of the month.  Before any of that happens, though, I have to get cracking on some Halloween Costumes and a trick or treat bag I promised to a special little lady - our niece - who missed out on the treat bags that I made for everyone for Baby Boy's first birthday party (she was a baby - she got a hat instead).  I've got all the details hammered out in my head for these upcoming projects... Now just to execute them.

Saturday, October 12, 2013

Busy Days and a Birthday!

I feel like I haven't even looked at my blog in days. Or has it been a couple weeks already?  Things have been cruising along at a rapid pace here chez Prairie Girl.

With a new schedule of preschool and skating lessons, and all the usual things like running into the city for doctor appointments, trying to keep on top of day to day housework, and the like things have been hectic to say the least.

Part of that hectic last week was preparing for a very special day! Baby Boy turned three this past Monday.  How?!?! How is it even possible that this wee little baby is now already three years old?

Baby Boy - A few hours old!
Giving his very biggest three year old smile
wearing this year's birthday crown, perfect for a Rescue Bots fan

Yes sir. Time flies! It was in a blink of the eye that he went from teeny tiny newborn to big boy!

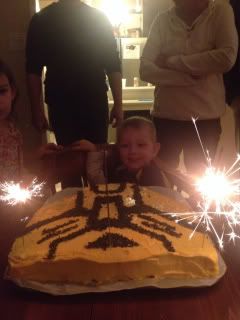
We had a party last Saturday with the family for him.  He was very excited that all his brothers and his sister were able to come to his party, as well as Grandma, a few aunties and uncles and some of his cousins too. He had lots of fun, and quite liked his cake that I made to look like the Rescue Bot emblem that he has on his crown.

Cake with sparklers! What more could a boy ask for ?

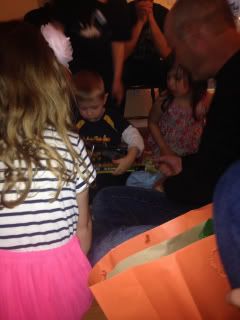
Cake and fun. Really what more could a boy ask for? Well... presents of course are always nice! He hit the jackpot in new toys - Oh My Word!!!! It was like Christmas in our house that evening!

Fun opening presents with cousins!

What a day!!!

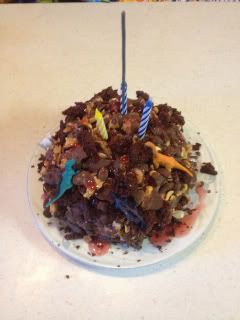
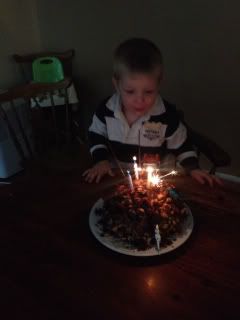
On Monday, it was his actual birthday. Daddy was on a vacation day from work, so we dropped Little Man off at preschool for the morning, then did some errands with Baby Boy. We met up with Little Man at the library - he was on his very first ever field trip! - and had fun choosing some books then went for Birthday Lunch at McDonalds. When we got home I made yet another cake. Baby Boy was quite insistent that he needed a volcano cake too, just like his brother had for his birthday, so I made a mini version. Needless to say, I don't think I want to make or eat cake for quite some time now...

The mini volcano cake
More sparklers and candles too!!
It was also N's 19th birthday the week before. And because he was home for the party I had made some pumpkin spice cupcakes for him and planned to put a candle in and sing him happy birthday too. Unfortunately, after almost everyone had left except J, N and N's girlfriend, I suddenly remembered the cupcakes that were in the freezer. So then I figured I'd just send them home with him to enjoy whenever he wanted. Except, I just found them still in the freezer the other day. Ooops! N - if you're reading this I hope you'll forgive your old mama. I promise I will make you pumpkin pie or pumpkin cupcakes - your choice - the very next time you're home. (and look at that... I'll wager that as good a bribe as any to get my kid to come home to visit! ha ha!)