Happy thanksgiving to all my fellow Canadians! I hope you are having a wonderful weekend full of all good things - food, family, friends. (BF)G and I are certainly enjoying the time with our little men folk (too bad the older kids couldn't be here, but they all had other plans - I'll have to get my invite in sooner next year!).
We have so much to be thankful for. Life is good.
So while I sit back and relax after a rather huge feast of turkey and all the fixings I thought I'd stop by and talk about some of my latest crafty pursuits.
I'm aspiring to be a bag lady these days. No, not the kind that you see pushing shopping carts with all their worldly possessions contained within shopping bags, but the kind that can't stop making bags. I've become quite smitten with making bags. You may have noticed evidence of this obsession withmaking bags through my posts about my
Rose Petal Bag,
Leibling's Bag and then my
Working Girl Laptop Bag. I haven't stopped there... Oh no. Not even close to slowing down. So today I want to show you my bevy of bags that I've been madly working on in the last few weeks.
The first ones were out of necessity. Well, not really, I suppose. I could've gone to Walmart and bought a cheap backpack (or as Little Man called it Snackpack), but where's the fun in that? Little Man started preschool last month and he needed a backpack to carry his snack and supplies in (thus the name snackpack) so I picked out a few tutorials and a pattern I had and let him choose the design he wanted. He chose Birchfabric's
Little Hitchhiker's Backpack. I modified a few things to work with the fabrics I had as well as modified the straps to a style I preferred, using the Fishsticks Designs Playdate pattern as a guide, but other than that it was a great little tutorial. I even made my own piping for it! He was thrilled with it, as was I!
 |
| Little Man on his first day of preschool |
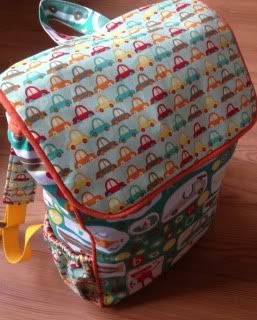 |
| The Little Hitchhiker's Backpack |
Then suddenly the night before preschool I realized he should probably have a little lunch bag for his snack so it didn't get scattered throughout his
snackpack. Again, I modified to fit the fabric I had on hand and made it much smaller since it's only to carry a snack, albeit a big snack - that boy can eat I tell you! I used a
tutorial (from Lemon Squeezy Home) that I've used before and whipped in up in about half an hour.
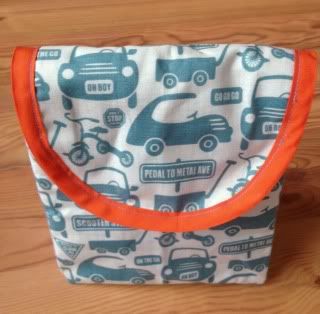 |
| The perfect size for a snack |
Baby Boy, who is already feeling woefully left out because he can't go to preschool too, was feeling even worse that he didn't have a "
knapsnack" as he calls them, of his own, so of course I made him one as well, following the same mods as Little Man's. I think I goofed on the amount of elastic at the top of the bag though and cut too short. I'll probably unpick it and redo it so it sits a little better. Also I placed the snaps a little differently and wish I hadn't, but he was really happy to have it made. He carted it around town with him the other day while we ran errands, with a juice box and a little baggie of goldfish type crackers in it, and felt quite grown up. He is so proud of his big boy
knapsnack.
 |
| The Little Hitchhiker's Backpack - Take 2 |
 |
| Going a wandering with his knapsnack on his back |
While I was waiting for my magnetic snaps for Baby Boy's bag to arrive in the mail - would you believe that even with shipping it's more economical (and far superior quality) to order from
Emmaline Bags than buy locally?? - I made yet another knapsack. This one is for a friend's little fellow who is turning three. Rumor has it the little guy like cars and trucks (hmmmm... I seem to know a few other preschoolers that have a similar fondness for all thing transport or construction...) so I used some left over fabric and some contrast I picked out specially to make Fishstick Designs
Playdate Bag. I also made a car wallet (pattern of my own design) to go inside the play date bag. I really hope he likes his present. I know my guys sure liked it! (I'm definitely putting car wallets on my "make for Christmas" list!)
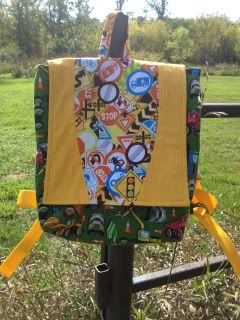 |
The super fun Playdate Backpack -
it even has slots for crayons on the inside! |
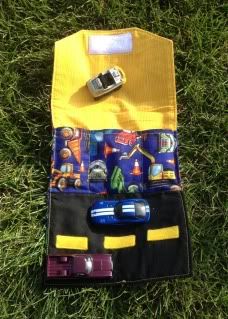 |
| Vroom - cars to go |
Last, but certainly not least, I've wanted one of those zipped, boxy styled bags for a Work In Progress small knitting bag, so after much perusing of the internet I finally decided on the one for me. I used
Truly Myrtle's tutorial - I love that her's, unlike so many, have no exposed seams. I loathe exposed seams in a bag. They just look so...
Exposed. The tutorial is straightforward and simple. Its just that I seemed to suffer from, well, I don't exactly know what, that made what should have been an easy project into one that refused to co-operate. The brown one - for a friend none the less, was my first attempt. I felt something looked just the tiniest bit off. So I made the second one... And realized as I was sewing the corners that something had gone wrong. I had cut out and sewn the whole thing the wrong way. So much for boxy - it's so streamlined that it barely fits a 50g skein of sock yarn. Sigh. I decided that hopefully my friend would love the slightly off kilter brown one regardless of it's quirks and I kept the long skinny almost pointless one for myself. Some day I may try this whole thing again. Maybe I'll even get it right. But in actual fact it's going to be a while before I venture down this particular boxy bag path once more. Twice bitten and all that...
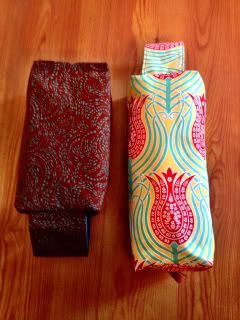 |
| WIP Bags |
So as you can see I'm all about bags lately. Next up I plan on making myself that
Necessary Clutch I've been obsessing about from Emmaline Bags! I have one all cut out and ready to sew, but then I started thinking I liked a different set of fabric in my stash much better so... We'll see which gets made. I'd also like to sew a bag for
Purse Palooza 2013 before the end of the month. Before any of that happens, though, I have to get cracking on some Halloween Costumes and a trick or treat bag I promised to a special little lady - our niece - who missed out on the
treat bags that I made for everyone for Baby Boy's first birthday party (she was a baby - she got a hat instead). I've got all the details hammered out in my head for these upcoming projects... Now just to execute them.


No comments:
Post a Comment