Wednesday, December 30, 2015

Christmas Craftiness 2015 - The Round Up

Well, here we are.  That time between Christmas and New Year's where I can sit back, relax for a few minutes and take a bit of a break from all the hustle and bustle of the holiday season.  Christmas was a lovely day for us, with everyone home bright and early in the morning for opening gifts and then having a huge brunch before they had to head off to their various Christmas dinner plans.  (although not as bright and early as the little boys felt they should have been here of course - they were up just after 5am this year, so had to wait a wee bit for the older ones to arrive)

Once again this year, I felt like I didn't get as many projects done as I had hoped.  Things went a bit crazy busy around here in the late fall, which set me back considerably, so there were a few things that got left off the list.  I'm not going to tell you about them though, because I'm saving those particular projects for next Christmas instead.   The silly thing is, last January I decided I was going to be super ahead of the game and start making projects then in order to avoid the "It's the week before Christmas, and oh my goodness I need to make sixteen bajillion gifts" panic.  I made precisely one project and then promptly forgot about my resolution.  Let me tell you, I thought I was still sitting smug and pretty until life got busy and then boy oh boy I regretted not following through on that "ahead of the game craftiness".  This coming year, I'm going to really try to do things ahead of time.  hahahahahahahahahahaha.  I know.  I know.  I live in a world built on delusion. ;)

Anyways onto the fun stuff!

The little boys set to work a few weeks ago making some new wall art for the holidays.  We did this last year and it was such a fun project we thought we'd try it again!  I think we'll try and keep up the tradition for at least a few years.  I envision down the road, years from now when the little boys are grown how precious it will be to have their teeny tiny hand and footprints hanging on our wall every Christmas!  They also did some art at school as gifts for us.

The top two are the ones we did at home, the "mistletoes" are Baby Boy's and the tree, Little Man's.
For my craftiness, I'll kick off (see what I did there?  ha ha!) with some hand knit socks I knit for my beautiful girls - G and Nick's lovely girlfriend, A.

These were my "ahead of the game project", Piccolo Mondo Anitco socks
I have no idea why I took a picture of just one. G does indeed have a pair of them!

A pair of Water for the Elephants for A to commemorate her trip
to Cambodia where she rode an elephant!
Next we'll move onto the knits for the "big boys" - J, N and G's boyfriend, B.

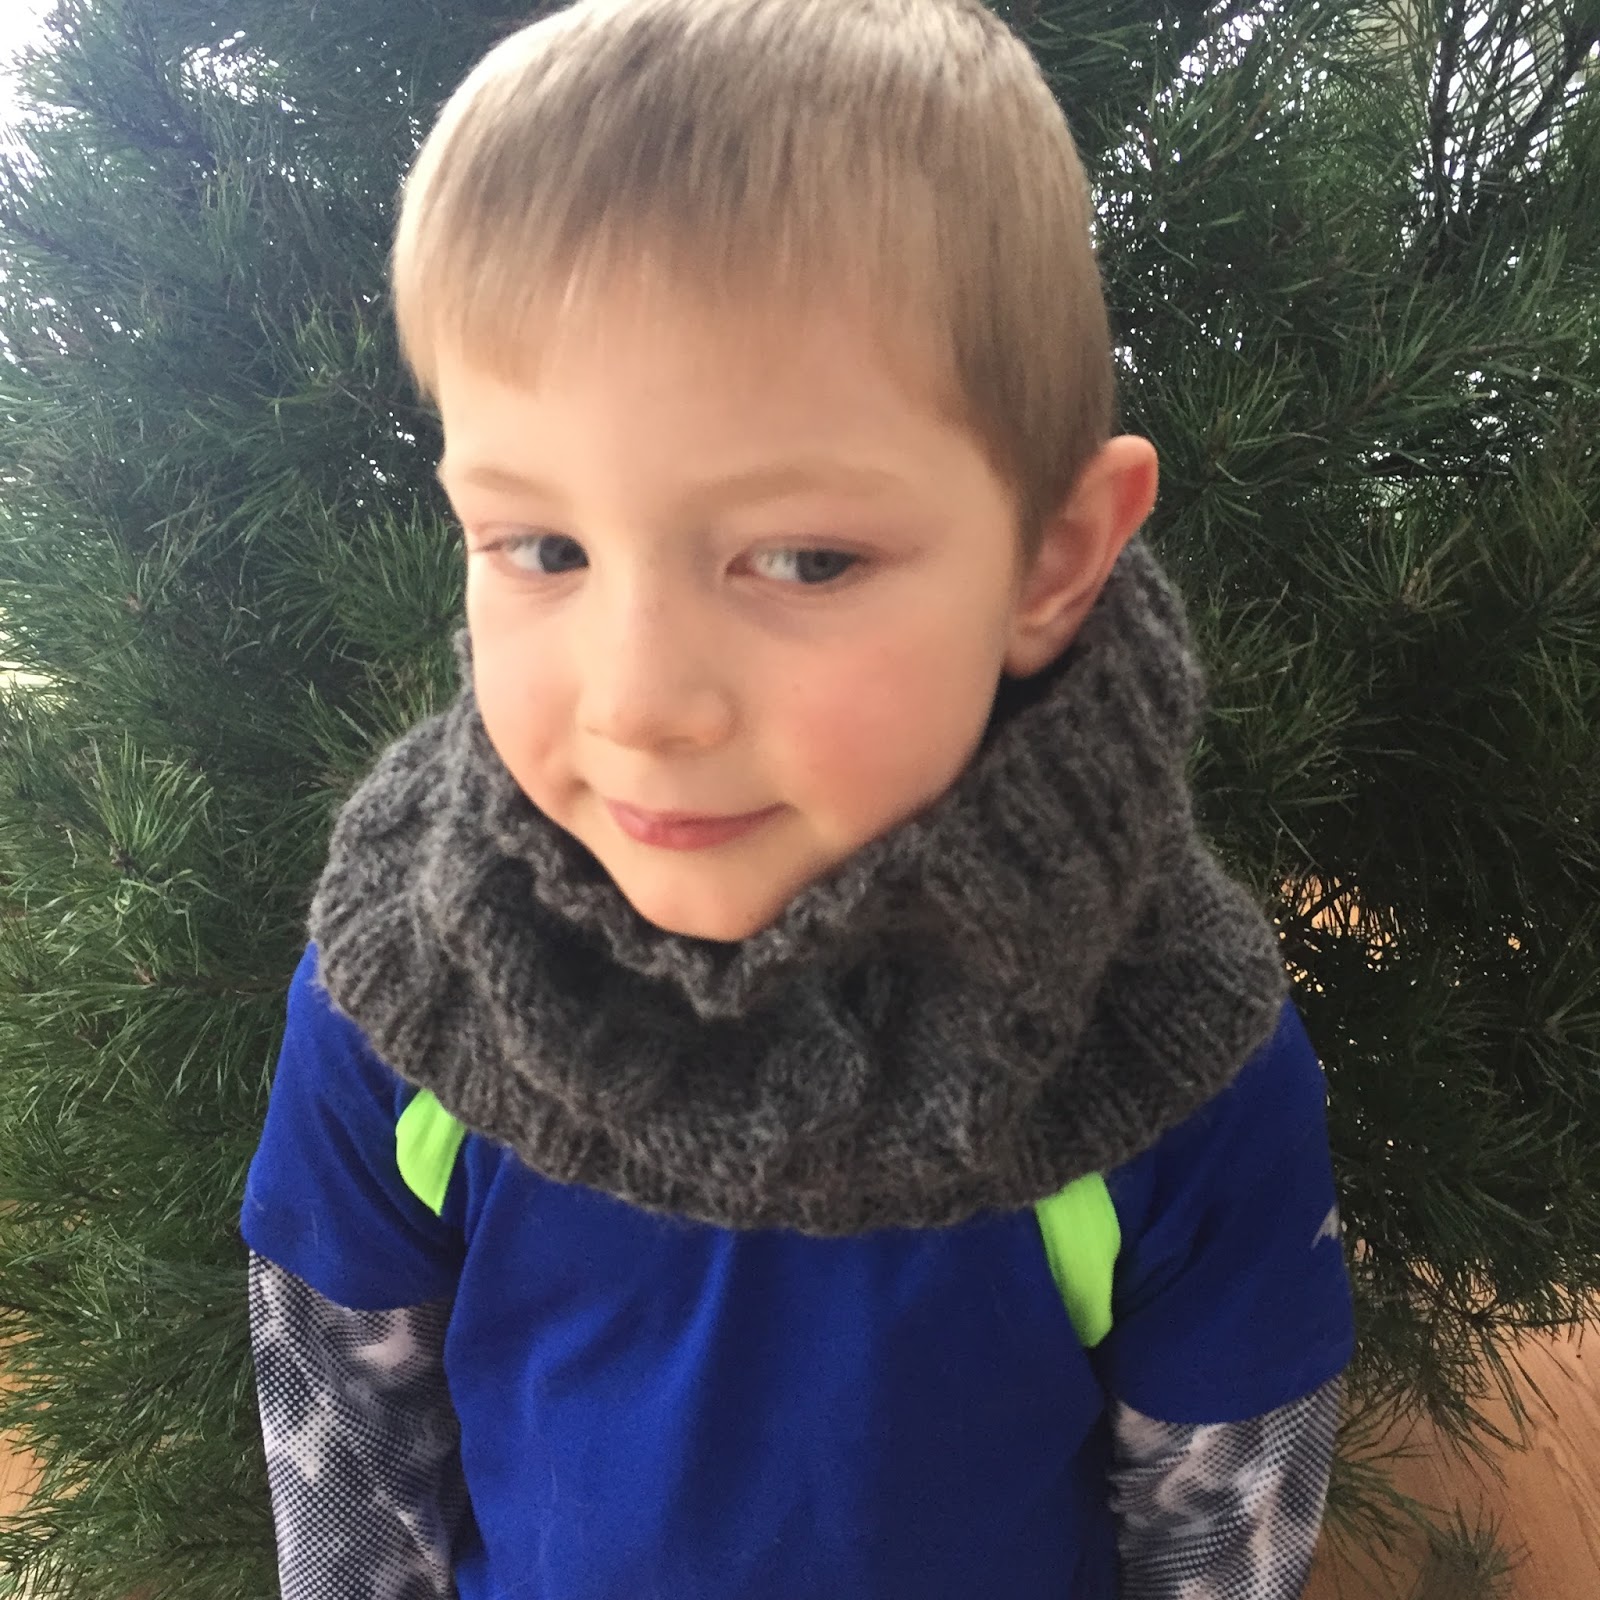
This one was for J - a Lansbury cowl, modelled by the handsome Baby Boy

And for B - Little Man is modeling the ever popular Oats pattern by Tin Can Knits
N's Wooly Bear Freestyle Cap almost didn't make it on time...
I cast off and wove in the ends at 3:30am Christmas morning! 
Of course no holiday crafting would be complete without some fingerless gloves in the project list (or so it would seem given my lists for the last few years!)

The first pair are "Leaves" for A, then the remaining four pairs were teacher's gifts
from top to bottom: Clary Mitts, Give em the Slip, Diamond Hand Wristwarmers and Magic Loop Mitts
That wraps up the knitting, so lets move along to the sewing!

The girls both wear scarves all the time, so I made them each a cozy flannel and lace infinity scarf
(my own pattern)

Earlier in the fall my nephew, who had requested "footie pjs" last Christmas, told me he'd outgrown his pair from last year and would really love a new pair.  I found out my niece also needed a new pair - not surprising since I think I sewed her pair almost two years ago!  So of course I obliged and they wore their cozy new jam jams home from the family Christmas Eve party.

The kids will be cozy warm this winter for sure!
Pattern is Kwik Sew #2704
Every Christmas I make the little boys a new pair of matching pjs for Christmas Eve.  I love surprising them with them, but this year I was really worried I was going to run out of time.  I even looked at some pjs at the store but held off buying them in hopes I could miraculously get the mama made ones done despite the time crunch.   Somehow I did manage to get a pair started for each of them on the 22nd of December and finished them up late the next night (Ack!!!! Moment of panic ensued when I found absolutely no buttons in the button jar to match.  How is that even possible!?!  Thank goodness I had snaps that would work!).  Taking a photo of two overly excited, overly tired little boys proved to be quite the challenge, so this is about the best view you get!

Wearing their new Batman pjs!
Pattern is a vintage Simplicity #6427
(How can it be vintage?!?! It's c.1974, which means its YOUNGER than me!)
The last project I sewed for Christmas this year just about did me in.  It's nothing untoward with the pattern, it was that I was tired and somehow between that and checking out my topstitching and just plain old not paying attention, partway through the back seams I sewed through my finger.  Bonus points go to me for not dripping blood on any fabric, but holy doodle that hurt like a son of a gun.  I've not had a "sewing through a digit" incident in almost 30 years and it's one I'd rather not repeat EVER again, thank you very much.  I almost gave up right there and then.  I also then had issue with the pockets and the zipper facing - not injury inducing, just pulling out my hair type issues.  The end result was worth the heart ache and hassle though, but I really felt it could've been a better experience.

G in her Greenstyle Creations Sundance Jacket
There were also a few other crafty projects for the holidays!

Some festive mugs done with Sharpie Oil Paint pens
for G and B to sip their mulled wine from
Every year since my kids were born I have given them a new ornament for Christmas.  I always tried to stick with a matching theme, which was significantly easier when there were only three of them.  Now that there's five plus the older one's significant others trying to find a matching theme became quite a challenge, so a few years ago I started making the ornaments instead.  This year's ended up getting done just under the wire - mostly because I just couldn't decide what I wanted to do.

Indecision.  It'll be my undoing some day.

Anyways - I finally made a decision and dashed outside shortly before we had to leave for the city on Christmas Eve and cut my branches.  Then at 11pm when we got home my wonderful husband carved the tops and drilled the holes for me while I ran around like a chicken with my head cut off, doing some hand sewing on G's jacket, wrapping presents, and putting presents under the tree and doing other miscellaneous odd jobs on my to-do list, then I set to work with some acrylic paints and an oil paint sharpie.  Sometime just after midnight I had seven cute little Santa ornaments ready to go!

Ho ho ho!

The little boys had two very special gifts that they had me help them make this year as well.  It was very hard for them to keep them secret and they were pretty much bursting by the time they were finally able to present them to Daddy on Christmas morning.

First up was a mug for him to use at work on his coffee breaks - I think this is likely going to become yet another tradition as they did one for him last year too and they're already talking about next year's mug.

Various views of the Daddy's new coffee mug
They also made him a new painted t-shirt.  I'm a bit worried that I didn't put enough fabric medium into the acrylic paints because it faded a whole lot when I washed it, but hopefully the initial fading is as much as it's going to do, because they really did work hard on their shirt and I'd hate for it not to last!


So that's it for the Christmas craftiness this year, but  I do have another project to show you that I just made as a birthday gift for my little niece.  I used pajama fleece and shimmery stretch satin for this  and it was a really fun project - fairly quick to make and low stress.  She was really pleased with it too I think, putting it on as soon as she opened it.  It's from Rissa's Mermaid/Fish Tail Lounge Sack pattern from The Plucky Butterfly Designs and I can definitely see making more of these in the future!  Unfortunately all the pictures I took of the little lady wearing her mermaid tail turned out blurry and out of focus.


As we approach the new year I'm going to work on some easy, relaxing projects.  I've got an Andi Satterlund cardigan, Anouk, on the needles for her latest knit along on Ravelry.  I've also got a Paprika Patterns Zircon Sweater on the sewing table that I'd planned to have done a few weeks ago and didn't manage to get done due to a bit of a fabric choice mishap.  And then?  I'm going to start on the those gifts for next Christmas.  (go ahead and laugh, we all know how likely it is that I'll actually follow through on that plan... LOL)

I hope you've all had a peaceful holiday season,  with whatever holiday or tradition you celebrate and that your New Year is full of happiness, good health and wonderful adventures!

Wednesday, December 02, 2015

You Know Dasher and Dancer...

... and Prancer and Vixen.  You know Comet and Cupid and Donner and Blitzen.  But do you recall the most famous reindeer of all, Rachel the Red Nosed Reindeer...


I'm really excited to be over at the Scientific Seamstress Blog today, where I'll be talking about how I've had some festive fun with their latest pattern, Rachel Reindeer!  I hope you'll stop by and visit me there!

Monday, November 30, 2015

Irena Top


Early this morning I told you about my Liana Stretch Jeans, and now I'm back because I want to tell you about another great pattern I was fortunate enough to test for Kennis of Itch to Stitch a few weeks ago!

This is the Irena* top!  It's just been released today and is on sale right now - there's also an extra savings for Cyber Monday today - you can check out the details on the Itch to Stitch site!


Irena is a deep V, cozy sweater. It calls for 75% stretch fabric and for this version, I used a really soft sweater knit that I was able to get on sale at Fabricland in the city.  It's longer length makes it perfect  for wearing over skinny jeans or leggings too.


The only tricky part of this quick to sew top is the corners of the neckline (I'm not sure if you can see I have a teeny pucker on the one corner - but unpicking stitches on this fabric was a beast so I decided I can live with it!).  No need to worry though.  Kennis walks you through the process in her thorough instructions and the rest of the sweater is really straight forward and easy!

I am also going to show you my second version - bear in mind though this was before the pattern was tweaked a bit, so it's not quite the same as the final version, but I love it so much and wear it so often I thought I'd show you anyways.  For this one I chose a sweatshirt fleece with only 25% stretch.  I meant to size up a bit to accommodate for the lack of stretch in my fabric, but completely forgot.  It's a bit more fitted than the intended design of the pattern, but it's warm and comfy and I can get in and out of it without needing the jaws of life to extricate me so it's all good! Ha ha!


I'm not sure why the bust is pulling in the photo.  I'm pretty sure it doesn't do that in real life.  Must be the way I'm standing or something.

I won't show you version one - although I should in the manner of a cautionary tale.  When choosing fabrics, you really need to pay attention to not only the stretch a fabric has, but the recovery.  If you'll remember from my earlier post today, I had this particular problem with my jeans as well.  Recovery really does make all the difference in a project.  For my first version of Irena, I carefully chose a lightweight jersey out of my stash with 75% stretch.  I felt it might be a bit too drapey as I was sewing it up, but in for a penny, in for a pound, right?  I think my jersey was a bit light to start with for a top like this, but that combined with the lack of recovery and oh my! Incredible growing top!  Laying flat on the table it measured correctly, put it on and it sagged to great lengths.  Yikes!!!

So lesson learned.  Choose fabric wisely.  (One would think I'd have learned this lesson and have it firmly cemented in my brain at this point, but apparently I simply refuse to believe certain facts of life.)

Anyways, two outta three ain't bad, so they say, and I do have two great tops that are in regular rotation in my wardrobe - at this point I'm pretty sure that people are starting to assume I only own two tops in my entire wardrobe, I wear them so often.  And of course I have the one that I'll probably take off some length of to accommodate the drape (I've used the term loosely here - this fabric goes beyond common drape!) and it'll make a great, soft and cozy lounge around the house type top. Waste not, want not and all that!

You can find the newly released Irena Top for sale over at the Itch-to-Stitch website!

Muppet Flail Arms! : or Liana

Strange title for a post?  Not really.  Imagine if you will a happy muppet-y flailing of arms.  I'll give you a minute...  Ok.  Got that image in your mind?  Good!  That's pretty much me right now!

Why you ask?  Because I've made myself a pair of jeans.  Yes.  I made jeans.  And I survived!!!!  Ok, ok.  I know I'm late to the party by about a year.  Every other sewing blogger/bloggess out there has made a pair of jeans.  But being late to the party has not diminished my excitement in the least.

I decided last winter that I was going to make a pair of jeans for myself.  So I bought a pattern. Then I bought denim.  Then I pre-washed the denim...  And then I completely lost all courage for making jeans.  Seriously.  I was completely terrified of the prospect of it.  Could not even contemplate being successful at it, such was my intimidation.

With my "good time gal" crappy Walmart Singer, there was absolutely no way I could make jeans anyways.  That machine had fits at anything heavier than two layers of quilt cotton.  But then I started shopping around for a new machine in the spring and I specifically chose a work horse 40-something year old Pfaff off of Kijiji with the notion that I could make jeans with a machine like that.  The first thing I did when I got that baby set up on my sewing table was try sewing denim (for research purposes it sewed through a whopping six layers of denim like it was butter).  But I was still way too intimidated by jeans.  Oh jeans how you scare me so.  There's just so many areas that they can go rogue on you, really.

Then one of my fave designers, Kennis Wong, of Itch-to-Stitch - you may recall I already have a slight obsession with her Idyllwild* tee going on - put out the call for testers for her new Liana Stretch Jeans pattern. Liana comes with three different leg options - skinny, straight and bootcut and uses denim with 25% stretch.  I jumped at the chance without even giving it a second thought.  I knew that the combination of Kennis' pattern making and instructions and the motivation of having a deadline was exactly what I needed to tackle jeans head on.  And I was right.

And actually?  They're not really that scary after all!  I had a bit of a fitting conundrum that was causing me one heck of an unflattering rear view - but thanks to Kennis, with her wisdom and advice, I was able to sort out that I just needed to do a bit of tweaking of the pattern for my shape and what a difference!


Yikes!!  Lets get those wrinkles going, going, GONE!!!!
For your amusement here's a little collage I put together to show the before, in progress and final tweaking I did for the derrière.  Yikes! Try not to laugh too hard at those huge smiley butt wrinkles.    It's amazing what 3/8" of tweaking can accomplish!

I love that this denim has a subtle stripe to it!
Also topstitching.  Love how it turned out!
I was worried about the topstitching.  I thought it might be a bit of a nightmare switching back and forth from thread to thread as needed, not to mention when using such a contrasting thread any little blunder is going to be so painfully obvious, but in the end it wasn't bad. You never have to change the bobbin thread, so it's pretty quick and painless really and actually it turns out I kind of like topstitching.  My trick for keeping my double lines nice and even was to do the edge stitching and then align my right edge of my presser foot (which conveniently - thank you Pfaff of the past - happens to be a lovely, perfect 1/4") along the edge of the edge stitching and voila!  There's also the built in benefit with topstitching that you get to have the rights to "ooh and ahhh" at your own handiwork every time you finish a section of it.

This is how I feel about taking photos of myself.  LOL
Also what the heck wind?!?  Could you give me two seconds between gusts?  Please?!?

At least this one is pretty normal.  LOL!  These are the straight leg version of Liana.
Something is obviously fascinating on the ground...

Did that camera timer go or not yet?!?
So there you have it!  Jeans.  Just like that.  Sewing didn't even take that long all things considered.  I set the timer the other morning for two hours and got the backs and the fronts all done.  A couple more hours for basting and fitting and modifying for my body shape, and then another hour and a half or so for hemming and the waistband and I was done.  Incredible!

I'll show you the first pair I made of Liana too - because while they're not the best fit, they're not really that bad. I think with some tweaking I can still make them work, but I had a couple issues with them.  First off my denim had really poor recovery.  Like a pair of jeans from Old Navy, I can wear them for about five minutes and then they start to sag in a sorry way.  So keep that in mind if you're making your own pair.  The percentage of stretch is very important for sizing, but ultimately so is the recovery.  (make sure that fabric bounces right on back to where it started from or prepare for some disappointment) I also panicked about sizing and made them a size too big.  Ooops a daisy!  Should have thought that one through better!  But this pair taught me so much about the construction of jeans and really helped me to overcome the intimidation.  They were a great practice pair and the fabric I used for the pockets? What seamstress wouldn't smile at it?

Pockets for my first pair
And since I'm showing off pockets -
here's the second pair making use of what I had left over from my "Bluebirds of Happiness" dress 


Again what is so interesting on the ground?!?!  LOL


Not bad looking until they stretch out and don't want to go back!
(Remember good recovery = happiness!)
So are you ready to take the plunge and try making your own jeans?  I highly recommend it!  Liana is a great pattern to start your adventure in jeans making with - Kennis walks you through each step in the illustrated instructions - and if you're an experienced jeans sewist, I think you'll really enjoy these! Having the opportunity to be a tester and getting in on this pattern at the ground level, so to speak, I know that she put a lot of work into creating a great pattern that will work for a really wide range of sizes! You can find the newly released Liana Stretch Jeans pattern over at Itch-to-Stitch.  Kennis is hosting a sew along for Liana and also has a great sale going on right now until December 6th!!

I'll be back later on today to tell you about another great new pattern from Kennis that I was lucky enough to test!

Tuesday, November 24, 2015

Penelope

Well, talk about getting things done just under the wire!  I finally sewed the last two buttons on my new cardi and blocked it.  The knit along ends tomorrow!   Phew.  Made it!


The cardigan in question is Penelope, another great design from Andi Satterlund, that was the project for the Untangling Knots Group fall knit along.  It is, like all of Andi's patterns, an easy to knit pattern.  I imagined I would have finished it a couple of weeks ago, because it is very simple and straight forward.  It is a full length cardi, so I anticipated a bit more time on the needles, than a cropped cardi would take, but I didn't imagine it would take more than a month.

I didn't have any crazy issues with it, like I did with my Sunshower cardi I knit in the summer - I don't know if you remember my adventures that led me completely astray multiple times (ahem.  all user error, of course, the pattern is great).  I had no problems except much to my dismay, my knitting mojo seemed to get up and leave this fall.

I have no idea where it's gone.   (If you spot it somewhere along your travels could you please send it back to me?  I've got loads of projects lined up to do for the holidays and no "Umph" to get them done.  Or really started for that matter.)

Where oh where has my mojo gone?  Oh where oh where could it be?????

Anyways, all that being said, I did finish on time for the KAL deadline, and I did end up with a cardi that I really love.  I knit this one straight from the pattern with no modifications what so ever and the fit is perfect for what I wanted!


This one is knit in some stash yarn I had.  Sirdar's Country Style DK - a wool/acrylic blend was used for the contrast and Universal Yarns Dolce Merino, which is a merino/microfibre blend for the main colour.   I'm hoping that the Dolce Merino holds up alright.  It seems like it could have a tendency towards pilling.  Both yarns are super soft though and well, stash yarns fit the budget quite nicely of course!


I think the only thing that my Penelope is missing is a new skirt to go with it!  I'll have to think on that.  Oh.  And a new pair of shoes.  (Those will definitely have to wait though.  LOL).

Monday, November 16, 2015

Under the Category of Better Late Than Never...

Or maybe we can all pretend that we just hopped in a time machine and went back a month!

I wanted to show you the few things I did for Baby Boy's fifth birthday in October and somehow time has flown by and here we are mid-November already.

Our littlest guy had not one, but three celebrations for his birthday! MADNESS I tell you.  Excessive madness!  LOL

Little Man made his brother a sign for the entrance way

The first was his "family birthday" party where I think I disappointed my nephew with my lack of handmade goodness in the treat bag.  I have to say, I felt both badly and incredibly honoured when he said, "What's the thing you made this year?  I always like the thing you make the best." And then he proceeded to list off the things I'd made in the past and I'm pretty sure he thought the cookies I'd made this time just weren't up to snuff.  One of my nieces had apparently been wondering on the drive out what kind of thing I'd have made them too.

So from here on in, I hereby declare that Auntie Sarah will stop being so lame and figure out something good to make for my lovely crew of nieces and nephews! (Really, I just couldn't come up with a good idea and then ran out of time.  No excuse really.)

Anyways.  Baby Boy is crazy about dolphins.  Specifically crazy about the dolphins Winter and Hope  of the Dolphin Tale movie fame.  We had got a second hand book about Winter last year and he immediately became obsessed. Playing Winter and Hope, talking about them, drawing pictures of them, telling us great epic stories about them...  So naturally a dolphin theme was what he wanted when birthday party planning rolled around.

For his family party I made a dolphin shaped cake and the aforementioned cookies.

Dolphin cake #1

Dolphin sugar cookies - still working on my Royal Icing technique 

A couple of days later we had his actual birthday, which required another cake and the traditional birthday crown.  I love that the little guys enjoy the birthday crowns still.  I never guessed when I made the first one for Little Man's first birthday that it would become a yearly tradition.

Dolphin cake #2

What a guy!  I can't believe he's already five!!!
 Finally we had his "school friend" party towards the end of the month.  I asked him what kind of cake he'd like figuring he may have been dolphin caked out by that point, but he requested an exact replica of the one he had for his family party.  I feel like I could make a dolphin shaped cake in my sleep now.  Ha ha!

Dolphin cake #3
I also wanted to have a game planned for the kids at the party.  I thought a rousing game of pin the tail on the dolphin would be good to amuse ten five year olds, so I got some poster board from the dollar store and painted a dolphin on it.  Then I cut out tail shapes from card stock - a different colour for each party guest.  Note to self: A loose weave scarf for a blindfold that the kids can actually see through kind of defeats the purpose of the game...  all the tails pretty much ended up one on top of each other in the right spot.  At first I thought the kids were just that good.  Then Little Man confessed,  "There's tiny holes in the scarf, Mom!  You can see right through it!!"  Ooops!

Help kids!  I need a tail!!!
And thus ends the birthday month of baby boy.  I think I'd better try and pin Little Man and Baby Boy down on their birthday themes for next year so that I can start thinking now of things to make for party favours.  Maybe that way I'll redeem myself in the eyes of my nieces and nephews!  :)

Saturday, October 31, 2015

Happy Hallowe'en

Just stopping by quickly today to wish everyone a Happy Hallowe'en!


We've been gearing up here for a few days now for the festivities.  Thursday night the little boys did their annual pumpkin carving ('scuze the mountain of dirty dishes - we'd just finished supper)


Friday was the school Hallowe'en party and the boys were excited to get dressed up in their costumes.  Little Man decided he was going to be a vampire and was excited to wear J's old vampire/Zoro cape that I made him some time back in the late 90s. I made the bow tie as a new addition to the costume using Sis Boom's Bosco Bowtie pattern.  He combined that with his suit from our wedding last year, some face paint and a wig to complete his dashing Dracula look.  The wig stayed home from school as he decided he looked funny in it and thought his classmates might laugh at him.  There was no convincing him otherwise.


Baby Boy had his heart set on being a vampire bat.  For his costume, I used the very popular Max and Meena All Ears Hoodie.  What a fab pattern!!! I was so happy when I was able to get it on sale a few weeks ago - the US/Can exchange rate has been making me think twice about all my cross border purchases these days, so the sale was much appreciated and great timing.  By the way - on that note, if you're a member of the Max and Meena Facebook group, Jamie posts a one day sale almost weekly!  I think I'll make some other ears versions for the boys in the near future.  Best part of it?  After Hallowe'en has come and gone the hoodie can go into his wardrobe for regular wear!

So the All Ears using the fox ears slightly modified to be bat ears, self-drafted wings, his suit pants (apparently vampire bats wear fancy pants according to Baby Boy) and his mask from his spider costume last year made for a very happy little bat.


Of course what would Hallowe'en be without some treats??  I signed up to bring a sweet treat for the class parties - of course I did!  I LOVE sweet treats and  I LOVE making sweet treats!!!  I knew that this year I wanted to do some sugar cookies. With the class party in mind, a few weeks ago I even bought a new set of Wilton cutters at the dollar store that had an awesome combination of broom, hat, cauldron and shoe. Spoiler.  I did not use the Wilton cutters.  Nor did I use the entire bin of other ghosts, witches, bats, pumpkins, black cats etc. cutters.  I used a tulip cutter and a smaller circle cutter to make ghost and monster eyeball cookies.  I love doing the royal icing and although I'm still perfecting my technique and consistency, I think I'm slowly improving.  No leftovers came home so I think they went over well in the Kindergarten and Grade One classrooms!


Now, I'm off to peruse Pinterest for some fun and quick ideas for supper tonight and then some spooky sort of snack for after trick or treating.  We're getting together in town tonight to take the kiddos trick or treating with school friends and then all having a little get together afterwards.  Hopefully the rain clears out and it's a nice evening for being out.  Should be loads of fun though, no matter what the weather, with a crew of an exuberant six and unders!

I hope you all have a very fun and safe evening no matter what your plans are for tonight!