Monday, September 30, 2013

I Really Do Love Me Some Lace!

I have a new cardigan and I absolutely love it. It's probably my number one favourite knit so far this year (and just for reference, I've knit 28 projects to date in 2013, so that's saying something!)

Hetty by designer Andi Satterlund is a sweet little retro vibe cardi - slightly cropped, fitted, with an all over lace pattern. I modified mine to be slightly less fitted and slightly longer, which was so simple to do as you switch from lace to stockinette as you do the shaping, so there's nothing complicated to figure out.

I have been hoarding some Arucania Nature Wool in my stash for over three years now. It was one of the treasures I received from my dear friend, Kristy's mom's stash. It also happens to be one of my favourite colours!  I gave been waiting for the right pattern to come along and as soon as I saw Hetty I knew that it was the one.

Timing was perfect too. Luvinthemommyhood's Summer Sweater KAL was still in full swing and just before it was scheduled to finish Andi's Ravelry group, Untangling Knots was going to be kicking off a knit along specifically for Hetty. I love knitting as part of a KAL, it really motivates me to keep going. Although, with Hetty I didn't really want to put it down anyways. It was a totally unique construction from any other thing I've knit. Top down with sleeves attached by picking up stitches and then doing short rows to form the cap. (I'll admit it made me feel brilliant when I mastered those short rows I've been so intimidated by!)

I finished it on Friday morning and it got a bath in Euclan then blocked and was ready to wear to my dinner date with my sisters last night.

Photobucket Pictures, Images and Photos
Swatching - actually got gauge first time around!

Photobucket Pictures, Images and Photos
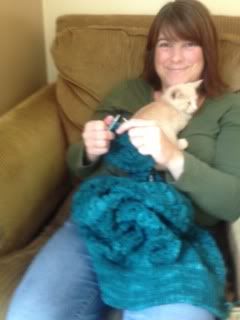
Trying to knit... with  help -
Little Man took this photo the other day
Photobucket Pictures, Images and Photos
Splish Splash getting a bath!
Photobucket Pictures, Images and Photos
All Done!!! I love it!!!!!
Photobucket Pictures, Images and Photos
Love the fit of my Hetty!


Friday, September 13, 2013

Monsters on the Move!

Early in the spring one of my mama groups on Ravelry got a group together to do a "travelling sock" project. There were a few of us who couldn't commit to a sock project for various reasons - for me it was because they had to start as toe up socks and I wasn't sure a project where others would be depending on my skills would be the best place to try and learn toe up sock knitting - so the idea for a traveling monster project was born. (Some moms did both! I bow down to their enthusiasm and time management skills!)
Photobucket Pictures, Images and Photos
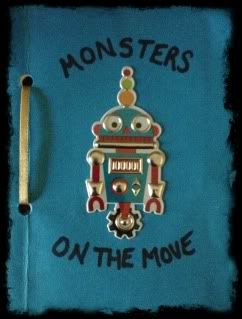
A small diary travelled with each monster -
this was ours
We could each choose our pattern and it travelled along. We also could make requests as to what kinds of yarns we wanted to be used or what colours were our little one's favourites. We all started our own monster (some of us, like myself chose to do two smaller monsters rather than one big one so that our "October Baby" and their sibling would each get a monster.
Photobucket Pictures, Images and Photos

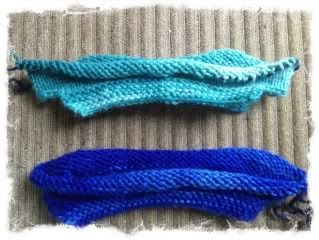
This is what the boys and I sent off into the world
I wrote up a very loose pattern for our monsters. Really what I hoped was to just give a jumping off point and hoped everyone would have fun. The part in the photo was meant to be a flat base, but the first knitter changed them into legs by shifting the start point (I assume). I love the legs a million times better than my flat bottom original idea!!! They are perfect!

Each knitter worked a few inches and then would mail it on to the next knitter. The last knitter finished up the monster's face (if requested) and sent it home flat and unseamed (to cut down on postage) to its owner. We kept the monsters a surprise so that we didn't have any idea how they'd look when they got back to us. Our monsters have travelled nearly 19,000 kms around North America before coming back home to us!!

Photobucket Pictures, Images and Photos
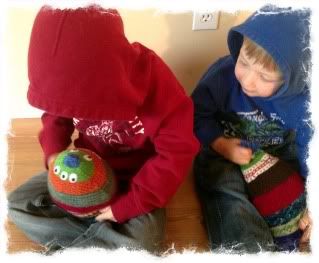
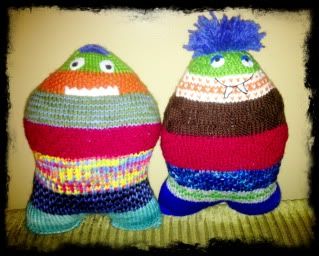
And these are the awesome monsters that arrived home!
Such a fun project!! And such a great group of ladies to do it with. Definitely good times and Little Man and Baby Boy adore their monsters!!

Photobucket Pictures, Images and Photos
Getting to know their monsters!
 Little Man is tickled with the fact his monster has eyes on the back of his head too
 and Baby Boy loves that his has hair!

So that's the last of my "crafty installments" for this week! Of course I'm still plugging away at my Hetty Cardigan. I was knitting while tired the other night and made a mistake I didn't notice so I have a few rows to rip back before I continue on. Sob!! I'm also busily working on some sewing projects that I'll likely show you next week! Hope you all had a great week and got in some time for your favourite hobbies or activities too!

Tuesday, September 10, 2013

Working Nine to Five...

Sorry. I've got Dolly Parton running through my head right at the moment. You'll have to forgive me if I break into song at some point along the way today.

The reason she's on continuous loop is my latest sewing project. Another gorgeous bag pattern from Anna of Charmed Liebling! You may have noticed I have a bit of a thing for her patterns. It's like an addiction. She sends a request to ask if I'd like to test and I'm helpless. I just love her patterns that much.

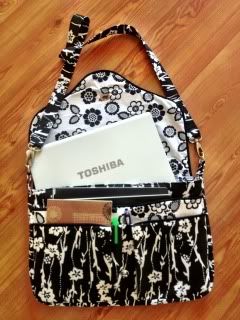
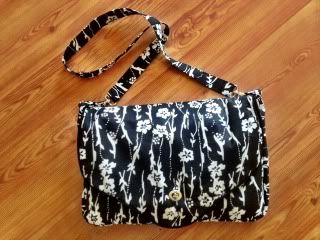
Anna has just released her latest, The Working Girl Laptop Bag this week and it's a beauty! Loads of pockets, a generous size - it even fits our somewhat large, somewhat ancient Toshiba, and great details such as piping (she guides you through making your own, or check out some of the other test versions! A couple testers used ric rac instead of piping and it looks amazing, another one did ruffles instead!) as well a locking clasp and swivel hooks so the strap is removable.

Photobucket Pictures, Images and Photos

I was really excited to get the pattern to test. Not that I really need a laptop bag, but I just loved the look of it and couldn't wait to try it out. As per usual her pattern did not disappoint. She puts so much attention into creating instructions that make it easy for even an novice sewer to understand, with lots of explanation and photos.  If you haven't checked out any of her patterns yet, I really urge you too.


And really, if you sew and you have anyone on your gift giving list that carries a laptop at all, I think this would be the perfect gift.


It's quick to sew up too. I only spent two days working on it, and part of that time was working up the courage to cut a hole in my beautiful bag to insert the locking clasp. Yikes! That is one heck of a nerve wracking task. Right up there I think with steeking your knitting. Well. Maybe not quite at that level, but close.

Photobucket Pictures, Images and PhotosA word about locking clasps.  It's come to my attention that not all clasps are created equal. Boo to that. I had ordered a locking clasp from Emmeline Bags when I ordered my gate rings for my Liebling's Bag, with the intention of using it on the Necessary Clutch I'm so smitten with. Then I got the project from Anna and thought I'd use it on my laptop bag instead. But. (There's always a but...) Then I was in the little fabric shop in town and spied locking clasps there. So I got one thinking I could use it for my laptop bag and the one from Janelle's shop for the clutch and I'd be covered on all basis.  EXCEPT not all clasps are created equal as I mentioned.  The one from the local shop is absolutely abysmal.  Where the ones from Emmeline Bags leave a neat professional looking finish inside and out, the un-marked ones from my local shop are applied like a magnetic snap would be, which ends up with the prongs showing and worst of all it lends itself to fraying around the edges. EEEEK! So not what you want when you've spent time and money on a beautiful bag. Not only is it unsightly, it doesn't seem like it would be very sturdy. Unfortunately this epiphany did not strike until after I was already finished the bag except for the final step of the clasp - the locking mechanism was already in (with much cursing and usage of clear glue to stop the fraying - where the h-e-double hockey sticks did my fray check vanish too????) and I'd have to take the entire bag apart to use a different clasp. More clear glue was used and hopefully that suffices to keep any fraying at bay, but really. Don't waste your time. Go for the good ones and you'll be much happier. You'll want to look for one with a little screw on plate for the back. It'll make a world of difference to the finished product.

Anyways, despite my disappointment with my less than great quality locking clasp I am really happy with my laptop bag and how it turned out! Stylish yet functional and versatile. You can't beat that kind of combination!  Head over to Anna's website and see the other test versions for inspiration then get working on a laptop bag of your own! (I might even use it as a knitting bag for going to knit nights! I could easily fit my ipad, a knitting project - even a large one, and all my necessities in the bag.)


And now, since I've been humming it in my head the entire time I've been typing, I'll leave you with this country classic from Dolly. You're welcome. :)


Monday, September 09, 2013

Miette

I have so many things to tell you about that I've been working on lately crafty wise that I don't know where to begin.

I've been mentioning it long enough and yesterday I finally managed to get a few pics of my newest cardigan, so I think that's where I'll start for tonight.  It's Miette from designer Andi Satterlund.  A sweet cardigan with a retro vibe and pretty feminine eyelet detail along the edges.

I fell in love with the look of Miette ages ago and knew I wanted one to wear with my summer dresses. Of course procrastination and a need to order yarn being what they are, it ended up finished sort of late in the season. It was also a billion degrees out when I finished it, so no need for a cardi at all. I am glad I got it done though and it'll be ready for the minute spring hits next year.

I chose to modify it from the 3/4 length sleeves to short sleeves to make it even more summery. (Also I'm lazy and sleeves are my knitting nemesis.  I HATE knitting sleeves.) It really only took about a month to knit and would have taken much less time except I sort of put it aside when my knitting mojo went out the window with the sweltering heat of summer.  (Interestingly enough I suddenly started going on it again when summer all but vanished for a few weeks in the middle. Ha ha!) Also, knitting something white while sitting on the deck seemed a bad idea.  Things have a habit of getting a bit dirty outside and I didn't want some sort of ghastly mishap occurring to my pristine white cardigan.

The buttons were another time killer for me.  I decided I absolutely needed vintage buttons for my Miette.  I justified it by the fact that I could get them just as cheaply off of Etsy as I could brand new buttons from the fabric store.  Especially if I went to the tiny shop in the local town instead of the big chain store in the city.  So I ordered a set. Actually, in manner of full disclosure I should admit to ordering two sets.  BUT! They were a great bargain. I promise you that. Really. They were.

The first set was a set of eight 1920's glass buttons.  They were very pretty. I thought they would be perfect, however, what I failed to do is mathematics.  Or proper mathematics anyways.  They turned out to be far too small.  Oooops! Have no fear though. I'm thinking they'd be perfect on a cute button down the front shirt at some point. I'll use them. It's not like they'll go bad! And did I mention they are 1920's GLASS BUTTONS?????

So, I had to get a different set. Which, ahem, I'd actually ordered long before my too small buttons arrived, only because after ordering the glass ones I found some 1960-ish plastic buttons from a closed out haberdashery in Paris for a song. 19 buttons for under $8.00  (and that included shipping!!). I'm lucky if I can get four nice buttons for under $8.00. My Parisian buttons arrived quickly - even before the ones from the states, but at that point I didn't know that my glass ones would be too small so I waited it out thinking that way I could compare and decide. It cost me a couple extra weeks in finishing time, but that's alright. As I said, I'll be all set for next spring!

I think it will be a really great addition to my spring and summer wardrobe in the cotton blend Berroco Weekend yarn I used!


Well that's project number one! I'll tell you about another tomorrow.  But for now I have (BF)G's lunch to make and coffee to set for tomorrow morning and I am eager to get back to working on my newest sweater, Hetty (which is also by Andi Satterlund - I LOVE her designs!)


Sunday, September 08, 2013

Wild Chokecherries!

Photobucket Pictures, Images and Photos
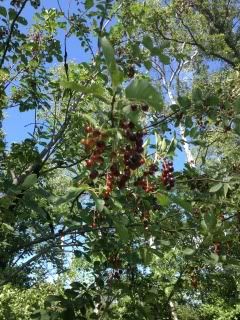
It's definitely a chokecherry tree -
 taken only a few days before the chokecherries turned dark purple
and were ready to pick!
I seem to have developed a small obsession with chokecherries after having discovered several, dripping with berries, chokecherry trees on our property (and confirmed by a quick picture text message to Mom a few weeks ago, having no desire to accidentally poison my family if I was wrong). They are actually everywhere I turn, except unfortunately the best one's seem to either be too high to reach with a ladder or too awkward for bush crashing too get too. There has even been a small incident involving over five foot tall stinging nettle in the gathering of chokecherries as well. Obsession. I have it something fierce. I seem to have a crazy need to pick all chokecherries. It's as though I dare not waste, or Mother Nature may determine my property to be unworthy of this boon of fruit.

Wild chokecherries, which are native to Western Canada, are an interesting sort of fruit. They are unbelievably tart, and more than a little astringent. They will dry your mouth out in a second when eaten fresh off the tree. One taste had me gasping and my mouth puckering for the rest of the evening. And yet, Little Man eats them by the handful. Crazy kid! Boil them, strain the juice and cook with sugar, however, and suddenly they transform themselves into amazingly delicious syrups and jellies.(and apparently wine - maybe a project for next year) just don't eat the stones if you're eating them whole or crush them if you are making juice - they contain Hydrocyanic Acid, which could make you sick if you consume too much. But the fruit itself is perfectly safe!

So, if you're like me and have chokecherries a plenty at your disposal here's a few ideas of what you can do with them!
Photobucket Pictures, Images and Photos
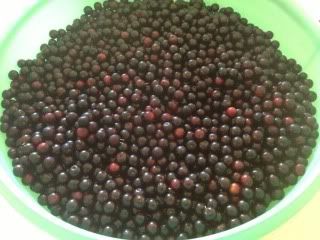
Lots and lots of chokecherries!

Preparing The Juice

First off you will need to pick, wash, boil and strain the juice. To do this, place your washed chokecherries in a large pot and barely cover with water. Bring to a boil, then reduce the heat and simmer for 15 minutes. Remove from heat and strain. You can use a couple layers of cheesecloth, a jelly bag, or like me grab an old cotton pillowcase from your linen closet that you don't care about staining.

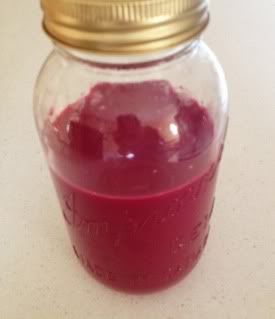
I place my colander on top of a bowl then hang my pillowcase "jelly bag" over the colander and pour the contents of my pot into it and let it pour through. I will use a potato mashed to press a bit more juice through at the end. I know a lot of jelly makers would be horrified as you're never supposed to do anything but let juice drip through, lest your jelly be cloudy, but from what I've read you can't expect a clear juice from wild chokecherries anyways. I've certainly found this to be true - it makes a somewhat thick, opaque, pink-purple juice, not even remotely close to clear! So go ahead and get every last drop you can! Waste not want not and all that! (just don't crush the stones!)
Photobucket Pictures, Images and Photos
Chokecherry Juice
So now you have juice. What to do, what to do????

All three of the following recipes will follow basically the same process once you've cooked it.

Processing Instructions

Fill clean, hot sterilized jars leaving a 1/2" headspace. Run a non-metal utensil such as a chopsticks, spatula or plastic knife, down the sides of the jar to remove any air bubbles. Wipe rims and apply snap rings and lids. Process in a boiling water bath for ten minutes.

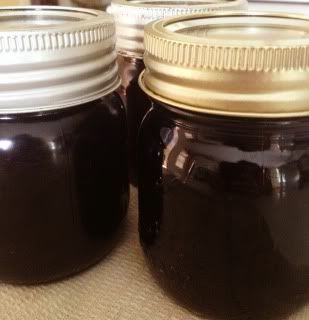
Wild Chokecherry Syrup

There is NOTHING in this world so tasty on pancakes or waffles. Seriously. It's heaven.

4 cups prepared juice
4 cups white sugar
1/2 cup lemon juice
1/2 pkg of powdered pectin (such as Certo which comes in a 57 gr/2 oz box)

Combine all ingredients in a large pot, bring to a full rolling boil for two minutes. Remove from heat and process as above. (makes approx 3 1/2 pints)

Photobucket Pictures, Images and Photos
Chokecherry Syrup

Wild Chokecherry Jelly

So good on toast and scones. YUM!!!

3 1/4 cups prepared juice
4 1/2 cups white sugar
1 pkg of powdered pectin

Combine prepared juice and pectin. Bring to a boil and then add sugar. Return to a boil, allowing the mixture to be at a full rolling boil for one minute. Remove from heat and skim foam if necessary, then process as above. (makes approx 5 half pints)


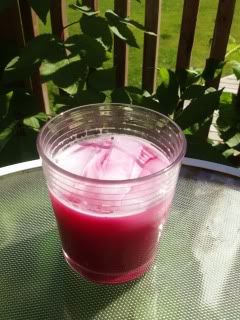
Wild Chokecherry "Soda" Syrup

So incredibly refreshing on a hot summer day!

3 cups prepared juice
1 cup white sugar

Combine prepared juice and sugar and bring to a full rolling boil for one minute. Process as above. To serve, pour a half glass of soda syrup (or to taste) over ice and top off with either soda water (we have a soda stream machine for making our "bubbly water") or ginger ale.
Photobucket Pictures, Images and Photos
Chokecherry Soda

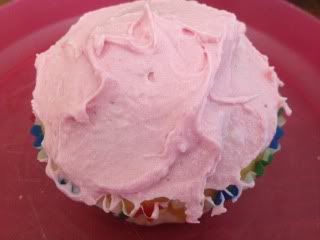
And for one last treat... I whipped up some chokecherry frosting the other day to put on vanilla cupcakes! So pretty and pink and not a drop of artificial coloring used at all! I made my usual buttercream using a bit of lemon juice in place of the milk and vanilla then stirred in some jelly and blended until smooth. So simple, yet so tasty!!!
Photobucket Pictures, Images and Photos
Chokecherry Frosting


I hope you enjoy these recipes as much as I do!

PS: I used a couple online resources and of course my Mom. For more info check out the following websites. Sorry I'm not sharing my mom - well except with my seven siblings, but that's only because I have too. ;)
The University of Minnesota
Manitoba Association of Home Economists


Wednesday, September 04, 2013

A New Bag!

First off, apologies for any potential weirdness that might occur in this post. I'm blogging from my phone. My Internet has died a mysterious and sudden death here at the house. All things look good, but nothing connects. It has been days. I may go mad. My phone only gets service sporadically here so I have no idea how things will work.

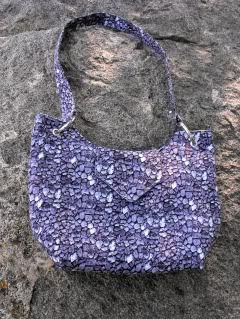
But enough of my griping and grumbling - let's talk about good things instead. I've got a brand new bag! It's another new pattern from Anna of Charmed Liebling called the Liebling's Bag! Such a fun bag! It sews together quickly, and features a outside zip pocket and two pockets inside - one slip pocket and one with an elasticized opening that will be perfect for my phone! Like all of Anna's patterns the instructions are really detailed and clear.

Photobucket Pictures, Images and Photos
Liebling's Bag by Charmed Liebling


One of my favourite details of the Liebling's Bag is the gate rings that attach the straps to the bag! I had quite the time finding the rings, but I'm going to tell you exactly where you can get them so you don't do what I did and have to spend ages hunting high and low for them!

Photobucket Pictures, Images and Photos
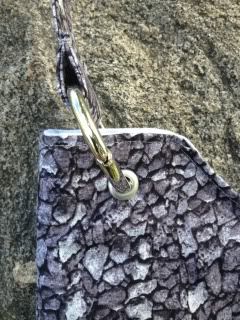
I really love the look of the shiny gate rings!

I first checked my local sewing shop. Nothing. Then I checked the one in the city. They had them but $10 felt a bit steep. Etsy and EBay both produced results but shipping from the states was crazy expensive (I might as well buy the $10 ones...) and my other options - from China - would take far too long to get here. I checked other places too. Walmart, Canadian Tire, even Dollerama. I thought all hope was lost. Then late one Saturday night I tried googling purse supplies. BINGO!!!!!! Emmaline Bags! Located in Alberta, Janelle has a great selection of purse making supplies all very reasonably priced. Best part (beyond great products of course) is shipping is inexpensive and FAST! I got my order within three business days!!!

I really like my Lieblings Bag! It will definitely be a go to bag this fall! And it will definitely fit all the essentials... including the fruit treats, hot wheels and super heroes as well as quite possibly a small knitting project. A girl can't ask for much more than that!!!

So jump on over to Anna's site to read more about this fun new bag and pick up the pattern for yourself! With the change in seasons - I saw a large flock of geese pass over the house today which means fall is setting in soon - it's always nice to treat yourself to a change of handbags as well!