Monday, November 14, 2016

Secret Pyjamas... Only Better!

Oh my goodness.  I am so over the moon ecstatic about my new dress for fall and winter.  It's the newly released Heather Dress from Sew Over It and it's ABSO-BLOOMIN-LUTELY fantastic!!!

I want a whole wardrobe of Heather Dresses.  Seriously.  I could wear this dress every day I think.  After wearing it all day I actually considered the idea of wearing it to bed tonight too.  Then I decided that would be wrong, but this dress is like secret pyjamas.  Only better, because it feels really great and put together.

I was a bit unsure on the style for me, because it's so far from what I normally sew for myself, but really the pockets sold me.  I do love a good pocket on a dress.  Also the fact I had what I thought might well be the perfect fabric in my stash pushed the idea right over the edge and onto my sewing desk.

I had picked up the lightly quilted knit fabric a couple of weeks ago for about $7/metre at Fabricland with the plan to finally make my Paprika Patterns Jasper sweater, but procrastination being what it is, the fabric was still sitting there uncut when Heather came across my radar.  I definitely wanted to try the colour blocking and my fabric having the light grey side and the dark charcoal side seemed like the perfect choice.  The fabric itself doesn't have a lot of stretch because although it's essentially a jersey the quilting of the two layers with a thin batting in between them makes it really stable.  It also makes it really cozy.  And really, really comfy.


I had some troubles with my ridiculously slow internet connection that led to troubles downloading my pattern, but Rosie from Sew Over It - who is super duper awesome, by the way, fixed my woes immediately and got me up and running again.  I just feel it needs to be said, in this day and age when customer service just doesn't seem to be what it once was, that Sew Over It customer service is really, truly top notch.  I'm so impressed with the company as a whole.

Once my computer issues were fixed it took next to no time to get printing and assembling my pdf pattern and cutting it out.  Sewing it was a breeze.  I did use a t-shirt knit for the pocket linings to reduce bulk instead of using my quilted fabric and after one attempt in the quilted fabric for the neckline, I abandoned that for a strip of charcoal ponte that I had left from a project I'd made last winter and am really happy with the results.

My only issue, besides the whole computer one, was not pattern related, but iron related.  I really need to clean my iron I think because I had a moment of sheer dismay when it suddenly got nasty rusty coloured stains on my front of my dress.  I was so upset I put the dress aside for a few days while I decided what to do.  I was considering buying enough of the fabric to do a whole new front panel, but that seemed so silly and time consuming.  Not to mention annoying.  Finally I decided to just not worry about it.  The stain is right along the pocket opening's edge and I figured no one could see it really unless I point it out and if they did happen to see it they're going to have more to concern themselves with then a stain on my dress because quite frankly they'll be at risk of getting punched in the nose for being that close to me.  You really can't see it unless you're that up close and personal with it.

So there you go!  A total win for the wardrobe with this one! I'll definitely be on the hunt for fabric for more Heather dresses in the future!  It's the perfect dress for with boots and tights for the cooler weather and I think with shorter sleeves and lighter fabric it will be pretty awesome for spring and summer too!


Monday, October 17, 2016

City Break Molly

Last month I succumbed to the lure of Sew Over It's City Break ebook.  It was on sale when it was released and given it's a bargain at regular price I just couldn't resist it at the sale price.  The ebook has five patterns - the Alex shirt and dress, the Erin skirt, the Lola coat the Mia jeans and the Molly top and dress.  They're all pretty basic by the look of them, but with lots of potential for changing them up.  I love that each look other than the Mia jeans has an alternate version - whether it be a longer or shorter coat or skirt or the top or dress options.

The only one I'm not terribly keen on is the Erin skirt - possibly because I drafted almost the same skirt back in '86 during my first year in Fashion Tech only the buttons ran down the back instead of the front.  So I think I'm stuck on the Erin skirt screaming "1980s teenaged me" at the top of it's lungs.  Don't get me wrong.  It was an ok skirt back in the day.  Pale peach and perfect for my preppy self.  But perhaps, too, it might be that 80s teenaged me was a whole different build than 2016 mid-40s me and I would feel a bit like "mutton dressed as lamb" trying to get away with wearing a style that I wore as a teen and not sure if my ego can handle the difference quite frankly.  I don't know really...   However, watch this space because knowing me, the Erin will grow on me, I'll forgive it for being so similar to my '80s skirt, and next thing you know I'll be sewing up one of my own.  It's been known to happen before. LOL

So, that brings us to the rest of the patterns, that I absolutely adore. I decided to start off with the Molly top and I'm glad I did. I sewed it as drafted (except for adding a bit of length, because I eventually shrink everything and crop tops are definitely not my thing). The pattern suggests using a jersey with drape for the top and something a bit more structured for the dress, but I decided to go a bit on the border of both - is that possible even - with my fabric and chose a nice lightweight sweater knit. I wanted something that I'd wear, but wouldn't be totally devastated if it was a complete disaster.  The sweater knit was 70% off, so it fit my criteria perfectly.


I should have taken off some of the width in the hips (I never do on my first go around, and really almost always should), but I think it works fine with my well loved rtw skinny jeans. I will likely shave just a touch off my next version though I think so it's not quite as swingy feeling. But it's comfy, cozy and I think I'll probably live in it over the coming months. It was also incredibly quick to sew! Pretty sure it took less than an hour from start to finish! I'm on the hunt for the perfect stripey fabric for the next one I make.

I can't decide which pattern to try next from the ebook, although I think which ever one I choose might have to wait in the wings for just a bit. I'm in the midst of Halloween costume sewing, I have a few decorations I want to make for the house for Halloween this year yet, I need to be getting started on holiday gift sewing and knitting and I should actually make my Betty Dress that I have got no further than the muslin stage. (but am almost finished knitting a cardi specifically to wear with it and have already bought tights as well - not too mention the fact I spent a ridiculous amount on the fabric for it). So many projects. So little time.

Thursday, October 13, 2016

Arenal Top

Kennis Wong's done it again!  She's come out with another fantastic wardrobe staple pattern and I was lucky enough to be one of the testers for it!  The Arenal Top* features two versions - one with long sleeves and a handkerchief hemline, and the one I tested, a straight hem, 3/4 length sleeve. Both versions have a front shoulder yoke that you can really play around with colour and texture to add interest to your top.  Of course, as always with Itch to Stitch patterns, it comes in sizes 00-20.  

Construction is really easy with this tee - the hardest part would be the v-neck, but I'm going to go out on a limb and promise you that Kennis has the easiest construction method ever for getting a perfect looking V.  I haven't willingly done a v-neck on a knit in about 20 years since an unfortunate mishap with a Kwik Sew pattern, that was so darn hard to do I ended up with a off centre v and scarred for the next two decades.  LOL

Arenal has changed all that.  I whipped up my second top yesterday from cutting to hemming in an hour and a half and part of that time was taken up with a serger that kept snapping the lower looper thread and a combination of my tension dial and twin needle that were pitching a fit over the fact I was using a spool and a bobbin instead of two spools of thread when I was doing the hem.  That's the first time my old workhorse Pfaff has ever given me a spot of trouble. (turned out I just needed to switch spots around for the spool and the bobbin and everything went fine.  Picky, picky machine.  Grrrr).

For my first version I used a really soft drapey jersey of unknown fibre content and a rigid lace for the contrast yoke.  I did the lace as an overlay rather than on it's own.  I was a bit worried about the fact there was no stretch in my lace - I actually hadn't even thought of it until I had already sewed it in - but there was no problem with the fit at all!  My only modification to the pattern was to add 3/4" to the length of it as I prefer my tees to hit a bit lower than the Itch to Stitch patterns usually come to on me as drafted.


For my second version, the only change I made from the first was to add just a bit more length.  I felt that my first one was still a bit on the short side for my preferences so added another 3/4" to make the pattern a total of 1 1/2" longer than drafted.  I also shaved a wee bit off the hips to make it a bit more fitted through that area.  Otherwise it's basically sewn as drafted.  My fabric was a cotton/spandex t-shirt knit and the contrast is a non-stretch crochet style lace.  ('scuze the wrinkles... probably shouldn't have worn it before taking photos!)


I highly recommend the Arenal Top pdf pattern as a great addition to your handmade wardrobe.  You can get your copy of it for 20% off right now on the Itch to Stitch website!

Tuesday, September 20, 2016

The Afternoon Blouse That Took a Week

Well, a week and a half I think.  Maybe two.  I don't know.  I've lost track.  It sure as heck took longer than an afternoon.  Except it didn't need to, I suppose.  All I needed to do was sew a button on.

I tend to procrastinate heavily when things aren't going as envisioned and this project is one of those times.  First off, I blithely traced off my pattern, cut it out and started sewing my wearable muslin.  Only after I was well on my way did I realize that I had traced off the wrong size.  C'est la vie.  I decided to keep going because I was falling in between sizes anyways.  Once I was finished I realized it would be very much not a wearable muslin - nope, I'm not showing it off.  Bad, bad fabric choice.  BAD.  Looked horrendous.  But upside was the too small size actually fit pretty well. In fact the waist and hips needed a nipping in I thought.  Whoot! Whoot!

Feeling bold, I nipped in the waist to hip and cut out my new fabric.  Sewed it up quick as could be and ran upstairs to try it on.  WHAT THE EVER LOVING ----?!?!  

I felt like a stuffed sausage.  Then I realized, the wearable muslin was soft, drapey, have some give rayon.  My new blouse is no give peach skin (aka polyester).  Damn and double damn.  So I wriggled out, very narrowly escaping the need for the jaws of life to extricate me, went back down to my machine and ripped out the side seams and re-sewed them with teeny scant 3/8" seam allowances.  It's better, but only really when I'm standing up.  Sitting down is a bit stuffed sausage-y still.  But it'll do.

So all's well that ends well.  Or so you'd think.  But no.  Not for this blouse.  There's a weird gaping and wrinkling about the neckline despite the fact I ever so carefully stay-stitched.  There's also some weird gaping and bunching at the button tab despite careful stitching and trimming of seam allowances.

Wrinkling and gaping is hard to see in a selfie
- but apparently photo taking was a "waste of time" today to a certain seven year old.
At least I look relatively normal in this picture... can't say the same for the next few.
WHY OH WHY Afternoon Blouse???  WHY???? 

I've wanted this Jennifer Lauren pattern forever.  I waited ever so patiently for a sale and snapped it up as soon as it went on.  I even printed it out and assembled the pattern then cut out my muslin immediately after purchasing it.  (I almost never do that, allowing patterns to age suitably on my hard drive before I ever get to printing them out let alone making them up).

This is my "Fine then.  Just take the picture please" expression.
So I'm at a cross roads with this one.  I wore my blouse today after I finally sewed the button on this morning and it didn't feel terrible.  But I want one that I really love.  I think I'll start searching for new fabric, and for the next one I'll definitely size up to eliminate the snugness, but I'm not sure what to do about the neckline.  Common sense would say take a wedge out where it's gaping, but then I'm worried it's just wonky due to fabric or stretching or me trying to beat it into submission with an iron that was too hot. (oops!)

I don't even know what this is.  Let's just call this entire blog post
"bloopers" and be done with it.
Not sure.   My first sewing project in a while and I can't really call it a win at this point no matter how much I wanted to be able to.  Some days are just like that I suppose.

Thursday, August 18, 2016

Finally, Anna

Let me tell you a tale of two Annas!
So, I really honestly believed that I was the very last of the sewers/sewists/seamstresses (whatever the heck you call us these days!) to make the By Hand London Anna dress.  Or at the very least I was the very last in the sewing blogosphere to make it, but I've been reassured there are others out there like myself that hadn't yet gotten around to making it for whatever reason.

To be honest when I first saw it a few years ago I was kind of underwhelmed by it.  It's not my usual style.  It's better suited to willowy figures.  It's almost $17 Cdn with the exchange.  I had reason after reason why Anna was not going to join the ranks of dresses hanging in my closet.  But over time I grew to like Anna.  Really like her.  Covet her graceful lines and feminine bodice pleats.  I had it BAD.  Every time another one popped up in my sights I was smitten even further.

Finally this spring in a moment of madness (and not terrible exchange rate) I snagged the pattern.  I don't know why it took me until now, at the end of summer to finally sew it up.  I kept waffling.  I was nervous after reading about so many fitting woes and then I couldn't find fabric I loved and again the reasons why not to dive in were popping up even though I really wanted an Anna of my own.  Some times I suffer a lack of confidence and it really does my head in.  But then the Maxi Dress Sew Along popped up on my Facebook feed and it was all the push I needed to get me going.

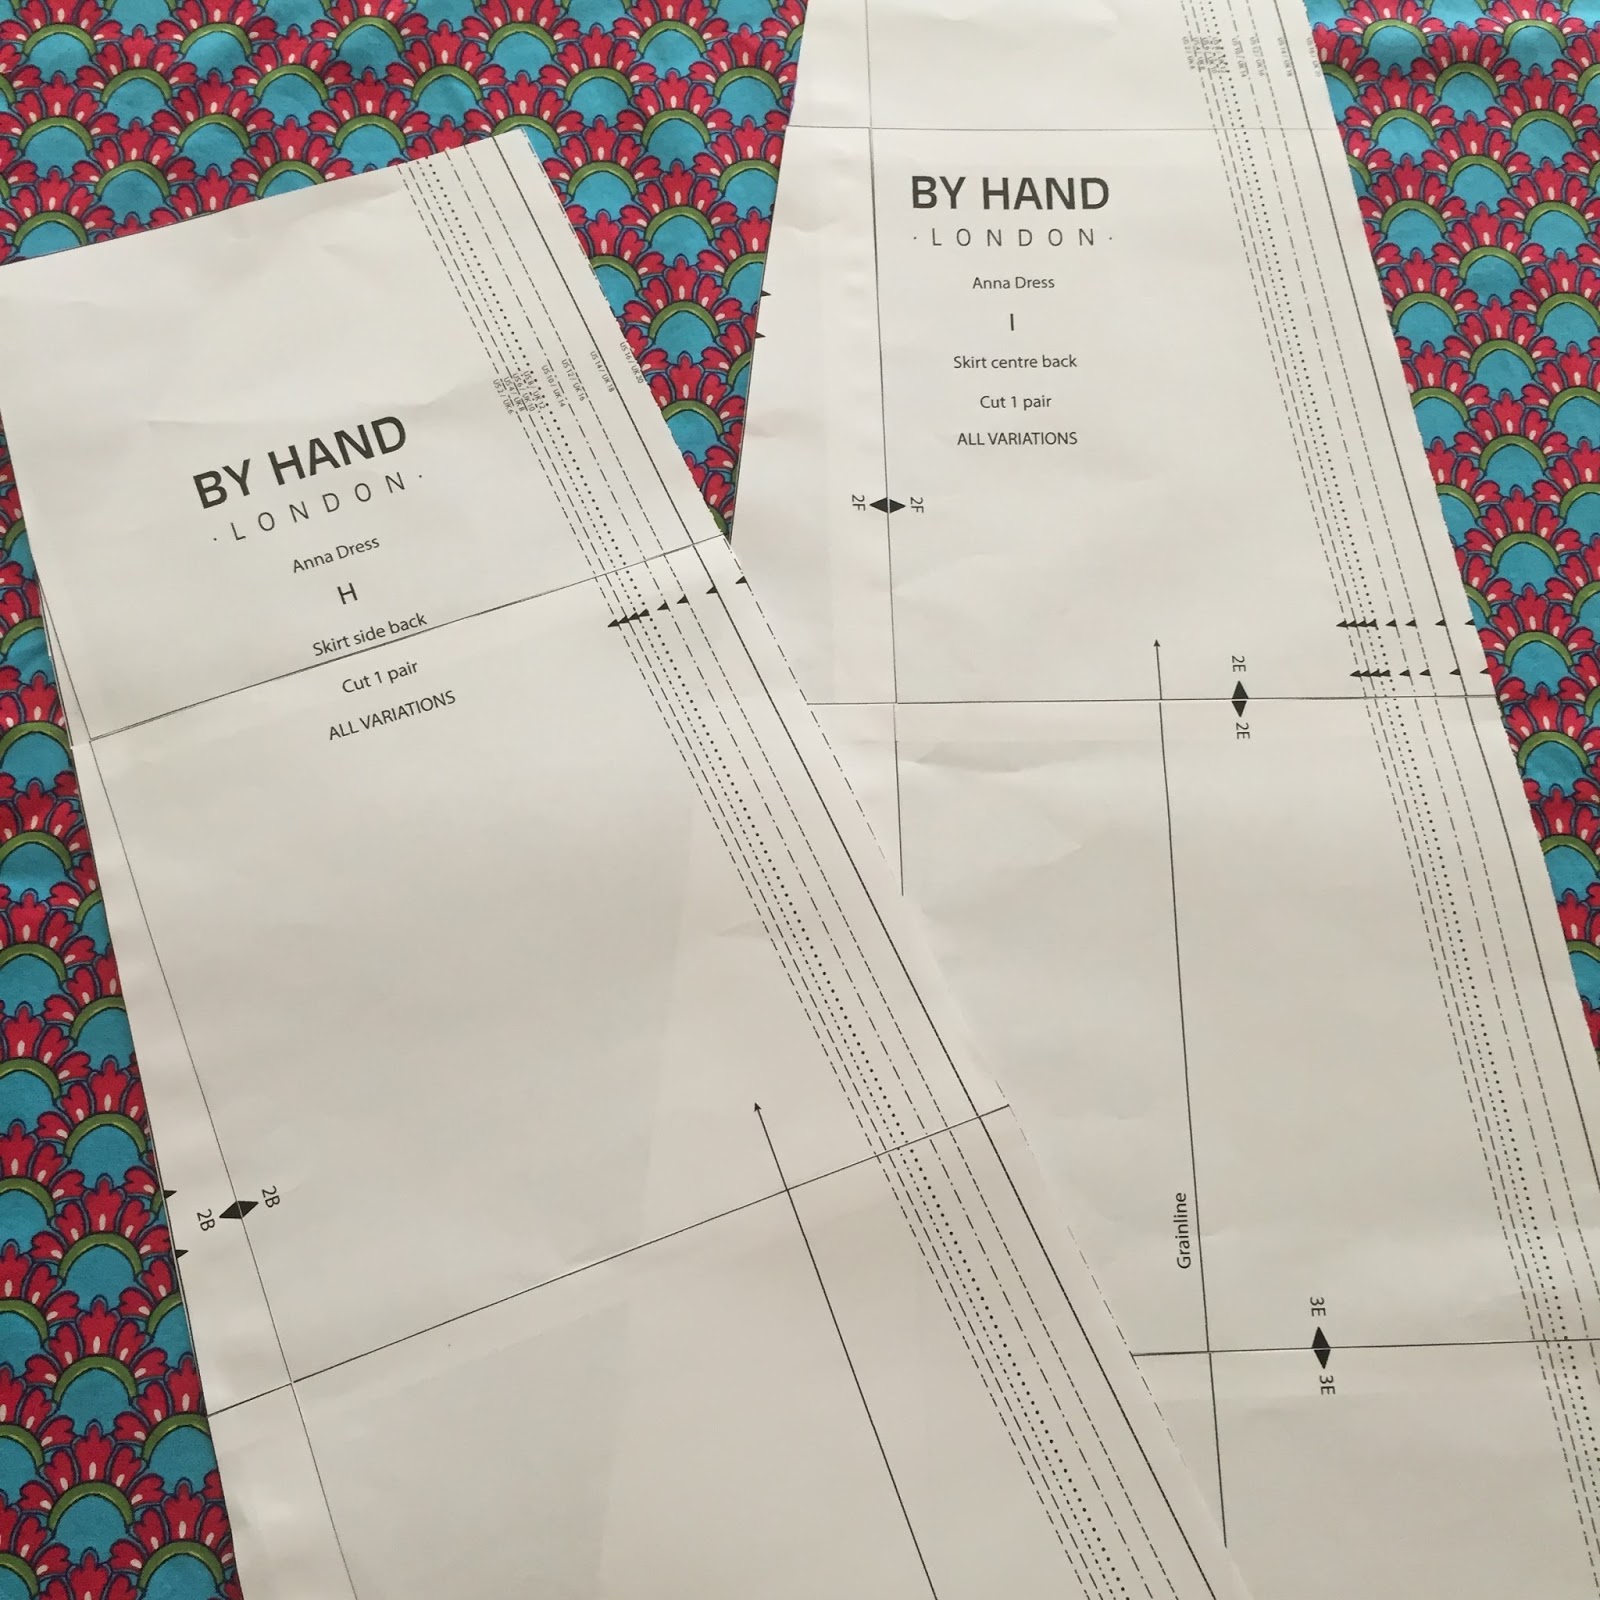
I hit up a sale at Fabricland at the end of July and what a sale it was!  I struck gold in the bargain centre where everything was 50% off, finding a quilt cotton that was reminiscent of the beautiful African wax prints I've been eyeballing for the last several months on line with its bright colours and interesting print.  At $2.50/metre I knew that even if Anna turned out to be my most hated sew ever (see - told you I was lacking confidence at the time!) I would have spent less than $8.00 on it.  I can do that.  I also got a great cotton sateen tropical print for 70% off that day that I'd been wanting for awhile but  was to cheap thrifty budget conscious to spend the money on.  With possible Anna fabrics purchased, washed, dried and stashed away at the ready there really was no valid reason for not giving it a go.


I muslined Anna and found that the fit issues didn't actually seem to be that ominous.  I wasn't experiencing any of the horrible back of neck gaping that so many did.  The neck line didn't seem too high.  The bodice was short, but bodices are ALWAYS short on me, so no big deal.  The fit felt good, although I was nervous about the snugness of the bodice.  I'm hard to please with that - I like to have a bit more ease in my clothes but there's a fine line between ease and sloppy and I hate sloppy.

I decided to cut out my quilt cotton first and make the midi-length version so that it wouldn't be such a fabric suck if things went south with it.  Sewing was super easy - except the zipper.  WHY do zippers always have to give me such fits???  That beast took one try for the first side (as always) and three tries and a chocolate bar for sustenance to get the second side looking decent.  I sewed up the side seams with a 3/8" seam allowance instead of the instructed 5/8" to allow for more ease and then I tried on my dress.  Dismay.  It felt and in my eyes looked like a frumpy dumpy sack.  Which in turn of course made me feel like a frumpy dumpy sack.

My zipper installing supplies at the ready!
I didn't know what to do to salvage it.  I consulted blogs, loads of pattern reviews and finally asked in one of my Ravelry groups where there is a super helpful, supportive lot of members who sew.  I took all their suggestions, thoughts and advice into consideration and decided to start with the easiest of them all.  I went back and stitched the side seams with the 5/8" seam allowance tapering out to a 1/2" allowance at the waistline.  Put the dress on again and couldn't believe the difference it made. I also made a mental note to stay stitch the heck out of the neck line next time, because I'm pretty sure that was part of my problem.

I wore the dress all day on Tuesday and while the neck line still feels a bit loose, it's totally wearable and what's better?  It's totally comfortable.  That dress is secret pyjamas I tell you!  I immediately cut out my tropical sateen when I got home and thought I'd finally tackle the maxi dress version for the sew along!


I have to tell you that I'm not sure I'm actually even a fan of maxi dresses.  I like them well enough on others, but for me?  I'm just not convinced.  Plus there's that danger of tripping and falling.  I have a history.  I once, during my ballet exam, when I was about 9 years old, managed to step on the hem of my circle skirt during the Italian Tarantella and instead of ending with a swish of my skirt and a clap of my tambourine, I ended up with the heel of my character shoe tangled in the skirt and me on my butt trying not to cry from the humiliation of it all.  Anyways.  That's enough traumatic wandering down memory lane for now.  Back to my maxi Anna.  I decided in for a penny in for a pound.  After all I had several maxi length dresses in the 70s as a little girl and I survived to tell the tale.  So I  spent Tuesday evening and yesterday afternoon sewing it up.

This time I shortened the boat neck line by about 5/8" inch on either side and stay stitched it.  I redrafted the facings and interfaced them right away so they wouldn't stretch out any on me.  I also had run low on printer ink so had Little Man measure from my hem of my first version to the top of my feet to know how much to continue down from the original midi length pattern (I also saved myself from having to reprint and assemble something like 43 pages just for the bottom half of the skirt that way).  Unfortunately, Little Man isn't necessarily the most accurate of measurers and my skirt is WAY too long.  Drag on the floor, potentially trip me up and make me fall down too long.  But he's seven, so you know.  You get what you get.  He did his best and I was glad for his assistance.  I'll just either wear stilts from now on or shorten the dress a few inches.  Oh!  I also, at the last minute decided to add pockets and just used the first pocket pattern I found in the disaster that I call my sewing room.  (It was the Emery Dress pockets in case you're at all curious).  I also tried the trick of putting a strip of interfacing down the zipper line.


I love the fit of this bodice even better than the first! My seams and pleats are a bit off (HOW?!?!), but they're symmetrically off so I'm just going to live with it.  My zipper oddly only took one try for both sides and turned out great!  The gods of sewing were clearly smiling on me.  I ate the chocolate bar as a reward instead of as a consolation like the first dress required.  My happy face seam ripper was not needed.

I'm ready for you invisible zip!
Anna.  She's a good one.  I'll definitely be making more of her.


Wednesday, August 10, 2016

You Spin Me Right Round

Early morning spinning session.
If you follow me on Facebook, Instagram, or have run into me in person over the last two and a half weeks you know by the title exactly what this blog post is about...

For years I've desperately wanted to get into spinning yarn.  Over time I've acquired some drop spindles and what turns out to be way too little fibre.  After a few aborted attempts with the drop spindle, a book and some youtube videos I finally decided to take a class last spring at one of the LYS.

It was a few hours long, thoroughly enjoyable, but truth be told I was a bit of train wreck with the whole co-ordination thing although I did leave the class with my drop spindle holding a little bit of a spun single attached to it so not all was lost.  I practiced a bit following the class but then got frustrated, set it aside, then couldn't figure out what I was doing when I picked it up again.  Still.  That dream of spinning was still there.

Imagine my surprise when, on my birthday, at the beginning of July I opened a lovely card from my husband and when I was instructed to keep reading, I turned the page of the inset of the card to find a note saying I was to have a one day class with a local master spinner in the city AND after my class I was to choose the spinning wheel I wanted.

OH MY WORD!!!!!!!!!!!!!!!!!!!!!!!!!!!!

The next day I phoned and booked my class for July 23rd and then anxiously waited, like a child waits for Santa Claus, for the day to arrive.  I was all kinds of nervous when I walked up to the door, but within minutes of entering the woman's home I was put at ease.   She was lovely and friendly and so very interesting.  It was a day filled with not only learning how to spin, but of history and tidbits of knowledge she'd gathered over her years as a spinner and former mill owner as well as just general camaraderie of two people who share a mutual love of all things wooly. I was fascinated, and couldn't believe when the time had come for the little boys and (BF)G to pick me up again.  I can't say enough good things about it.  It was just an all around fantastic day.

My new crafty tool!!!
After the day of trying out three different wheels I was completely taken with the Ashford Kiwi 2, so the cheque was written, the wheel carried out to our vehicle along with a bag of fibre, a skein of my first ever hand spun single I made that morning,  a skein of plied yarn that I'd made that afternoon clutched tightly in my hands and my imagination running wild with the possibilities that lay ahead of me.  My instructor had given me the advice that I should spin every day if I could.  "Five minutes a day is better than one 35 minute session a week" she'd said often enough throughout the day that it stuck.  I sat down to spin some more as soon as my wheel came into the house.

Top is my first ever single, bottom is my plied yarn 
I've found that I don't have a problem spinning every day.  I have a problem stopping when I start.  Supper?  Who needs supper?  There's still fibre to be spun!!!  It's soothing, it's therapeutic and it's addictive.

Mystery roving yarn plus a teeny tiny skein of mystery roving plied with the polwarth batt
I quickly finished up with all the Polwarth fibre she'd given me to "get me started", and then dug through my stash to find some mystery roving I'd bought years ago in hopes of learning to use the drop spindle that N made me one year when I must have talked non-stop about drop spindles.  (I think he was about 12 or 13 at the time).  I went through the mystery roving in a day, so then I moved onto a drop spindle kit (BF)G had given me for Christmas a few years ago.  It held the promise of three different types of fibre to be spun.  When it was getting low, I quickly contacted a friend who I know spins and asked her if she had a good local source that she could tell me of for fibre.

Last of the fibre in the house!  Panic was setting in!
Turns out there is a wonderful little farm not five miles away from me.  I paid them a visit last Friday afternoon and was in heaven!  I came home with enough stash of fibre - shetland and shetland/alpaca blends if you're curious - to hopefully get me the next few weeks at least!

Shetland Sheep, Shetland Sheep have you any wool,
Yes ma'am, yes ma'am, three bags full!
My poor husband is wondering what kind of monster he has inadvertently created in buying me the wheel, and he keeps gently suggesting that maybe, just maybe I'd like to start knitting something with all of the yarn I've made.  I think he worries that he may some day be buried alive by the ever growing pile of skeins of yarn that is amassing in our room.

Resistance was futile.
I had to dive right into my shetland/alpaca blend rolag as soon as I got home!
Right now I've been working hard on trying to get more consistent with my drafting so that my finished yarn is more consistent.  The shetland/alpaca blend from up the road is amazing to work with - so easy to spin and makes me happy to know it was prepared right in the little room at the back of the farm house.  I love the idea that this is local to me and hand produced from beginning to end from sheep that I've been introduced to! (although they seemed to be much less enthusiastic about our meeting than I was, choosing instead to largely ignore my ooh-ing and aaah-ing and I want one-ing!)

Spinning has really taken over my crafting world right now and my knitting and sewing have mostly fallen to the wayside.  I can't help it.  I am completely smitten.  I have always loved that with my sewing and knitting I could take a simple object of yarn or fabric and turn it into something.  The fact that I can now take essentially a blob of fluff and turn it into yarn and then turn it into something is just takes it to that next level for me!

Wednesday, July 27, 2016

Anchor's Aweigh

Follow my blog with Bloglovin

I'm so excited everyone!  I've been completely obsessed with making a nautical themed dress for months now, probably at least since we were still knee deep in the snow.  (Ok.  That might have just been May knowing the prairies but let's not quibble ok?)  Now it's done and ready to wear!

I had originally planned on making my nautical fabric into another Emery dress, but had been holding off not quite sure what I wanted to do with the skirt (certainly not waistline gathers.  Nope. Not for me, thanks!) So my lovely cotton fabric that I ordered from a seller in Thailand early in the spring sat languishing in the storage bin.  OK.  That's a lie.  It only went down to the sewing room about two weeks ago.  Prior to that it sat on my dresser staring at me begging to be sewn up.

Anyways, I'm going off course here.  Let's get back to business.  A few weeks ago Kennis of Itch to Stitch released an update to her Marbella* pattern.  It's a pattern I've had my eye on for a long time, I love the slightly scooped out boat neckline, but hadn't quite committed to purchasing yet because of the skirt.  I'm just not sure I'm a tulip skirt kind of girl.  But the update happens to be the addition of a variation for a circle skirt.  Yes, please!!! I'm definitely a circle skirt kind of girl no question about it.

I look impatient here.  I wasn't...
Little Man was telling me how to pose and I was concentrating.

I muslined the bodice because you just never know when it's a new to you pattern but as like almost all of the Itch to Stitch patterns I've sewn to date, it fit great from the get go.  The only adjustment I made was to lengthen the bodice by about 3/4", which is pretty much standard for any pattern I sew from any company.

Oooh!  Look at the impeccable lining up of the invisible zip.
Ok.  You can't really see it, but it's there and it lines up
...and it only took me three bloody tries to get it perfect.

The pattern itself sewed up really easily.  I did choose to skip the lining step and just lined the yoke instead.  I'm a bit lazy that way! LOL  It was also a billion degrees outside which meant it was about a billion and two degrees in the house when I was sewing and the thought of extra layers was just too much for me to contemplate at the time.

Note to self.  Be careful where placing hands.  I'm not grabbing my own butt.
I was following instructions to put my hands in my pockets.
Just not fast enough.
Seven year olds are demanding photographers I tell you!

I was going to get fancy with my hem and do some ribbon or contrast fabric binding but in the end decided that I'd keep it simple and just do a narrow three-step hem for it.  I did buy some fishing weights to stitch into it, to lessen the "flash my knickers" potential but then promptly forgot about them.  I might just stitch them in just above the hemline into the seam allowances on the sides and centre back and see if that does the trick.

I think this dress is going to get a lot of wear this summer.   The cotton is soft and a great weight and I love the style and fit of the dress itself.  This one is a total win for the wardrobe!!

See ya later!  I'm off to do some more sewing! :)

Tuesday, July 19, 2016

Vintage Baby

This year I decided I was going to officially take part in the Vintage Pledge hosted by Marie of A Stitching Odyssey and Kerry of Kestrel Makes.

I wasn't sure at the time I signed up what I wanted to pledge, so I will admit to being pretty wishy-washy about it.  Something along the lines of "I will knit or sew some projects using vintage patterns".  There's commitment for you, all right.

I still have absolutely no direction in mind for what I'm doing in terms of my vintage pledge, well... in many areas outside of the vintage pledge as well, but we'll focus on the pledge in this post, not life in general at the moment.  LOL!  I have enough stress going on in life at the moment that my crafting should definitely not be one of them.  So, my goal is to have fun and enjoy this and just see what happens.

One of the limitations of my Vintage Pledge is that I do not have an extensive library of patterns to choose from.  Although with the 80s now being included I suppose I have many more than I realize - but when I think vintage I like to go a bit further back.   Also, the majority of the patterns I do have are children's patterns.


Wow!  So that was a lot of preamble to get to the point of this post, which is that I have actually made my first Vintage Pledge project of the year!

I signed up to do a swap in one of my Ravelry groups in the spring and was assigned a little girl who lives in the Southern States so I really wanted to make her a little sunsuit for the heat of the summer.  I knew I had a great 1960s pattern in my stash that would fit the bill exactly for what I was envisioning for her.

I didn't realize until I dug it out of my pattern box that the pattern itself was a size 2 and the little miss in question was just turning one this summer and unlike my gargantuan babies, she is slightly more petite, so between consulting a modern pattern I had in my stash (well - early 1990s anyways) for sizing and a bit of going by guess and by golly I graded the pattern down to what I hope is closer to the 12 month size clothes she actually wears.


It was a fun sew and I love the blend of the vintage look of the pattern and the modern beachy print.  I decided to add eyelet instead of a self ruffle at the bottom because I LOVE eyelet on all things and then changed the bottom of the bloomers to have a ruffled edge rather than a turned under casing because ruffles should be somewhere on a baby girl's sunsuit in my humble estimation and since I'd eliminated them from the top they had to go on the bottom.  (My mind is a mysterious and bizarre place.  Don't feel badly if you're thinking, "What in holy hell is she on about now?!?!" I certainly won't judge you for it! LOL)


I also knit a quick little head band because the swap was on Ravelry and I felt that meant it should definitely utilize yarn somehow in it!  I used a thoroughly modern pattern but picked one that I thought sort of echoed the vintage vibe of the eyelet I used on the suit.  The Princess Headband took almost no time and was an absolute pleasure to knit!


Anyways.  End result?  I adore this outfit and as a bonus it fulfils the first of my Vintage Pledge projects.  Whoot!  Whoot!

Next up on my sewing desk is a modern pattern for me, but I do have a few more vintage pledge project ideas floating around in my head right now!

SaveSave

Tuesday, June 14, 2016

It Only Took Three Years...

I've finally finished my Jane Richmond Gemini top and it only took me three years to get to this point.

I first cast on Gemini for the 2013 Tops Tanks and Tees Knit Along on Ravelry.  I even finished it during that KAL.  Unfortunately it was a disaster fit wise and I completely ripped it out the very next day.   I was ever so proud of myself that I not only ripped it out, but I cast on immediately again in a size smaller.  But then I made a mistake and ripped out again and restarted, then ripped and restarted and then eventually made a mistake, got confused where I even was in the pattern and tossed it into the deep dark recesses of my closet where it sat for a few years until this spring when I was trying to decide what to knit for the 2016 TTTKAL and found this languishing in a bag.

It wasn't even on needles any more, but the lace panel and a few rounds below were done, so I decided to put it back on the needles and figure it out once and for all.  Things were going swimmingly... or so I'd thought.  Until a few inches from the bottom I tried it on and realize that my gauge had gone to hell again and my top was getting larger and larger.  The bust fit well, but below that was a mess.

I just about threw in the towel then, but after investing so much effort already, I decided it had precisely one last chance.  I ripped back to almost the armholes and restarted again, immediately working a set of decreases along each side.  Then knit two more inches and worked another set of decreases.  Then noticed way back where I'd joined a ball of yarn I'd somehow twisted the stitch, dropped the one below it and goodness knows what else.  It was the ugliest stitch imaginable and stuck out like a sore thumb.  To give you an idea of how bad it was, my husband even noticed it from a distance and gently suggested something should be done about it.  He was right, so I painstakingly dropped down approximately 4" of knitting for two stitches and reworked them back up, which was no easy feat given that it was a stitch at the start of a new ball of yarn, but so worth it.  After that was done, I kept knitting, keeping close watch to make sure I didn't let my gauge go rogue on me again, and finally did a couple of sets of increases for the hips and finished up.

This was the original gemini in it's droopy tent like capacity:

Re-worked and much, much better :


I swear I thought I would never ever see the end of the tunnel with this one and I didn't finish it in time for the due date of the TTTKAL, which was a bit disappointing - I was two days late, but I am really glad that I did slog away at it and didn't give up.  It's exactly the fit was I was envisioning back in 2013 when I first set out to knit it.   Sometimes it pays to be a "responsible knitter" and re-work things until you get them the way you want them, even if it feels like an impossible task at times. To keep going and have something you'll wear, rather than something that languishes in a dark corner of the closet never to see the light of day again.  I suppose like anything in life.  Sometimes it's just good to persevere.

Tuesday, June 07, 2016

Vienna

I have a new addiction.  It's the latest release from Itch to Stitch* that I was fortunate enough to test.  Vienna is a fantastic little pattern.  Like Kennis Wong's Idyllwild tee that I couldn't stop making in the fall, this one has proved to be just as addictive.  No sooner had I finished my first one, I was cutting out a second one.  Fabric for version three is sitting on my table and version four is in the planning stages.  It's like potato chips.  You can't just stop at one.

I absolutely LOVE this top.  Cute, full of options, great size range, easy to whip up in a few hours max; the perfect warm weather sew.  Vienna is designed for a knit body and woven yoke, but I can tell you that lots of the ladies testing the pattern opted to do a completely woven version and they all turned out looking fantastic.  I can also tell you that almost all of us testing immediately jumped into making a second version as soon as the first one was done.

Another perk with this pattern is that you can use smaller cuts of fabric.  My friend sent me a parcel of fabric delights from Japan recently and one of the pieces was a sweet little cotton lawn print.  I adore the fabric.  From a distance it looks like just a floral print.   Pretty enough alright, but then hello!  Who's that peeking out from the flowers?  A polar bear!!!!  How much fun is that?!?! I only had half a metre of my precious polar bear in the flower garden fabric, and wondered what I could do with it.  With a print that fun I knew I wanted to have it in a garment somehow.  Then the testing call came out for Vienna and I knew exactly what I was going to do!  It was the perfect place to showcase it!

My first version used a cotton/spandex blend t-shirt knit for the main body and a cotton plaid for the yoke.


My second version used a drapey bamboo/spandex knit for the main body and cotton lawn for the yoke.


I highly recommend getting your hands on Vienna, which just so happens to be on sale right now for 20% off, and then run, don't walk to your sewing machine and get some fun new shirts in your wardrobe for summer!!

Wednesday, June 01, 2016

Me Made May Update

If you follow me on Instagram at all this is pretty much all going to be old news, but for those that don't I thought I'd give a bit of an update on how Me Made May went for me.

Here was my pledge for this year:

I, Sarah Jane, of Prairie Girl Knits, sign up as a participant of Me-Made-May '16. I endeavour to wear at least one handmade item each day for the duration of May 2016' (not including my bras and handbags as that would be cheating since I only ever use handmade for them. LOL) I also endeavour to discover what "holes" are in in my wardrobe so that I can begin to fill them up.

Just like last year I looked at my Me Made May challenge as a great time to discover what was missing in my current hand made wardrobe.  I was surprised to find that there weren't really any in terms of what I wanted to wear day in and day out.  Something I counted as a big success compared to last year was that instead of repeating an outfit because I'd run out of hand mades to choose from it was a repeat because I just love it that much.  I didn't find it a struggle at all this year to reach for hand mades as I'm realizing the ready to wear is really being phased out in my wardrobe and the majority is in fact hand made at this point.

Other than a couple of pairs of jeans this past winter (that I used a gift card for) I can't remember buying any clothing for myself.  Lisa of Sew Over It often mentions her personal rule of not buying if she can make it and its a sentiment that I can relate to quite a bit.  It's not that I have a hard and fast rule for myself on the matter exactly, but more that I simply prefer to make my own clothes rather than buy ready to wear.

So here's a glimpse of what my month looked like mostly through the eyes of Little Man who was my designated Me Made May photographer.  He was occasionally assisted by Baby Boy and when both little guys were too busy (or fed up, because lets face it, taking Mommy's picture every day gets a bit boring after a while) a selfie did the trick for recording the me made of the day.  There is a photo for every day except for May 1st - I forgot to take a photo of my Me Made that day - off to a rollicking start wasn't I?  Ha ha! And in case you're thinking that I can't count there are a couple of extra photos just because I changed from one me made into another partway through the day because I was going out.

May 2 - 7
May 8 - 14
May 15 - 21

May 22 - 28

May 29 - 31

All in all it was a great month and I made a few happy discoveries along the way in terms of what I had available and what favourites were amongst those choices. I easily succeeded in achieving my goal of wearing at least one handmade item per day.  I really enjoyed keeping up with all the photos on Instagram too.  It was loads of fun seeing what others were making and wearing.  One thing I am kind of over is the whole daily photo thing.  I always feel pretty awkward in front of a camera and so I find the daily photo feels a bit weird and after awhile I start feeling a bit silly posting a "LOOK AT ME!!!!" photo every single day.

I'm continuing on with my own journey of utilizing and expanding my hand made wardrobe.  I just made a new top earlier this week, have a skirt on the sewing desk and top on the knitting needles as I type this, and have plans for several upcoming projects.  In the same vein as continuing on, it occurs to me that I didn't even think about it this morning when I grabbed a hand made to put on when I was getting dressed for the day.  I call that success on my personal challenge!

So that's pretty much it for my thoughts on the challenge this year.  Did you make a Me Made May pledge this year?  How did you feel it went for you?