Wednesday, October 31, 2012

Happy Halloween!

I wasn't really planning on doing much more for Halloween other than putting up the window cling decorations. I figured the boys were still little enough they wouldn't know they were missing out since they've never done anything Halloween like yet other than some decorations on the windows and carving a pumpkin last year. We live in a rural area where no one in the area trick or treats so they've really never been exposed to it.

Photobucket Pictures, Images and Photos
A literary favourite of a certain two year old
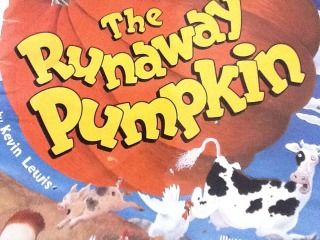
But I was somehow foiled in that plan. They have a book that is about carving pumpkins that Little Toddler Man loves, then there's "Runaway Pumpkin", a rollicking good book that I think I've read at least 100 times to Baby Boy, then we had a Halloween party at music class. But all that is of no consequence really. What really tipped the balance in this whole business was that someone (who? WHO?!?!?!) told Little Toddler Man about trick or treating and he's been obsessed with the notion for weeks.

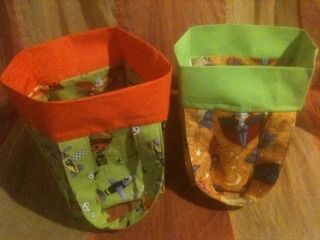
So there you have it. Baby Boy and Little Toddler Man will experience the thrill of it all for the very first time tonight. In preparation I thought their little hands might find a pillowcase (the preferred receptacle of my childhood - pillowcases hold a lot of loot!!) awkward, and a tote bag might be too big, so I found the treat bag tutorial I'd used for Baby Boy's birthday party last year and made them each a new bag.
Photobucket Pictures, Images and Photos
Treat bags from (where else??)Fishsticks Designs

I explained the intricacies of trick or treating to Baby Boy this morning. I told him you go up to someone's door and yell trick or treat then you open your bag, they will put a treat in it, you say thank you and go to the next house. I think he caught on fairly quickly... Moments later he sidled up to me in the kitchen, opened his little treat bag up and said, "Put treat in there now pease" - he was somewhat disgruntled when I told him no treats right then and that he had to have breakfast first. Oh the trials and tribulations of being two!

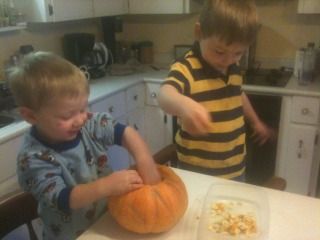
Right after breakfast this morning the boys set to work cleaning out then helping carve the pumpkin they grew in the summer. Little Toddler Man is an old pro, he helped last year with his pumpkin he grew too. He got a somewhat hesitant Baby Boy enthusiastic in no time. Both boys were sort of disappointed to be done with all the "slimy pulp" as LTM kept calling it
Photobucket Pictures, Images and Photos
Cleaning a pumpkin is good fun!

Photobucket Pictures, Images and Photos
They apparently have great affection for the final result of their hard work!

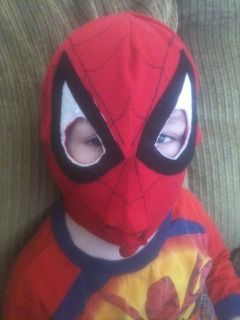
I had great plans to make them Spiderman costumes. I have an old pattern I've made a few times now, and had planned to modify the body for cost and fitting over parkas, but I got as far as the masks and decided to rethink my plan. I was worried that the mask wouldn't allow for unobstructed vision, and I was running out of time anyways as I hummed and hawed about drafting a new "body" pattern.
Photobucket Pictures, Images and Photos
Kind of cool, but not so great for seeing... Or breathing really - apologies to J who wore his when he was about six or seven without complaint. Why didn't you say anything honey???

The decision to rethink made my life so much easier! I opened up Little Toddler Man's closet, pulled out the basket of costumes and figured out what would fit. The boys happily donned J's Jack O Lantern costume of 1993 and G's bunny costume of 1994 for their party at Kindermusik last Saturday and they'll wear them again tonight. The bonus of these (beyond breathing and seeing) is they will definitely be able to fit their winter gear underneath. Which given the grey overcast sky and expected temperature of +2C this evening it's a pretty necessary bonus!
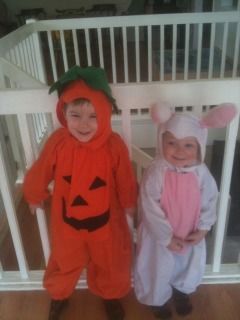
Photobucket Pictures, Images and Photos
They'll be ready to go!

Happy Halloween! I hope you all have a fun and safe evening enjoying the festivities!
Thursday, October 18, 2012

Super Simple Baby Hat

I promised to put up the tutorial for the super simple baby hat I made last week during KCWC, so here it is!  If there's anything unclear or missing don't hesitate to let me know!!

Super Simple Knit Baby Hat

Supplies:

knit fabric - for this you can use remnants, old t-shirts, etc.  You will need approximately 18" wide by 8" tall for this project.  You will also need a contrast band cut 13 3/4" wide by 2 3/4" long with the stretch going across the width.

other requirements - ball point needle, measuring tape, paper, pencil, scissors, sewing machine, thread and water soluble fabric marker or tailor's chalk

The Hat!

Let's get started shall we?  We'll begin by making our pattern!

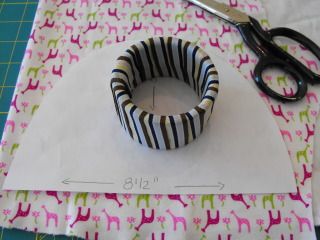
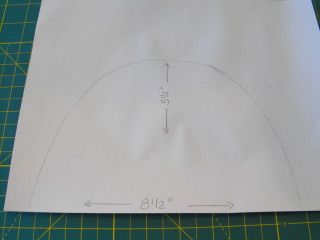
With an 8 1/2 x 11" sheet of paper, draw a dome shape that measures 8 1/2" wide and 5 1/2" tall at it's center point. When you are happy with the curve of your dome, cut out your pattern. (note: an easy tip for making your pattern would be to draw it out on freezer paper, then you can iron it directly on to your fabric, shiny side down and it will stay put while you cut it out, eliminating the need for pinning or weights.  Once you've cut out your fabric simply peel the freezer paper off. This is a great method when working with knits!)

Photobucket Pictures, Images and Photos
Step 1
Next you'll cut out your fabric.  Lay your pattern piece on the knit fabric which you will have folded in half width wise.  Use your pattern weight (or if you must your pins.  I promise I won't judge!) and cut it out

Photobucket Pictures, Images and Photos
Step 2a
You will now have two peices of your dome shape and one band that you have already cut out.
Photobucket Pictures, Images and Photos
Step 2b
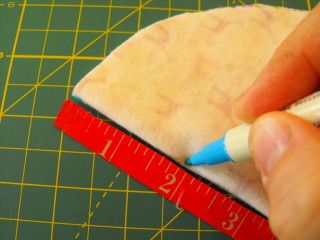
For the next step, fold your dome shapes in half as shown below.  Mark the center point and then mark 2" directly below the centre point on the wrong side of the fabric. Do this on both halves.
Photobucket Pictures, Images and Photos
Step 3
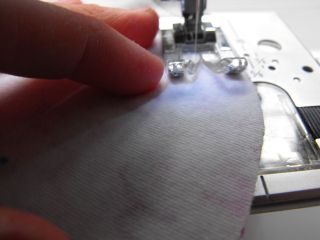
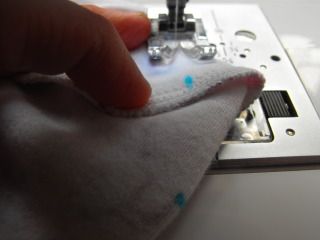
Now the fun begins!  Thread your machine, making sure you have a ball point needle in the machine, place your two dome shapes right sides together and begin by sewing around the outside edge of your dome using a 1/2" seam allowance and either a zig zag stitch or stretch stitch, backstitching at beginning and end. I also have successfully used a regular straight stitch - you might want to just lenghten your stitch length a smidge.
Photobucket Pictures, Images and Photos
Step 4
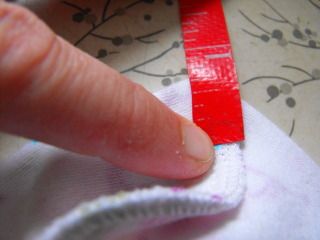
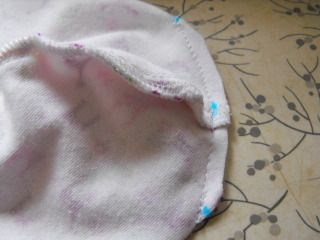
Once you have finished off the seam you will find your center mark that you made in step 3.  Pull the hat together and smooth it out so that it is flat with the 2" markings on either side (your seam that you have just sewn will run down the center front and back at this point) and mark 1/2 " down from center. 
Photobucket Pictures, Images and Photos
Step 5
Stitch from edge to edge creating a dart along top centre following your markings. You can then trim the excess off leaving a 1/4" seam allowance.
Photobucket Pictures, Images and Photos
Step 6a

Photobucket Pictures, Images and Photos
Step 6b
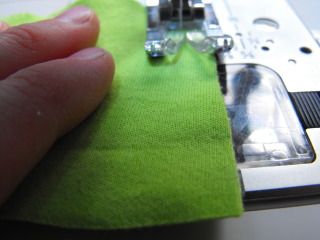
Next you will create the contrast band.  Fold your 13 3/4" x 2 3/4" strip in half lenghtwise, right sides together.  Stitch a seam down the short end of the your folded strip using a 1/4" seam allowance so that it forms a tube.
Photobucket Pictures, Images and Photos
Step 7
Next fold your tube in half from bottom to top, wrong sides together and press. Find the center back of your hat (to find center back, fold the hat in half and follow the line of your dart down to the bottom) and line up the center seam of your contrast band with the center back of the hat, raw edges and right sides together.  Pin at center back then find the center front of hat and band and pin those together.  Stitch using a 3/8" seam allowance, stretch the band to fit as you go.
Photobucket Pictures, Images and Photos
Step 8
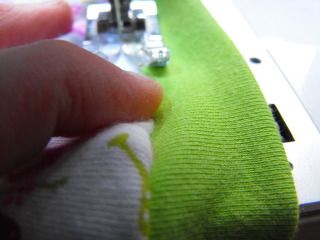
You're almost there!  For your final step, press the seam allowance of the contrast band up towards the hat, then top stitch approximately 1/8" inch from the seam on the hat to finish it off. Lightly press.
Photobucket Pictures, Images and Photos
Step 9
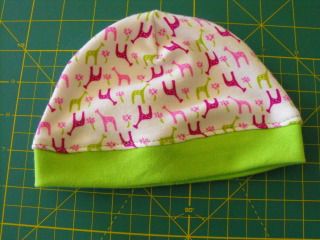
Your done!  Now go find a sweet little baby to put it on!  This hat is meant to fit approximately a 3 month old.  Although as we all know babies do come in all shapes and head sizes, so it can really go from newborn to probably six months depending on the individual.  (My giant babies would have probably been able to wear this size closer to newborn - by three months old Little Toddler Man was in 12 month clothes...)
Photobucket Pictures, Images and Photos
A Super Simple Baby Hat!

Wednesday, October 17, 2012

KCWC and a Crafty Roundup

So... Last week was Kids Clothes Week Challenge. You know, the challenge I always say I'm going to do and then for one reason or another I don't do anything sewing related all week.

This fall I was determined to be successful. And while I may have not made the entire seven hour challenge I did get a good five hours in, which is a good five hours more than I've ever managed for KCWC.

I even did a little baby hat pattern up too (which I'll try to get organized and show you later on this week). So all in all I'm calling it a success!

Here's my two completed projects for the week (I also almost finished a pair of pjs for Baby Boy but had some technical difficulties with the Goodtime Gal machine - hopefully it's just in need of a new needle because Old Faithful is still on the fritz and needing repair. I'd be ever so sad if I had no machine. Eeek! Doesn't bear thinking about!)

Photobucket Pictures, Images and Photos
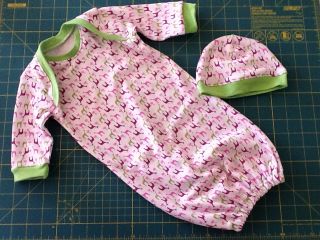
Fishsticks Designs lap gown from the Little One Layette pattern and self drafted hat pattern - yet another baby gift for a friend!

Photobucket Pictures, Images and Photos
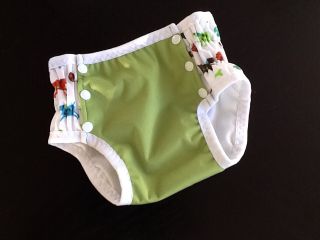
Tinkle Time Pocket Trainer (slightly modified) for Baby Boy

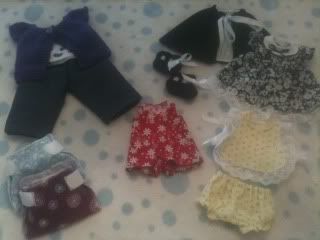
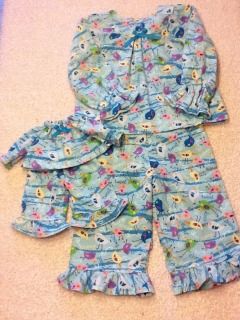
I've been busily sewing and knitting prior to KCWC too. Remember the doll Mei Tai I showed you a few weeks ago? It was part of a birthday swap gift for my October Mamas group on Rav. Now that the birthday girl, her mama and her brand new baby brother have received their parcel I can show you the rest. I knew the little one was getting a baby doll so I set to work making a wardrobe. I used a vintage (although I hesitate to call it vintage when it's 40 years old, ahem, which makes it younger than me...) pattern for the dress, cape, sunsuit, and romper, a 20 year old pattern for the tee and jeans and modern patterns (modified slightly so they would match) for the toddler and doll pjs. The sweater and booties were free patterns from Ravelry. The diapers are my own design.

Photobucket Pictures, Images and Photos
A new wardrobe for dolly

Photobucket Pictures, Images and Photos
Matching toddler and doll jammies!

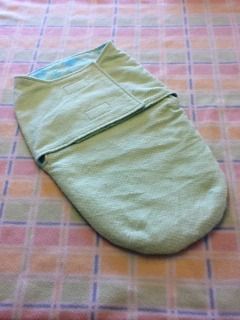
For baby I made a flannel swaddler blanket using an online tutorial I'd found when expecting Baby Boy, but never got around to making. Too bad too. He was the swaddling king when he was tiny... I was really happy with how it turned out and think I'll add it to my list of baby gift possibilities!
Photobucket Pictures, Images and Photos
Snuggly soft swaddler

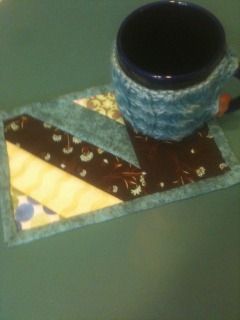
For mama I made a mug rug and coffee mug sleeve thinking they might come in handy with a new baby in the house!

Photobucket Pictures, Images and Photos
Mug rug and sleeve

Let's see. What else was there? Ah yes! Some knitting!

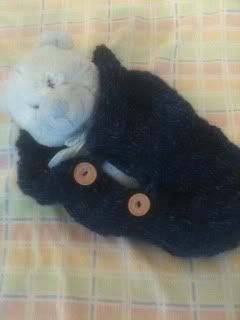
First up another baby swaddle blanket for a gift. This one is a quick knit on big needles with big chunky yarn. I used the Button Up Baby Wrap pattern available on Ravelry. It fits Blue Bear just right!

Photobucket Pictures, Images and Photos
Wrap knit in a soft wool/cotton blend

I also knit a pair of socks from my "Summer Mama" friend Joeli's new book, Tiny Treads. I test knit Sandman and am really pleased how they turned out! I was also really excited when another Ravelry friend gifted me a copy of the book as a surprise! Thanks again Sally!! I'm definitely looking forward to trying out more of Joeli's patterns!

Photobucket Pictures, Images and Photos
Baby Boy loves his Sandman socks!

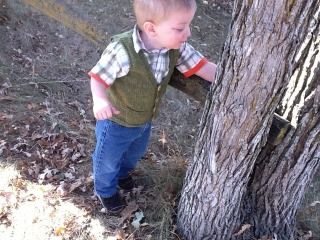
So that's about it for me, but before I go I have to show off the beautiful handiwork of a couple of my friends! First up is the sweater vest (which coincidentally is another of Joeli's patterns "Pepo Pie") that was knit by my friend Lin as part of Baby Boy's birthday swap parcel - both baby boy and I love it!

Photobucket Pictures, Images and Photos
Looking like quite the little gentleman in his vest

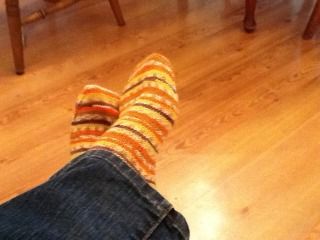
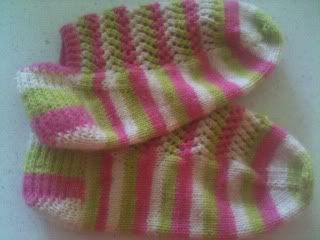
I also got a wonderful fall surprise in the post a little while ago from my friend Kim! Aren't these socks perfect for conjuring up thoughts of all the very best things about fall? Leaves turning colour, candy corn and very best of all pumpkin spice lattes?

Photobucket Pictures, Images and Photos
Love my fall socks!!!

Thank you Lin and Kim for your gifts of beautiful knitting!!!

Friday, October 12, 2012

A Picture Is Worth A Thousand Words

Reading Soulemama's blog I was inspired by her {this moment}. She says,

"A Friday ritual. A single photo - no words - capturing a moment from the week. A simple, special, extraordinary moment. A moment I want to pause, savor and remember."

In the busy hustle, bustle of life, this notion of a photo capturing a moment to pause and savor really appeals to me.

A Moment To Remember

Photobucket Pictures, Images and Photos
October 6, 2012

Thursday, October 11, 2012

Easy Peasy Pattern Weights

So, I was loading a year's worth of photos from my camera onto my laptop the other day when I came across a set of pictures I'd taken last winter thinking I would show you how to make some really easy pattern weights. Guess I forgot. Better late than never. Right?

I learned how to "properly" cut out fabric back in Fashion Design. We didn't pin our patterns to the fabric, but instead used weights. Not pretty ones mind you. They were unexciting metal. Pins can be a nasty little piece of work sometimes. They can leave holes in some fabrics, cause runs in others, they can also distort the fabric. With little ones under foot pins can pose a whole other realm of madness. (a certain three year old likes to sneak off with my pins and stick them into the upholstery. Not cool! Especially when you collapse into the armchair at the end of the evening to watch some mindless tv and you sit on a dozen or so pins - thankfully sharp side down, but still...) Yikes! Why set yourself up for mishap.

Don't get me wrong. There is definitely the odd occassion when you're going to want to pin something, but let's save that for when we're sewing shall we?

Pardon the poor quality of the photos and excuse any messy counters you may catch a glimpse of. There is precisely one place in this house where I can safely plug in my glue gun sort of out of reach of the "go go gadget arms" brothers and that just so happens to be right by the stove.

So here we go! I can guarantee the most difficult task of this whole endeavor will be picking out your hardware.

Photobucket Pictures, Images and Photos
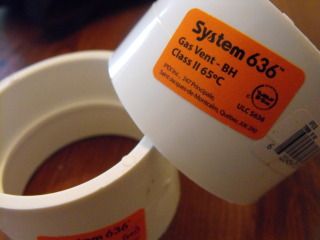
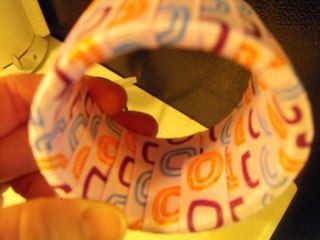
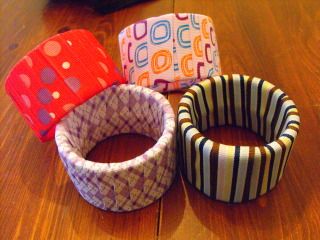
Go to the hardware store and grab yourself something that looks like this. Get a bunch. They're dirt cheap.

Photobucket Pictures, Images and Photos
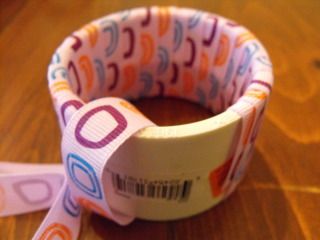
Find a couple yards of fun ribbon and start winding!

Photobucket Pictures, Images and Photos
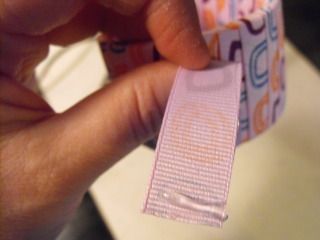
Flip the very end over about 1/4 - 3/8th of an inch (um... it would appear I forgot to turn the raw edge under on this one.) and squeeze a line of glue along the end

Photobucket Pictures, Images and Photos
Tuck that edge down on the inside nice and snug

Photobucket Pictures, Images and Photos
You're done! Wasn't that the easiest thing ever?!?

Now the next time you cut out a pattern you can leave your pins in your sewing box and weigh the pattern down instead! Happy sewing!


Some Birthdays

We had a couple birthdays lately! On September 30th, N turned 18! I'd post a picture, but I haven't clapped eyes on him in quite some time so I don't have one. He keeps telling us he'll be home soon...

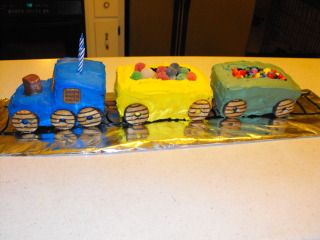
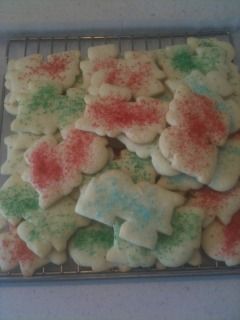
On October 7th, Baby Boy turned TWO!!! That event I have pictures of! I did a quasi-train themed party. Cake, treats for the goody bags and his birthday crown had a train theme. That's about the extent of my "theme-ness"

Photobucket Pictures, Images and Photos
Chocolate Cake Supreme With Buttercream Frosting
Photobucket Pictures, Images and Photos
Train shaped sugar cookies
Photobucket Pictures, Images and Photos
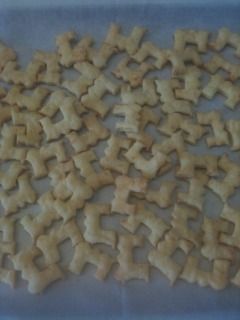
Train shaped cheddar crackers
Photobucket Pictures, Images and Photos
The Birthday Boy in his train crown

Happy Birthday to my boys!!!!

Friday, October 05, 2012

A Picture Is Worth A Thousand Words

Reading Soulemama's blog I was inspired by her {this moment}. She says,

"A Friday ritual. A single photo - no words - capturing a moment from the week. A simple, special, extraordinary moment. A moment I want to pause, savor and remember."

In the busy hustle, bustle of life, this notion of a photo capturing a moment to pause and savor really appeals to me.
(this time I couldn't choose just one so I've done a series)

A Moment To Remember

Photobucket Pictures, Images and Photos
October 4, 2012

Photobucket Pictures, Images and Photos
October 4, 2012

Photobucket Pictures, Images and Photos
October 4, 2012

Wednesday, October 03, 2012

Follow the Leader Socks

Uploaded from the Photobucket iPhone App
Follow the Leader Socks!!!
Remember a while back I told you about my socks - the ones that I wrote the pattern for?  Well, it's now a fabulous PDF so I can share it with you!  I'm kind of silly excited about this!  So with out further ado, go ahead and click here and get your very own copy of Follow the Leader Socks!

The idea for these socks popped into my head one day as I watched LTM and Baby Boy playing at the playground at a park in a nearby town. LTM ran, zigzagging from play structure to play structure. First the toddler structure then over to the big slide, next the monkey bars then the swings, all the while with Baby Boy in hot pursuit.

When we came home I checked out the stitch library on knitting on the net for a stitch pattern that might fit the "follow the leader" type tour of the playground the boys had done. Stitch found I started typing things out on my iPad. Then I found some fun, playful yarn and cast on. Having no clue as to how to take those notes and turn them into a PDF I asked my Summer Mamas on Rav for help. My friend Jen quickly offered advice and help and then turned it into a PDF! Thanks Jeniffer!!!

I hope you enjoy the pattern. It's simple, easy and somewhat mindless - great for knitting through continual distractions... Ahem... Like toddlers! You can put it down and pick it back up again and easily know where you left off!

Happy knitting!!!