Wednesday, February 05, 2020

The Pursuit of Craftiness

Hello, hello!

Last time I was here I said I wanted to share some of the fun projects I had been working on in my blogging absence and I thought I'd pop on over here and take a moment to write while I wait for my blueberry muffins to come out of the oven. If you're looking for a to die for blueberry muffin recipe by the way, try Joyful Healthy Eats recipe.  Mmmmm.  I think this is the fourth batch I've made in the last month.  Everyone here loves them.  Even my hubby, who up until this recipe (and her recipe for orange cranberry muffins which I have also made several times), was a self proclaimed muffin hater, is now requesting I make them for his lunches.

Anyway, let's get back on track and talk about the pursuit of craftiness, which is why I came on here tonight.

I had a lot of fun working on little projects - you know the kind.  Quick, simple, almost instant gratification.  To start out, I ended up participating in the Secret Santa exchange at work this year.  I usually dread those sorts of things, because I tend to get super stressed out about picking out the perfect thing, but I thought it might be a fun way to get involved and participate at my new school.  We did the last five days of school before the holidays and I ended up doing a mix of hand made and store bought gifts.  I really enjoying myself and will definitely do it again next year!  I love putting a handmade touch on my gifts for my exchange person, our lovely gym teacher.

For her handmade gifts I pulled out my embroidery thread and my old Betz White pattern that I used several years ago and made her a peace dove ornament.  I haven't done any embroidery since the last time I sewed one of these ornaments and I found once I got into the rhythm of it, I quite enjoyed the stitching.  I love this ornament so much.  I definitely want to make one for our tree!! On another day, I set to work using my Silhouette Cameo and changed up a design I had bought in the design store to perfect it for her.  I think she liked having a "gym teacher" specific mug! For the last homemade gift I thought being a gym teacher, she might like something to relax with at the end of the day, so I sewed up a flax heat/cold bag for her.  (Note to self.  Sew one for yourself, Sarah.)


Once those were done, I set to work on the gifts for the little boys teachers.  Last year I made a zippered pocket infinity scarf and it was a big hit, so I thought I'd go the same route for the ladies. I got a bit fancy and used embroidered cotton for the scarves to make them a bit more festive. For the lone male teacher in the group I made a mug in the same style of the mug I made for the gift exchange at work.


Once those were done and ready to go, I set to work with some fun gifts for the kids!  Making special things for them is one of my favourite things to do.  My Silhouette Cameo 3 got a work out this year!  I made t-shirts for each of the big boys, and socks for the girls.  I also sewed up pocket scarves for each of the girls as well and completely forgot to photograph them.


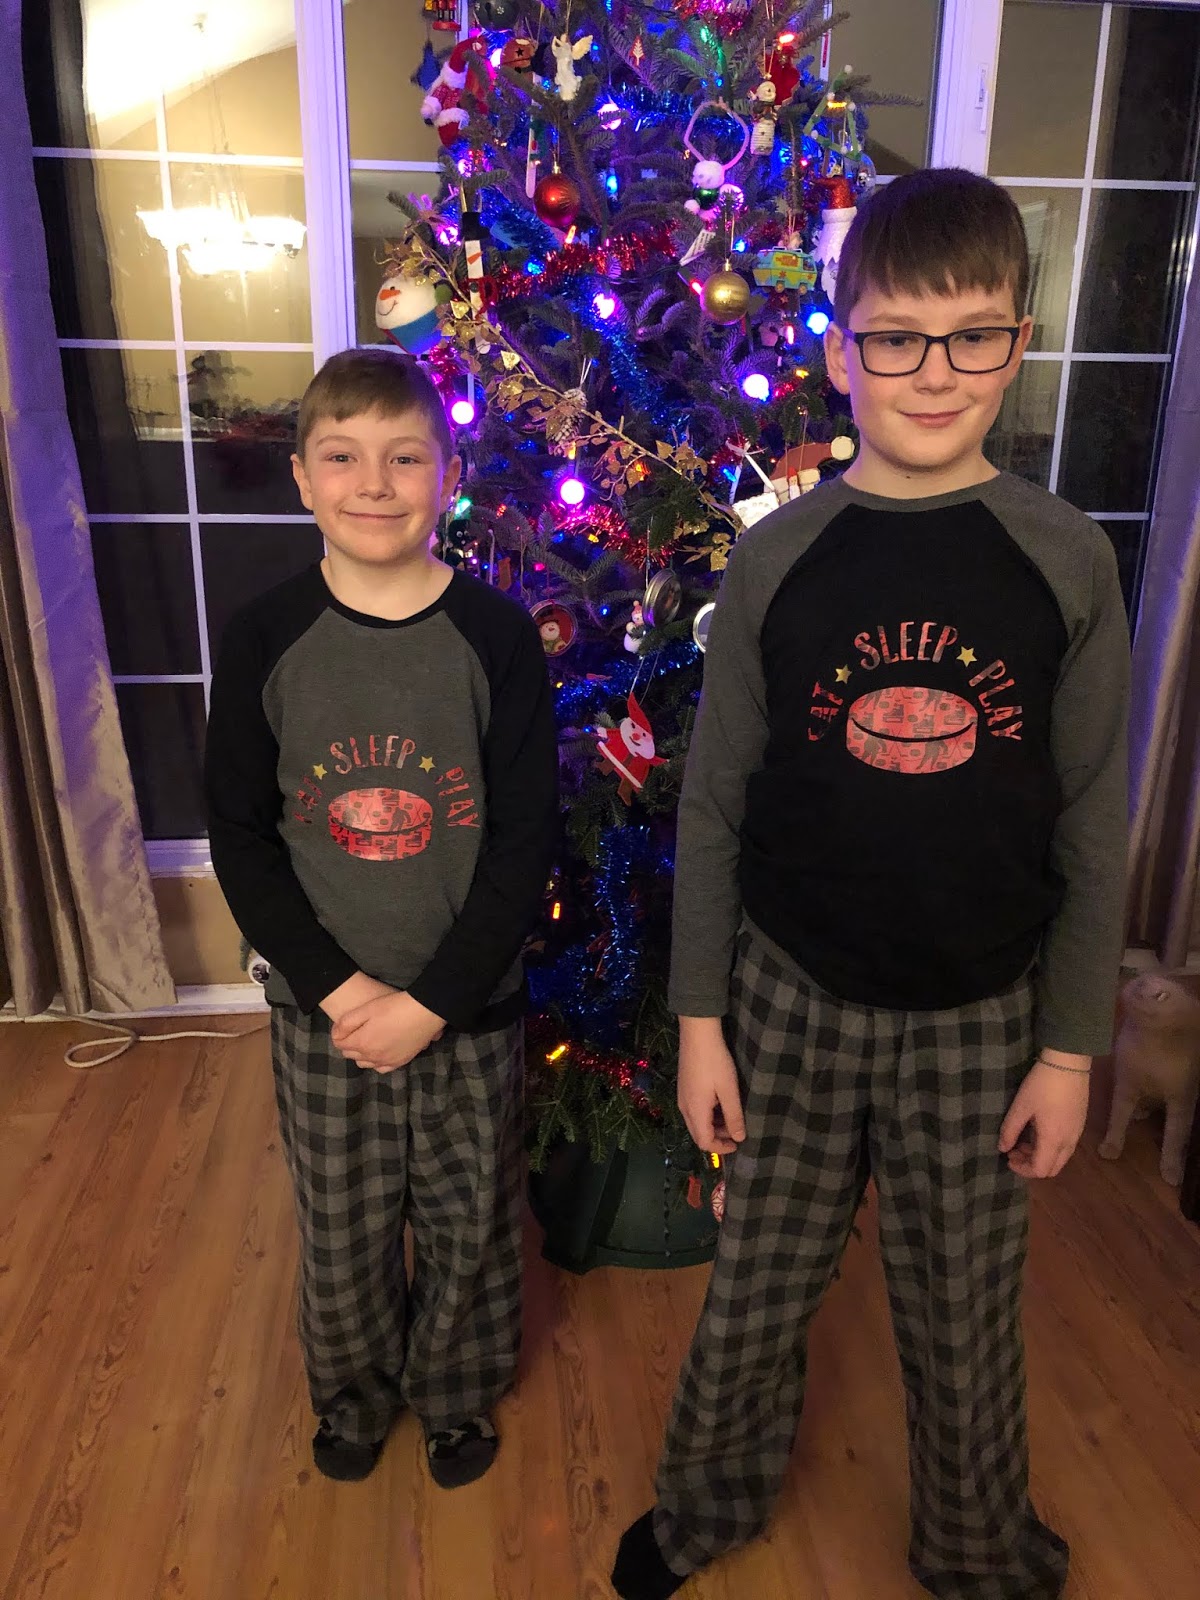
Of course, like every year, I made the little boys a new pair of pjs for Christmas Eve.  I think at this point there would be some sort of revolt if I didn't.  I used the Walk the Plank for the bottoms and the Jolly Roger Raglan for the top.  Both patterns are from Patterns For Pirates and worked out really well for the boys! Of course I had to play with my Silhouette and cut out some vinyl for their pjs too. Instead of tags or label like I would normally use I also used vinyl to put their hockey jersey numbers on the inside of both the pants and the shirts!

The next project made was not actually made by me, but I have to show it off! I had more of a supervisory (and ironing) role.  The boys always "make" a shirt for Daddy for Christmas and this year, Little Man sat down one day after school and created his idea for the design.  He and Baby Boy had a consultation meeting and came to an agreement that they would create the shirt using a combination of vinyl and paint.  Then they sat down at the computer and designed it on the Silhouette, choosing the fonts, making the lettering, aligning everything, and then they selected a simple snowman shape to create a stencil with.  They did the sending to print and all the weeding of the vinyl except the star font which was a beast to do.  I was really impressed with both their level of collaboration and their efforts.  It's such a cute shirt and even better because it was their very own concept!


Last but not least was a fun little pattern that I made as a safe way to transport the mug that the boys made Daddy as well.  Last year we hadn't painted a mug and I think everyone was a bit sad about that, but I couldn't find one that would transport easily or if it could it wasn't microwave friendly which was a must for his coffee breaks.  If it transported easily and it was microwave friendly there was no way for the boys to personalize it.  After perusing pinterest for ideas I found a tutorial on making a mug carrier that would fit the bill perfectly allowing us to paint a regular coffee mug, and allow for safe transport (turns out if you leave mugs at work in that staff lunch room, even when they are clearly personalized and someone's special mug, people feel free to use it and not wash it out - yuck - so transporting it back and forth became necessary).  This little bag is padded enough that it keeps the mug safe, but small enough that it's easy to put in a lunch bag or backpack.


So that, along with some test projects I can't talk about yet, and a few other things are the crafty pursuits that kept me busy!  I really did have fun making each and every one of them.  It's fun to do the quick and easy little projects every now and again.  I'll be back again soon to talk about a few other projects I've done in the last couple of weeks.  I even have a knitted finished object!!!  I just need to block it and take some photos.  I can't wait to show it to you though!  

I'd better head off for now.  I've nattered on long enough.  The muffins are cool now (it's taken a lot longer to write about these than I thought!) and I need to make lunches for tomorrow!

Until next time, happy crafting!

Thursday, January 23, 2020

I'm Back!

Well.  It's certainly been a while.  I seem to have taken an inadvertent lengthy blogging hiatus.  I honestly meant to come back ages ago and post, but clearly it just didn't happen.  I've had a lot going on and I've been ridiculously tired so blogging was one of the things that unfortunately fell by the wayside.

I've done quite a bit of crafty things over my time away from the computer though and one of these days I'll sit down to tell you about them, because I had a lot of fun doing them and I'd love to share them with you.  I've also done some super secret test projects that I can't share just yet, but promise I will just as soon as I can down the road!

In the meantime, I'm here today to tell you about a project that I made way back in the fall for the Minerva blog that's finally gone live today so I get to show it off!

It's the Christine Haynes Ellsworth Coat made in a medium weight Lady McElroy Cotton Sateen!


It was quite an endeavour, but I'm really very proud of it.  I can't recall ever making a fully lined coat before and it's been on my sewing bucket list for the longest time! I won't spoil the details here, you can hop on over to read all about it over on the Minerva blog instead.

But before you head over, just take a closer look at that fabric... flowers and foliage and birds, oh my!!!  It's all of my favourite things!


Wednesday, November 06, 2019

Cape Cod Capelet

Just stopping in with a quick post this morning to tell you all about the newest pattern from Itch to Stitch*

I remember back when I was a little girl - maybe grade two or three - Mom knit me a poncho. It was a variegated yarn, but the predominant colour was pink and I LOVED that poncho.  I wore it for years!  When Kennis posted the call for testers for her Cape Cod Capelet, I was reminded of my poncho of long ago and while this isn't anything like that poncho, I had a feeling I would love it just as much.

It's that time of year where I can't decide if I'm chilly or too warm, so sweaters are a bit too much right now, and while the "Librarian Dress Code" dictates that a cardigan must be worn, sometimes it gets a bit dull day after day.  I jest... A cardigan does not necessarily need to be worn, but must be within reach at all times. (Actually I'm just kidding.  There's no secret librarian dress code despite the fact that I'm sure my students think otherwise with my constant rotation of cardigans. LOL )


So let's mix it up a bit and throw in the Cape Cod Capelet!  I made mine out of snuggly rib sweater knit fabric that I got locally at the fabric shop in town and I want to live in it! I did tone it down a bit from my 1970's poncho and went with a pretty basic neutral grey that I can wear with anything. It's the perfect thing to throw on to ward off the chill.

It's such an easy pattern too!  Only four pattern pieces - front, back, sleeve and collar. And it whips up quick as can be.  It has a high low curved hemline, raglan sleeves, and a loose "floppy" collar - mine is a bit less floppy due to the nature of my thicker sweater knit.  I don't think it took more than an hour to sew up so it's got instant gratification, sew it up in the evening and where it out the next morning potential written all over it.  You can choose from so many different fabrics for this one.  I even saw a stretch lace version pop up!!  Wouldn't it be glamorous for the holidays in lace over a shimmery cami and a pencil skirt or skinny pants... hmmmmmm.  Filing that idea away in my mental filing cabinet for future pondering!


Best part about the capelet is it was the kick in the pants I needed to finally figure out how to use the cover stitch option on my Singer Serger/Cover Stitch machine.  I've only had the machine for three years now. When I first got the machine I'd tried out the cover stitch but clearly hadn't threaded it correctly.   To be honest the machine is a bit of a beast to thread and some of the places thread needs to go are very hard to get at or even see.  And the instruction manual is about as clear as mud, so I got frustrated, then I got intimidated and then I gave up.  However, the Cape Cod Capelet has a curved hem and I hate sewing curved hems with the heat of a thousand burning suns.  Which is a problem, because I love wearing curved hems.  Such a struggle.

So I sat down on Sunday afternoon, grabbed the manual for my machine, screwed up my patience (and courage) and figured the damn thing out.  It took a few test runs, but once I had it figured out I was off to the races.  A cover stitch is magical on a curved hem. I'm willing to bet it's pretty great for regular hems too! LOL.   I want to cover stitch all the things now.


I really recommend this pattern if you want a quick fun project to add to your wardrobe!  You can grab the Cape Cod Capelet on sale this week over at the Itch to Stitch site.

Saturday, September 28, 2019

The Sew Over It Sylvia

Well, there is a certain greatness to my lateness once again.  I've been feeling a little overwhelmed with everything going on these days, that I feel like I don't know if I'm coming or going most days.  Which is how I completely forgot that I had a post going live on the Minerva blog up until Wednesday and then managed to have it once again completely slip my mind in the crazy that was my day yesterday.

So here I am, a day late, to let you know about my newest post for Minerva.  It's the Sew Over it Sylvia Robe sewn in a crinkle satin print!


I actually sewed this one back in the beginning of July when the temps were soaring and the sun was shining.  Of course here we are now the end of September,  barely getting into the double digits and so many cloudy rainy days.  My Sylvia robe is likely going to migrate to the back of the closet now in favour of cozier cardigans and sweaters, but I still love it just as much as when I sewed it up and might pull it out for those days that I want a dressier look!

I hope you'll stop on by the Minerva blog and have a look!  And while you're there, you'll want to check out the other projects up there.  I'm always in awe of the beautiful creations on the blog and find it so inspirational.  (My to make list always grows exponentially after reading everyone else's posts!)


Thursday, September 19, 2019

Itch To Stitch September Spotlight


Hello, hello!  I'm so excited to be here today to share in the 2019 Itch to Stitch Blog Tour.  If you've read my blog before at all, you'll know that I am a huge fan of Kennis Wong and her designs for Itch to Stitch*.  They consistently fit well, are well drafted, and the instructions are always easy to understand and have loads of details.  (Even after sewing for as many years as I have I appreciate the care that is put into the instructions to make things clear!)

Like last year's tour, I decided to try out a pattern that I'd never made before.  I've glanced at the Carey Top on and off over the last few years, but didn't give it too much notice thinking I'd get to it one of these days.  When I suddenly realized that it was suitable for knit or woven fabrics it immediately jumped to the top of my "must make" queue.  It's not often you find a pattern that will work with both, so I really wanted to put it to the test and see how things would go. (Also, how had this totally slipped my notice for so long?!?!)

The Carey Top has endless possibilities besides the fact you can choose between using woven or knit.  You could choose to do it all one fabric, or get fancy and use a contrast for the shoulder panel.  Kennis suggests in the pattern that you could use a sheer fabric to make a beach coverup or you could lengthen it to make it into a longer tunic or a dress. So many easy options for changing things up!! It's a fairly simple pattern too, consisting of only five pattern pieces - front, back, shoulder panel, neck facing and drawstring.  You could even get creative and use ribbon, twill tape or a leather or suede lacing and skip making a drawstring if you wanted.

Without further ado, let me present : The Carey Top - two ways.


For my first version I  decided I wanted to try it in a knit, so I dug through my stash and chose to use a lightweight French terry that I purchased last year from the almost local to me, Fabric Snob.  (I'm really, really trying to be good about using stash fabrics as much as possible these days).  I went with using the single fabric instead of a contrast.  The only change I made to the pattern was my standard addition of 1 1/2" added to the body that I need to do for almost all patterns I make to account for my long torso.  For the ties I simply cut thin strips of the french terry then tugged on it slightly to get it to stretch and curl.  No need to finish the edges in any sort of way!  Such a quick and easy way to do them.  The French terry was easy to sew and went together so quickly. This top is the best of everything.  Perfect length, soft, cozy, comfy and will be a wardrobe staple for both work and casual!


Of course since my first version was a knit, my second had to be from a woven fabric.  I wanted something with a light hand to it, so once again headed back to my fabric stash bins and chose a silky feeling polyester crepe from another Canadian shop, that I'm sure needs no introduction, Blackbird Fabrics.


I'll admit that I much preferred sewing the French Terry one.  Knits are just so darn easy to sew and slippery fabrics?  Well, they are definitely not my forte. To be honest, they make me swear.  A lot.  My fabric wanted to shift and slide all over the place which was driving me batty, but I'm so glad I persevered because I am completely smitten with this version!  It feels so comfy, yet dressy and pretty.


I love these two versions of the Carey top so much I've found myself eyeballing my stash bins, scoping out more possibilities.  How many days of the week could I wear a different version of Carey before people started noticing, I wonder.  Hmmmmm... I may have to put that question to the test.  I'm thinking lightweight sweater knits, jerseys, more french terry and more crepes...  This pattern is a definite win in my books.

Thanks so much for stopping by here!  Before you go though, I have a few last things to tell you about! As a treat for you we have a discount code for today, September 19th on the following patterns! (Check out tomorrow's tour stops too for another special flash sale code on the patterns being featured!)

Use the code 919itsblogtour25 for a 25% discount on the following patterns. (You'll want to hurry!  Remember the code is only valid today, September 19th for the next 24 hours from 8am - 8am EST). This is such a great selection of patterns!  I've made all but Salamanca, Davina (although I'm thinking that one is going to be going in my cart today to be made in a stretch velvet version for Christmas this year...) and Orono.

Carey
Zamora
Samara
Idyllwild
Orono
Davina
Salamanca
Envigado

We also have two fantastic prize packages to give from our blog tour sponsors!  You can enter with the Rafflecopter Giveaway below!

Prize # 1

Itch to Stitch: 3 PDF patterns of choice
Raspberry Creek Fabrics: $100 Store Credit

D&H Fabrics Co: $50 Store Credit

Simply By Ti: Prize of $20 Store Credit
So Sew English Fabrics: Prize of $40 Store Credit

Sly Fox Fabrics: $25 Store Credit

Prize #2

Itch to Stitch: 3 PDF patterns of choice

Beautiful Textiles: $100 Store Credit

D&H Fabrics Co: $50 Store Credit

Surge Fabric Shop: $20 Store Credit

Knitpop: $50 Knitcoin Credit

Rafflecopter begins Monday September 16th and will close at 11:59pm ET Sunday, September 22nd. 2 winners (1 per prize package) will be drawn and announced Monday, September 23rd.

a Rafflecopter giveaway

And last but not least, I hope you will be sure to enjoy the rest of the blog tour posts and check out the amazing ITS garments made by these talented sewists!

Here are the Bloggers for the ITS September Spotlight Itch to Stitch Blog Tour

September 16th 
September 17th 
September 18th 
September 19th 
September 20th 


Wednesday, August 21, 2019

Better Late Than Never - Catching Up to #30days of Dresses

I definitely meant to do my post on how the second half of #30daysofdresses went but then completely forgot to do it.  Here we are 3/4 of the way through August and I've suddenly remembered it, so better late than never here it is!  But first, I want to share a new project with you that I sewed up in the last two weeks as well as a sneaky peak at a few projects I have coming up on the Minerva Blog this fall!

So let's get started!  First up is my new dress, the very popular Chalk and Notch Fringe Dress.  I wasn't sure I really liked the style for me when the pattern first came out.  I had only seen it on women who were definitely not my body type, so it was hard to imagine how it would look on me.  At some point they re-released the pattern with a larger size range from what I gather, so that there wasn't just a standard A/B cup bodice, but also a C/D cup bodice, and I started seeing more and more curvy sewists in the dress.  Of course being the ever fickle sewist I am, I was suddenly obsessed with the pattern despite having not given it a second glance for the longest time. So I decided to give it a go for myself.


I did need to add length of course to the bodice, but then forgot to take length off the skirt, so it does fall somewhat longer in the hemline than I think the designer would have intended.  I'm not sure I'll take the skirt off and shorten it or if I'll just leave it as is, with a mental note to shorten it next time I make the pattern.  I chose to make View A with the buttons and sleeve tabs in a size 18 C/D.  The only modification I made was to lengthen the bodice.  The dress is very simple to sew, but I took my time, sewing it in little chunks of time here and there.


I'm loving my new method of sewing in small chunks.  I find it so much more relaxing and enjoyable than trying to get things done all in a rush!  So much so that I'm planning to take part in the Instagram challenge of #seweverydayseptember that was proposed by Sheona of Sewisfaction. It'll be a great reminder to myself to slow things down and even doing a small sewing related task every day is good enough!

Anyway, back to the dress.  I sewed it using a rayon challis that I had purchased from
Fabricland earlier in the summer.  They had it in a navy colour way that I really wanted, but sadly didn't have near enough fabric left on the bolt, so I went with the black instead.  I can still pair it with my favourite red Lotta from Stockholm clogs, so I was happy.  (Does anyone else base the majority of their fabric purchases on a favourite pair of shoes?)  I can also wear it with my black pair of course but why when I can wear red?


I'm pretty happy with the dress.  It's comfy and has pockets (who doesn't love a good pocket?).  I'm just not sure about the length.  Should I shorten it?  What would you do?


This was one of the dresses I had planned to make in July for #30daysofdresses, but that didn't happen obviously. Neither did the Kielo Wrap Dress I had planned. (I should get on that one soon!) I did sew two other dresses though, so that was pretty good I thought!  Unfortunately I can't show them to you yet because they are for the Minerva Blog and won't be up for a while yet, but I thought I'd show you a sneaky peak of them today.


Now, lets take a step back in time for a moment to July and the #30daysofdresses challenge.  I'm happy to say I did it!  There were only a few times that I chose to wear my Samara Pants* instead of a dress but other than that one pattern, all other days saw me wearing me-made dresses.  There were lots of repeats.  Turns out I don't have thirty dresses in my wardrobe and quite frankly I'm ok with that.  It was quite evident that there were some dresses I obviously love more than others because they were on heavy repeat rotation throughout the month, whereas others I was happy to just wear once or twice throughout. I thought that I might immediately go back to pants and shorts as soon as the month was over, but I've found myself still wearing dresses far more often than pants. Possibly in preparation for winter when it'll feel too cold to even contemplate a dress unless I absolutely have to... lol   I was pretty pleased that I managed to document it all on Instagram too except for one day that I forgot until I was already in my pjs.  It was a repeat day anyway, so I felt it really didn't matter. (for those curious, it was my SOI Heather Dress).

So if you're still reading after this marathon post, I'll leave you with a look at how the rest of the month panned out for me.  I've put the links to the patterns below (clockwise from top left)


I'm going to sign off now, because I've got some housework that desperately needs doing and another project I'm working on right now for Minerva that is calling my name and two boys that are claiming they are starving and "WHEN IS IT GOING TO EVER BE LUNCH MOM???"

Tuesday, August 06, 2019

#ITSSUMMERCLASSICS

So you all know by now how much I love Itch to Stitch* patterns.  I've tested countless patterns before their release and if I don't have time to test, I almost always purchase the pattern myself at some point after the release.  I swear that Kennis Wong, the designer, creates her patterns just for me because I never really have any alterations to do besides adding some length usually or the odd tweak here and there if I'm making pants.  But I hear a lot of people say that about her patterns so I guess they're not really just for me.  LOL!

We're doing something fun over in the Itch to Stitch group on Facebook until August 7th where makers have been asked to highlight their favourite ITS patterns for summer and hashtag it #ITSSUMMERCLASSICS.  I've definitely enjoyed putting together some collages of my wardrobe staples.  It's funny to see them put together like that because I don't necessarily think about the patterns when I reach for a garment out of my closet, but you can definitely tell which patterns I love the most... hello Crystal Cove Cami and Samara Pants!  I'm looking at you!!!

I thought I would share my various collages I put together here on the blog too, so you can see what my favourites are.  So here we go!  First up is Cami's and Tanks - from top left to right the patterns are:

Crystal Cove Cami (modified to have a straight back and wider straps)
Crystal Cove Cami (same mods as above)


And then of course tops and tees:


Moving right along we have the Samara Pants.  Oh how I love this pattern so much!  I made three pairs back to back and I wear them all the time.  They have the swish of a skirt and the practicality of pants (no inadvertent wardrobe malfunctions in the wind! LOL).  

The tops that I've paired them with in these photos are all Itch to Stitch too.  From left to right they are:
Crystal Cove Cami (my modified version from above)


Let's go on to the dresses now.  While ITS has quite a few dress patterns in the shop, (a lot of which I own!) for some reason I've only made two of them so far.  Odd.  Must remedy that.  The Marbella is my absolute favourite dress in the summer.  I made it a few years ago and it's my summer time go to.  It has an anchor print that despite the fact I live on the prairies, I get seasick at the sight of a boat and have no sailing experience what so ever I am inexplicably drawn to.  Pairing it with my red Lotta from Stockholm peep toe low woods always makes me feel like a million bucks.  It just screams summertime to me. 


And then there is the Petaluma Dress


Last but not least lets talk shorts.  I have the Hermosa Shorts that I just made recently that I'm looking forward to making a second pair of as soon as I get the chance! Also ages ago I made the Liana jeans but oops! Within a few months I had managed to shrink them and they ended up way too short to wear. (I'm the world's worst laundry do-er.  I can shrink just about anything!)  So I cut them off and made shorts out of them because I wasn't going to waste all that effort of making jeans.  Once altered to shorts,  I then proceeded to live in them!  


I hope you've enjoyed my Itch to Stitch pattern selections for beating the heat of summer!  Don't forget you can always take advantage of bundle pricing in the Itch to Stitch shop if you're wanting to stock up on patterns.  No codes are necessary so the discounts will show in your cart automatically.  One small note that I feel I should address is that as you may be aware, I am an affiliate for Itch to Stitch, but this is not something I take lightly.  ITS is the only company I am an affiliate with at this time as I feel very strongly that it is important that I truly believe in a product I'm going to recommend and that it is something I am happy to use myself over and over again.  So yes, if you purchase through my affiliate links, I do receive a small commission, but you can rest assured that all opinions I present here on my blog are open,  honest and of my own. 

Monday, July 22, 2019

Kosice Top and a Bit of Blog News

Good morning all!  I'm back again with another great new pattern for Itch to Stitch.  Just releasing today, the Kosice Top and Dress* pattern is another one you'll want multiples of in your wardrobe!

It is a fairly straight forward pattern for lightweight woven fabrics and utilizes French seams so to take care of finishing those potentially delicate seam allowances.  Kennis, as usual with her Itch to Stitch designs walks you through all the steps so no need to worry if you're like me and feeling a little rusty on using French seams!  The pattern is in the usual ITS size range from 00-20 with cup sizes A-DD.


The shoulders are delicately gathered on Kosice, using an elastic that is then completely enclosed and the v-necklines are finished using bias tape.  With those features and the previously mentioned French seams, the insides of the garment are left neat and tidy!  I always forget how much I love a good French seam - I really should use them more often instead of always relying on my serger for finishing!


I used a shirting weight cotton that I had left over in my stash from my Penny Dress a few summers ago for my shirt version and the dress version I've not got around to sewing yet I plan on using a lightweight almost peach skin feeling polyester type dress fabric.  Can't wait to getting around to that one!! For my blouse I had a really hard time deciding on what buttons to use, but finally settled on some vintage ones I had in my stash.  I had exactly the five I needed to finish up and thought it was fate.  (that is until I was lazy and used my machine to stitch on the button and broke the last one clear in half by not being careful.  Button tragedy!!!!!  So don't look too closely... but one of these things is not like the other at all.)

Now's the time to snap up your copy of Kosice!  It's on sale over at the ITS shop for the release week right now!

In other blog news, but still ITS, if you head on over to the Minerva Crafts Blogger Network today, you can check out my latest post on how I used the Samara Pants and the Crystal Cove Cami to create my faux jumpsuit of dreams! 


Monday, July 15, 2019

Halfway through 30 Days of Dresses

Its not the first time summer time has rolled around and I've gone on a "pants strike" and worn skirts and dresses, but I think it likely is the first time I've made a point to do so.  The Stitch Sisters, Rachel and Nikki, set forth the challenge this year on Instagram to wear 30 Days of Dresses and I thought what the heck, I might as well!  I've still not bothered to count how many dresses actually hang in my closet, but there are quite a few.  (definitely not 30... at least I'm fairly certain there's not 30 in there...).

I was going to try and see how far I could go into the month without repeating a dress, but then some dresses I just reach for because they're the best for the weather or more importantly my mood.  So I'm not going to fuss about repeats.  Full disclosure time : 1) I've not worn a dress every day so far.  One day I wore my Samara Pants.  But they are darn close to skirt like so I decided they could count anyways.  LOL  2) I sometimes haven't worn a dress for the whole day.  Like the day it was so windy I thought it best in the name of public decency to change into shorts to take the boys football practice rather than risk an epic and embarrassing wardrobe malfunction. Or the morning I walked in the parade with the football team and then came home to mow the lawn.  I didn't put a dress on until much later in the day after parading and yard work and swimming had been done.

Of course I've made a couple of dresses in the last two weeks, because... well, because I can.  So why not?  I had both the patterns and the fabric in my stash already so why not? #sewyourstash for the win!!!

I'll tell you about them first and then I'll leave you with some photos of my first half of 30 days of dresses.


First up was a mash up of the Patterns for Pirates Sweetheart and Sunshine patterns.  I absolutely love my P4P Sunshine, but sometimes the crossover neckline and maxi skirt feel a bit fancy for daily wear (although I did choose to swan around in my maxi on the 5th for my birthday!).  To make my dress a bit more or a day wear feel, I shortened the Sunshine skirt to just below the knee and combined it with the bodice of the Sweetheart.  Then I added some bands to finish the neckline and armholes and boom.  New favourite, throw it on whenever kind of dress!  The fabric is a double brushed poly from Blended Threads in Saskatchewan that I purchased at some point last year.


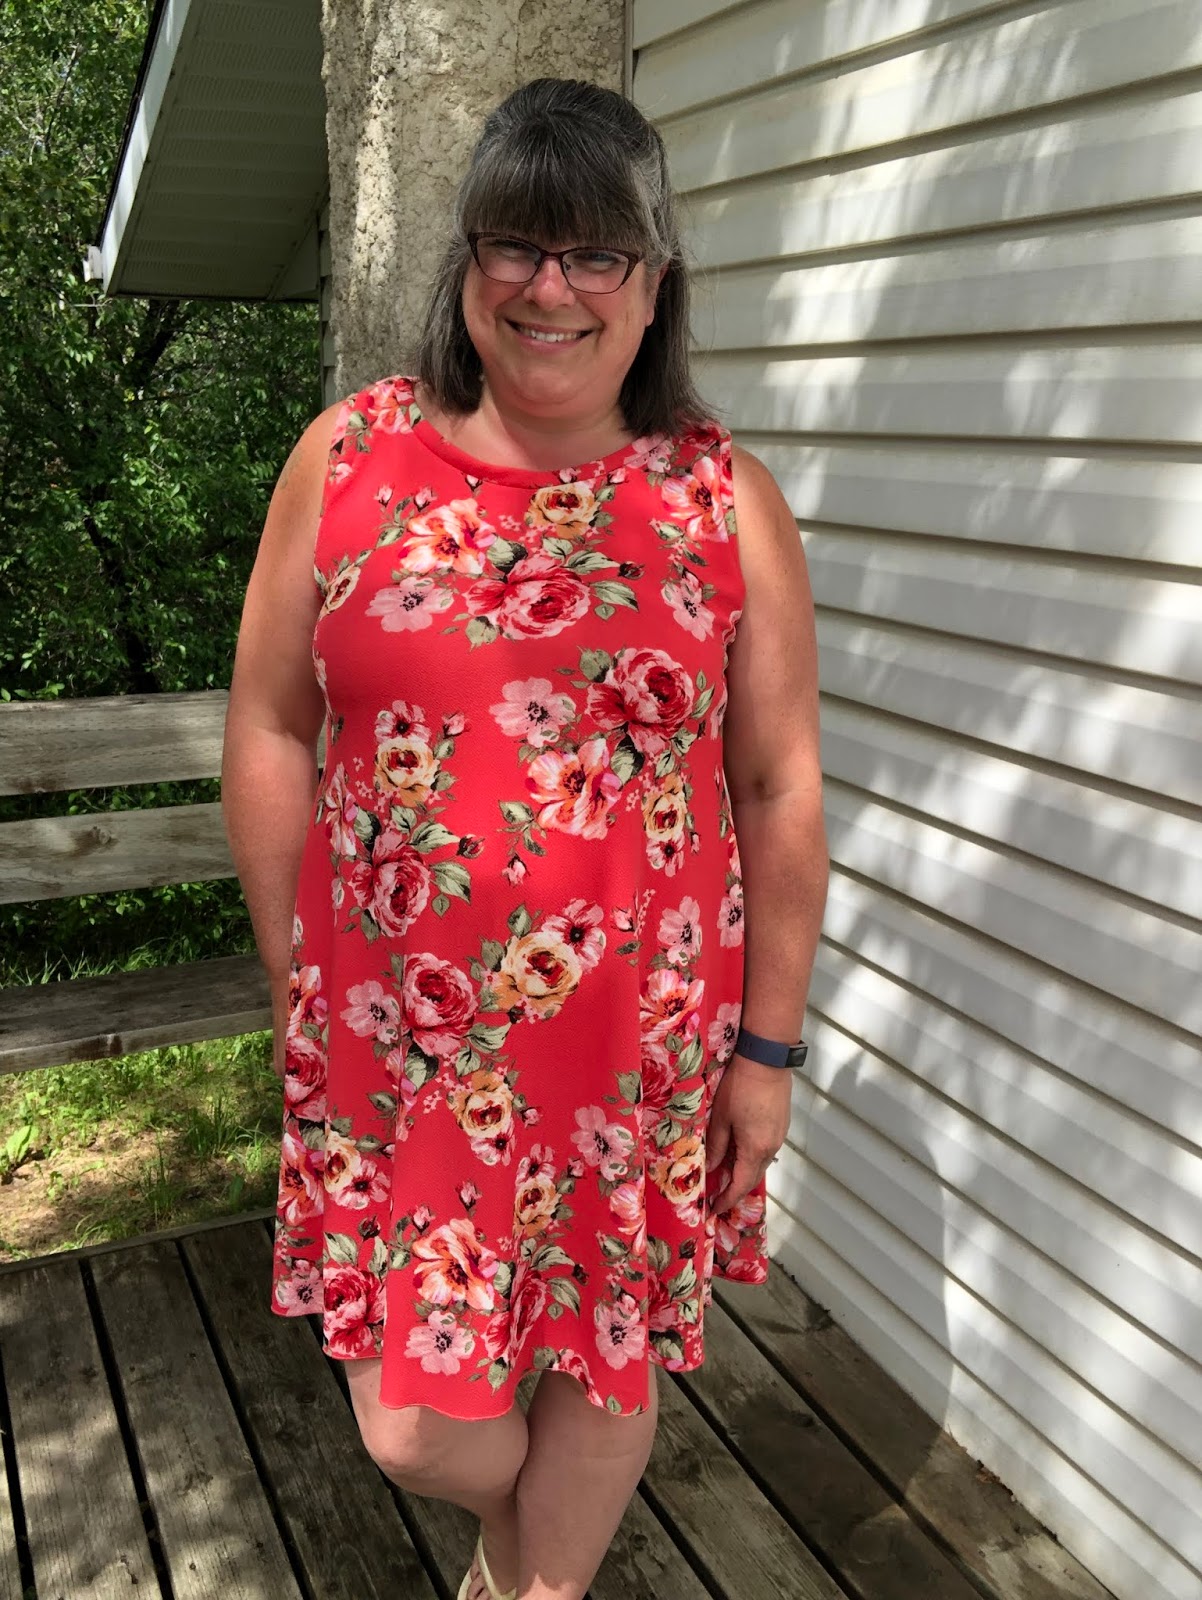
My second dress was for the #sewcialistminichallenge over on Instagram.  I spun the wheel over on the Sewcialists blog to see what colour I had to sew and got "coral".  Perfect luck!  I've had this coral coloured Liverpool fabric sitting in my stash for a little over a year and  I've been meaning to make some more Halla Pattern Agnes dresses after living in the two I made all last summer so choosing a pattern was easy peasy!


Agnes sews up ridiculously quickly so I started this the other day then quickly finished it up yesterday in time for the deadline for the five day challenge.  I had to get a bit fancy with cutting it out - I seamed the center back and cut the front flat rather than on the fold to make sure I could make use of my less than 1 1/2 yards of Liverpool.  It's a smidge shorter than I'd prefer due to fabric constraints, so I did I tiny rolled hem on my serger to finish it off without losing
any length.  All I was left with was a tiny pile of scraps.  SCORE on the stash busting of this project!


And before I go here's July 1st through 7th (Clockwise from the top left hand corner not necessarily in order worn - I've included links to the patterns)


And July 8th - 14th (Again clockwise from the top left hand corner not necessarily in order worn - with links to the patterns)


And the halfway point today!  July 15th


So there it is - that's the first half of the month done.  No guarantees I'll do the next fifteen days in dresses, but I'm going to give it a shot anyway!  I'll check in with you again at the end to let you know how it went and if I find time to sew up a few other dresses that I've got fabric and patterns at the ready for...

Saturday, June 22, 2019

You Had Me At Floral

Hello all!  Here I am again already.  Just a quick drive by post again to let you know I'm back on the Minerva Crafts blog today!

Minerva Crafts is definitely one of my favourite fabric shops (maybe you could tell...). I love the huge selection, the prices are always really reasonable and shipping is phenomenal so I have shopped there for several years now.  I really appreciate having the opportunity to be a part of the blogger network, even if I sometimes feel ridiculously out of my league when I see the other sewists that are featured.

Anyway, enough rambling!  Today's post is featuring a gorgeous cotton lawn that is, of course, floral. (was there any doubt it would be?  LOL) When the list of fabric choices came out, I saw it and that was it.  No need to ponder over any other choices.  They had me at this one.  I think we all know by now a pretty floral fabric is my weakness.


I used mine to make none other than Selkie Pattern's debut London Dress!  I hope you'll hop on over to the Minerva Crafts blog to read all about this latest project!