Monday, January 23, 2012

Craft On!

So it's been a busy time for me crafting wise. Little Toddler Man and I have got into a fairly good groove where he plays with toys kept specifically in my sewing area or plays on the piano (also in the same room). Occasionally a game of match the charm squares, put the pins in the pincushion or sort buttons amuses him as well, allowing me a bit of time on the machine while Baby Boy naps.

I decided to try a couple of patterns from my Sewing For Boys book. LTM has been showing a lot of interest in taking himself to the potty, but I've found that most of his pants aren't really accommodating. Whoever thought zippers and buttons on toddlers' clothes a good idea must have either not had a toddler of their own, or they didn't mind as they spent countless hours running a small tot to the bathroom all the while the tot was arguing, "No! Me do!" (or is that just in my house?)

So, I chose the Little Heartbreaker Pants. I really like this pattern. Simple, easy on, easy off, adjustable elastic waist. Perfect. I also love the details, the Hong Kong finish on the pockets - who knew it was called that? Not me, but I like it - and the red railroad fabric I used for the waistband facing and pockets - I sometimes wish I could put them on him inside out so everyone could see the details!


Before I did the cuffs I wanted to check the length, so LTM happily tried them on. Poor Baby Boy felt left out. He came running to me tugging at his pants and babbling and gesturing wildly. I asked him if he wanted mommy to make him new trousers as too and a mad bobbing up and down of his little head and repeated smiles and "uh huh" and it was pretty obvious. He wanted new pants too. I promised I'd make him a new pair the next day.

I thought I'd do the Treasure Pocket Pants for him. I thought using the denim for facings might be a bit bulky especially on an elasticized waist, so I dug through my bin of cottons and found enough leftover to use the construction print I'd made his shopping cart harness from back in the spring. So, his pair has the cotton print on the waist and hem facings as well I made some bias tape out of it for the pockets. I really love these pants on him and he was really happy too, so win, win again!


Moving right along, LTM has grown so much lately that all his pajamas are getting ridiculously short on him so using my favourite Kwik Sew pattern, I whipped up a new pair of flannel jammies for him one afternoon.

I had another couple baby gifts needed so a set of Baprons for one little one and a Austen Lee Romper for the other were my next projects. I had used up the last of my good colours of bias tape on the last few baprons I had made so I made my own. I really think if I'm going to do that again I'll get one of those handy little gadgets for making it. Well I'll get one as long as it saves me from more burnt finger tips. Ouch!


I also finished a project that's been on the go for three years now, but I can't show you pictures or say any more about it just yet. It's a super secret surprise for someone!

Oh and under the category of reuse and repurpose, I cut apart a sweater I knit when I was expecting LTM, that was itchy and ill fitting, not to mention at some point one of the dogs or cats had chewed a big hole in it. I've never worn it, never will, and with the gaping hole it's not as though I could donate it anywhere. So part of it became cuffs for a super quick pair of polar fleece mitts I made for myself before taking the little boys out to play yesterday afternoon.

In knitting news, I'm on a sock kick! My friend, who is a fantastic seamstress and owner of Monster Pants (need diapers? Check out her Facebook page, she makes adorable ones!) is also a fantastic knitter. To cheer me up she sent me a gorgeous pair of hand knit socks! I love them and now remember what I love about hand knit socks, so I've fixed the holes in my Pomatomus socks and cast on last night for a quick pair of Tiny Tulip socks!

Now. If you'll excuse me, Baby Boy is napping, LTM is having a quiet time and I have some knitting to do, although I suppose I should tackle the dishes, do some laundry and mop the floors first...

Monday, January 16, 2012

Pizza Night on the Prairies

We live in a rural area, the closest town is about 15 minutes from us. Delivery is not an option. We probably could get take out pizza, but chances are it would hardly be hot once we got it home, plus the choices of pizzerias in town are abysmal. Why spend $$ on crappy pizza? So we make it here at home. Even Baby Boy, who is (shudder) a finicky eater likes it. Little Toddler Man loves it too, so I thought I'd share my recipe for no-fail yummy crust and a few of our favorite topping combos!
Photobucket Pictures, Images and Photos
Deluxe: Pepperoni, bacon, green pepper, mushrooms and onion!

Pizza Crust
(makes three - four crusts depending on the size of your pans)

Heat oven to 205 C / 400 F
Mix 2 tsp of sugar into 2 cups of warm water
Dissolve 2 pkg of yeast in warm water/sugar and let sit about ten minutes
Add 2 tsp salt, 2 TBSP oil (at this point I usually throw in either oregano or basil or even sometimes some minced garlic)
Stir in 5 cups of flour, then knead dough until smooth and elastic.
Cover and let rise (I usually find a half hour long enough)
Divide and roll out crusts and place on pans that have been liberally sprinkled with cornmeal.
Bake in oven ten minutes (this prevents a soggy crust in the end so you don't want to skip this step.)

VARIATION: N likes to make a stuffed crust. So easy to do! Simply cut strips of mozzarella cheese and place along outer edges of pan, leaving enough dough to fold over the cheese and seal. Nom. Nom.

Cool your crusts a few minutes while you finish preparing toppings (this takes me an inordinately long time because I have two toddler sous chefs helping me!

Toppings

Ham and Pineapple - kid friendly favorite as evidenced by the fact a certain LTM ate no less than two and a half on Friday night and Baby Boy had close to two slices!

Spread about 1/4 cup zesty (or your favorite) pasta sauce on crust
Add well drained pineapple chunks and lots of diced ham. Don't skimp on ham and use luncheon meat. No, no, no. Go for the gusto and use real honest to goodness ham. You won't regret it! Promise!
Top with mozzarella cheese

Photobucket Pictures, Images and Photos
LTM and Baby Boy's fave - Ham and Pineapple

Spicey Chicken - (BF)G loves this one!

Spread about 1/4 cup ranch dressing on crust
Mix cooked, diced chicken breast with Franks Buffalo Wing Hot Sauce to taste and put on crust
Finish topping pizza with chopped tomatoes, red pepper and of course lots of cheese. For this one I like to use a combo of mozzarella and cheddar.

Greek - or Eat Your Veggies

Spread about 1/4 cup of pasta sauce on crust
Top with chopped tomatoes, green pepper, red onions and black olives. Sprinkle lightly with mozzarella and lots of crumbled feta cheese.


Bake pizza at 400 F for about 10-12 minutes, then switch to broil for about 3-5 minutes. Remove and let sit for ten minutes, cut and enjoy your feast! I guarantee you'll never want take out or delivery again!

Thursday, January 12, 2012

More Than Just a Quilt

In the beginning there was a group of "Summer Mommies" who met on Ravelry when they were expecting babies in the summer of 2009. The mommies found out that not only did they love to knit, several of them had a similiar addiction to sewing as well!

One day one of those Mommies suggested that a fabric swap be done. It was decreed that each Mommy would send the other Mommies a pre-determined amount of 5" Charm Squares. Oh what fun ensued. Swap I, II, III and IV went ahead in a mad flurry of cotton zipping around the globe!

And thus the Summer Mommies Friendship Quilt was born.

Let me tell you, there is a certain thrill in getting envelopes stuffed with gorgeous fabric rather than the usual offerings of the post (bills, bills and more bills!). The stack of squares grew larger and larger. The possibilities of what could be done with the fabric grew equally large!

I had about a million different ideas swirling around in my head. Being new to quilting I was pretty daunted by doing anything too big, but then (BF)G was asking for a quilt for our bed, and here I was with this healthy stash of already cut fabric... so I finally decided on the size of quilt I'd make. Queen. Yep. Queen sized. Me, who has only managed to ever finish two baby sized quilts and one twin sized quilt top (some day I'll get that sucker finished too!) making a queen sized quilt!! What an undertaking. But in for a penny in for a pound I always figure!

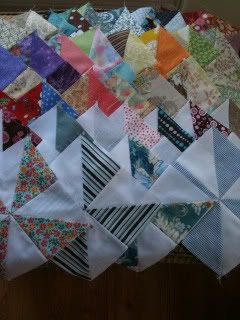
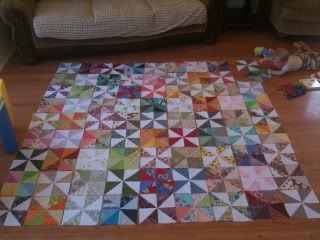
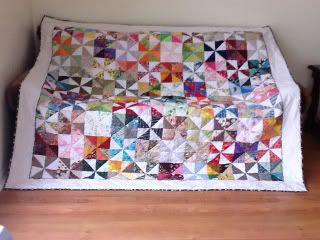
So size determined, the next step was to figure out how to go about doing it. I fell in love with pinwheels somewhere along the way and knew that somehow, someway my quilt would have to have them. But I only had so many pairs of squares and a whole lot more of singles, so I knew I couldn't do exclusively pinwheels. After weeks of designing and re-designing in my head I finally decided to do pinwheel blocks of white and pairs alternating with more pinwheels that are probably not called pinwheels at all, (but I like to think of them as such), made up of eight different fabrics.

April 2011 - Quilt blocks are all sewn
April saw the start of the actual sewing. Blocks were finished relatively easily. A few re-dos here and there to fix non-perfect points and I was pretty happy with the results. Then came the peicing them all together. A bit daunted and out of thread, I took a bit of a break, then dove back into it whole heartedly!

Testing the layout - note a wee Baby Boy trying to steal the blocks!
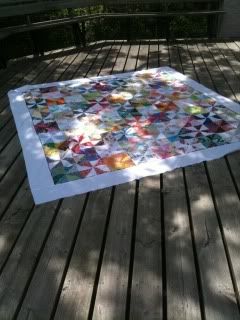
By June I was finished the quilt top. Easy peasy. Right? All that was left to do was choose backing and binding, make my quilt sandwhich and finish it. I selected binding at the fabric store in the city, without problems, but couldn't find a backing I liked. I didn't want to peice together - too expensive, I didn't want an extra wide print - all the store in the city had, so I phoned around to some local country shops figuring surely they would have a good selection of quilt backing fabrics. I hit pay dirt. A jaunt, one sunny fall morning to the next town over to the shop, a store that was actually housed in someone's house. It was a weird little twilight zone-ish kind of experience as sometimes very small towns can be - people noticed as I drove down the street. They actually stopped and stared. It was abundantly clear they wondered who the stranger was in their midst. But in the end the backing was procured. I was all set to finish.

June 2011 - The Quilt top is finished!

What I did not count on was the abject fear I had that I would well and truly somehow ruin my quilt. That trepidation kept my quilt from being finished for months. Then I decided weather was turning cold, (BF)G was asking about the quilt and the quilt itself would call to me from it's spot on the shelf everytime I worked on another project. Deciding it was now or never, late in the fall I started tackling the machine quilting of it. I did a bit each day, hauling my machine upstairs to the kitchen table as soon as the boys went down for a nap. It was hard work. I really felt I didn't have a hot clue what I was doing, but it got done, and the binding was sewn on. Then the handstitching needed to be done. Let me tell you, there is something daunting about the task of hand sewing approximately 370" of fabric. It sat a few weeks while I worked up the motivation.

Then early one December morning, in much need of distraction, I sat down and started stitiching. I didn't get very far that morning, but later that night I curled up in the armchair and started again. It took me several occasions to get all that hand sewing done, but I finally had it finished just after New Year's. A Summer Mama sent me some Shout Colour Catcher sheets - oh how scared I was to put the quilt in the wash. I had visions of disaster. But the colour catcher sheets proved their worth. The quilt came out looking vibrant as ever, the sheet like mud. Thank heavens the quilt did not look like mud. I think that would have been the end of me, or at least my sanity!

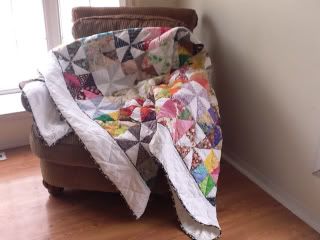
The Summer Mommies Friendship Quilt
2011
So my quilt sits on my bed now, pretty, cozy and warm. There are millions of mistakes in it, but really it doesn't matter to me if there is a pucker here or there, or if the seams don't line up perfectly in every single block. The Friendship quilt is so much more than just a quilt to me. It's a representation of the friendship, support, and love that exists in the Summer Mama's group. A group of women who, from across the globe, that have, for the most part, never met in person, that have shared this journey of motherhood together. We've celebrated milestones of our children, and the joy of the births of new babies. We've laughed, joked, and debated with each other. We've moaned about the intricacies of the terrible twos and potty training. And we've cried and been heartbroken together as we mourned the loss of the few babies who never got the chance to live. Always supportive, always caring. As I stitched the binding, curled up under the weight and warmth of the quilt, it was a reminder of that support and it was a comfort to me. Another mama mentioned that it was like a big hug. And indeed it is.

Wednesday, January 11, 2012

First Projects of the New Year

I hope you all had a happy and healthy start to 2012! After a low point for us earlier in December, I'm glad to say things seem to be on the upswing! I had all five of my beautiful children home Christmas morning, we celebrated (BF)G's 49th birthday and (BF)G, the little boys and I rang in the new year our favorite way. Quietly and at home with a prime rib dinner(even the Yorkshire pudding rose to the occasion! I was so happy to see their puffy, golden perfection as I took them out of the oven. They can be a bit finicky and sometimes fall a bit flat shall we say!), and we rounded out the evening with a video marathon. I've even had a chance to do some crafting. It feels good.

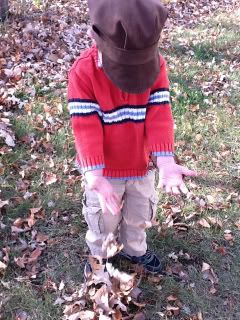
First up was a new hat for Little Toddler Man. His Christmas one was a disaster! Too big, too girly and too downright ridiculous. In making his new one I turned to the tried and true Toddler Ear Flap Hat pattern I used for Baby Boy's Christmas hat. Ah. Success.


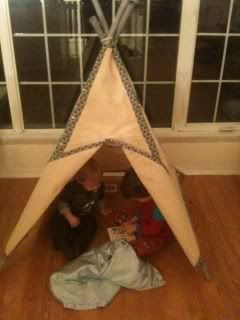
I also got my first major sewing project of the year done! (BF)G gave me two new books for Christmas, Growing Up Sew Liberated and Sewing for Boys. I was completely smitten with the play tent in the first book, so set to work. I had enough home dec fabric left from LTM's pouch sling I'd made for him when he was a baby to use as contrast and got some inexpensive clearance home dec fabric ($3/m) for the tent panels, spent $11 for some PVC conduit for poles (bamboo garden poles it called for were going to ring in about $40. Eeek!)and so for $20 and a few hours time the little one's now have their own play tent. The only thing I really did differently was to do a double fold binding along the bottom edge rather than a hem. I thought it tied it all together nicely that way. The boys have been loving it so far!


Feeling like I was on a roll, I made a couple more Bapron bibs for friends' little ones, a tea wallet to send to another friend, and finally finished the matching sets of flannel pjs requested by (BF)G, LTM and Baby Boy that I started forever ago! I really hope they still fit...


And in really, really big crafty news (well to me anyways) I put the final hand stitches into the binding of my quilt, washed and dried it. It's done!!!! It does feel like it should have it's own post given the magnitude of the project though, so you'll have to wait a bit for the details on that one!

I'll leave you with a pic (BF)G's niece sent of her little one on her 1st birthday wearing the "Cupcake Outfit"

Friday, December 30, 2011

Giving Credit Where Credit is Due

I used some awesome patterns, tutorials and recipes in my holiday crafting over the last several weeks. As promised I wanted to give you the info. Giving credit where credit is due, plus you can go off and make your own now if you want! :)

So let's go with the felt food first. There's loads of tutorials out there, but I used these particular ones as my jumping off point. (the hotdog was my own creation - if I ever get my computer and scanner working again I'll try to do a tutorial up for it)
Craftiness is not Optional
Skip to my Lou

For the real food head on over to my favorite crockpot site, A Year of Slow Cooking for Nuts and Bolts and Chex Party Mix

For sewing the Cupcake Outfit is a skirt of my own design and the top is a modified Charlie Tee. You know where that's from... My fave Fishsticks Designs. The Heating pad is from a great tutorial at The Green Wife and the pocket warmers adapted from Diamonds Fur and Laundry. The doll tents are from Sew Mama Sew.

All knitting patterns except the Star Crossed Slouchy can be found in Ravelry's database. They include: Jacques Cousteau Hat, Snowboarder Hat That Rocks, Toddler Ear Flap Hat, Star Crossed Slouchy Beret (found at the Yarn Canada site), and Nottingham.

There we go! I think that should cover it! Happy crafting!

Thursday, December 29, 2011

The Round Up

As promised, here is a round up of the holiday craftiness I was so busy with! I'm in a hurry so no notes as to what patterns, tutorials etc I used. I'll add those later, I promise! And thanks to a combination of blogger's uncooperative nature and the fact I'm doing this post from my iPad, (yes, the Mac is still dead) the projects are in absolutely no particular order!

Knitting! Sewing! Cooking! Oh my!


Monday, December 05, 2011

Woe is me

My trusty Mac has died. (possibly thanks to a certain two year old). I have to locate the disc (why can I not seem to grasp how important organization is until I'm madly looking for something and telling (BF)G, "I know where it is. It can only be in one of three spots"). Then hopefully it's just a matter of reinstalling my operating system. Touch wood.

Thankfully after the last time, ahem, J and I managed to accidentally wipe everything out, I've been much more diligent about backing up my photos. Wish I could say the same for some other things - some writing I've done in the past, patterns, tutorials I'd saved and so on. Oh well. No use crying over spilt milk, or lost files as the case may be. The pictures are the important ones and I have those.

I've been crafting up a storm lately, but I can't tell you about it and definitely can't show you. Tis the season for secrecy after all! ;)

I'll do a round up before the new year probably, because I am really loving some of the things I've been working on. In big news too, my Summer Mommies Friendship Quilt is almost done!!!!! All that is left to do is handsew 368" of double fold binding. I'm so excited, but unfortunately holiday projects must take precedent.

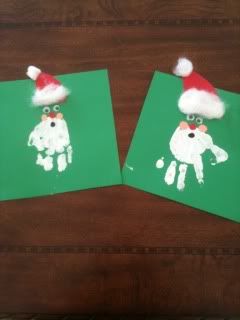
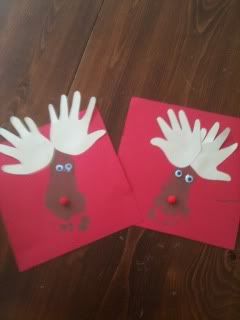
I've done a few little crafts with the toddlers in preparation for the holidays. We've done salt dough ornaments and my two favourites, santas and reindeer using hand and footprints!

Monday, November 07, 2011

What is it they say about intentions?

I always have the best of intentions to get things done.  So often I lack on the follow through.

My own little KCWC was about a big a bust as the actual KCWC for me.  I got next to nothing accomplished.  But I've decided to be ok with that.  I just have to accept the fact that I don't have the chance to sew every day.  I could.  You know.  Instead of go to bed at night, but with two little boys that like to get up with the rooster down the road, I need my sleep! 

I did get a few crafty things done though, so here's the round up so far!

I made a hat to go with the owl outfit I made for my friend's little one - I loved this pattern!  It's Barbara Prime's Owl Tuque.  
Owl Tuque and Owl Outfit
I also made a tea pouch for another friend who was saying one day how she was freezing at work - a case of air conditioning still being on when it shouldn't have - and she didn't have tea to warm up with.  So I thought a little tea pouch she could slip in her bag or desk would be in order.  Then she can always have her tea with her!
Tea to Go!
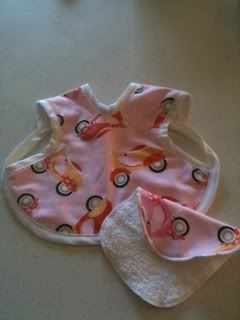
I also jumped on the Bapron bandwagon and made a couple for friends who have just had babies.  I can see what all the fuss is about! It's a great little pattern, although how it could fit up to a 30lb toddler is beyond me.  I tried it on Baby Boy and he was like a 26lb stuffed sausage.  I might make him a couple, but I'll have to make them a bit wider!
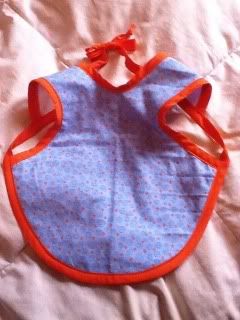
Bapron 1

Bapron 2 and washcloth
No pictures yet.  I'll get one when the whole lot is done, but last but not least I got one pajama top done for the matching jammies of 2011 so far.  Finally.  I should really get my act together and sew the other two.  (BF)G isn't likely to outgrow his, but LTM is definitely at risk at the rate he's growing these days!

Speaking of LTM, he and Baby Boy didn't get dressed up and go out for Halloween this year.  Both of them are too little for candy and it would require driving into town or the city to go trick or treating.  Something I was just not willing to do on a weeknight at bedtime for candy they can't eat.  But we did carve a pumpkin.  We had a nice big pumpkin that LTM grew himself from a little seed.  He was pretty proud of that pumpkin, rightfully so!  He took care of it for many months, watering it with his little watering can, checking on it every day to see how it was growing.  He really enjoyed the carving part too – helping with removing the seeds, which we then washed together and roasted.  Turns out it's his new favourite snack!  He's always trying to sneak into the cupboard for a few!
Little Toddler Man's Pumpkin!!


Last but not least I have to mention J and G!  J turned 21 yesterday and G turns 19 tomorrow!!!  I can't believe it's 21 years already since I became a mother for the first time!  It seems like a blink of an eye ago, J and G were little toddlers like Baby Boy and Little Toddler Man are now.  How fast it goes and what an incredible journey it's been so far!  Happy birthday to my two beautiful children adults!!!
J and Baby Boy - taken July 2011

G and LTM taken October 2011


Tuesday, October 18, 2011

So much for having a plan...

First and foremost Baby Boy turned one on October 7th.  How is my baby already one????  Happy Birthday little fellow!


Last week was Kids Clothing Week Challenge.  I was going to be participating for the first time - somehow I always find out after the fact that it's on, but this time I found out a whole few days ahead of time.  So I made a plan.  It looked something like this:

Monday, Tuesday, Wednesday -

  • cut out flannel for boys and (BF)G's new set of matching pjs (ok - I realize (BF)G's pjs don't really fit in with KCWC, but whatever.  If I'm cutting out a gazillion yards of the same fabric I might as well do it all in one fell swoop.
  • sew at least complete sets for the boys (Using Kwik Sew pattern 3126)
Thursday -

Friday and Saturday - 

  • make outfit for friend's expected baby
  • make LTM a new belt using elsie marley's tutorial
Sunday -
  • finish up odds and ends from the week and possibly begin work on a birthday gift I hope to make
HA HA HA HA HA HA HA HA HA HA!!!!!!!

I'm so dilusional it hurts!

Here's how the week actually shaped up:

Monday -
  • Cut out fabric for pjs, realize I don't have enough for the fronts of the boys tops and (BF)G's top in it's entirety
Tuesday -
  • Go to my local LFS and buy another 2.5 m of flannel, preshrink it once home

Wednesday - 
  • Sweet nothing - oh! Not true.  Pop into the fabric store in the city for corduroy for LTM's hat
Thursday -
  • Cut out hat
  • Start sewing pjs - get the boys' bottoms done except for elastic
Friday - 
  • definitely sweet nothin' done
Saturday -
  • ditto
Sunday - 
  • Feeling all woe is me, I completely failed at my first KCWC I decided to make one project and see it through to completion.  The Eddie Cap is sewn and well loved.
So.  What a bust.  All the challenge required was one hour a day.  I tried to be realistic and tell myself if some days didn't get any challenge love it was alright because other days I could double up.  Ah well.  Life being life, sometimes other things come before sewing, and (BF)G had a week of vacation time from work and spending time with him and the little guys, plus spending a day with G before she took off for Costa Rica for the next six weeks all fell into the coming before sewing category.

That being said, I really wanted to do KCWC, so although the official week is done, I'm doing my own little challenge this week, just to say I did it.  So far so good.  Right now I can't for the life of me remember what it was I did Monday.  Hmmm.  No clue.  Must be getting old.  The memory is going! Tuesday I cut out and sewed the pants for my friend's baby as well as cut out the shirt.  Today I sewed the shirt.  And thought about cutting out the remaining top pieces for the matching pjs - does thinking about it count?? Tomorrow, maybe I'll actually start tackling the tops! Once they're finished I'll see what comes next.  Belt (kind of necessary - suddenly LTM has become a skinny minny and his pants keep falling down) or the birthday gift -  birthday's not till December so maybe I can wait on that one.

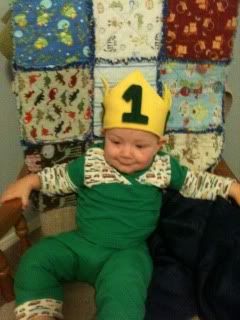
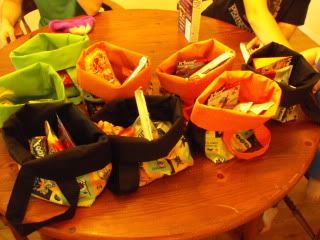
I did do some major sewing before Baby Boy's birthday and KCWC.  I made Baby Boy his birthday crown and nine goodie bags using Fishstick's tutorial.  I also knit two hats for the babies that were too little for regular party goodie bags and finished a blanket square and small toy. 

The round up of finished projects (in no particular order thanks to Blogger not letting me put the photos where I wanted them to be):

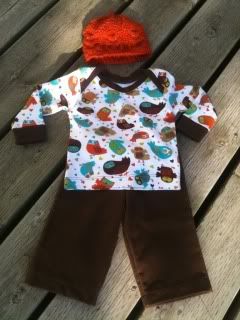
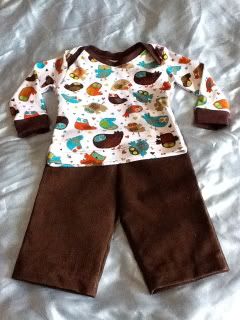
Baby Gift Outfit
(top is Fishstick's Lap Tee and bottoms adapted from a Simplicity pattern)

Blanket Square and Toy for a communal project

Party Favor Petunnia
Party Favor Pumpkin

Goodie Bags for Baby Boy's party guests

The Eddie Cap
The Eddie Cap View 2
So overall some good productivity.  Just not during the week I expected to focus on it.

PS:  It's just come to me what I did on Monday!  I sewed (BF)G's pj bottoms!  Phew.  That lack of memory was kind of bugging me!