Showing posts with label Recipe. Show all posts

Tuesday, April 02, 2019

Pasta Pomondoro with Italian Sausage

Well, this is a bit different!  It's been approximately forever since I posted a recipe (and I'm still definitely no food blogger/photographer by any stretch of the imagination), but given how long it took me the other day to find the piece of paper I jotted down the ingredients on years ago, I thought it might be handy to just pop it up here on the blog.  If for no other reason, I will be able to find it again next time I want to make it.  I'd forgotten how tasty this dish is until I was grocery shopping with my husband the other day and he reminded me of it and asked if I could make it again soon.  Its pretty quick and easy so I made it on the weekend after we'd had a busy day running around doing errands.

The "recipe" is something I came up with about 15 years or more ago after having a similar dish in a restaurant.


Not sure why I was using 1/4 cup of oil at the time - that seems really quite excessive! So we'll just ignore that and carry on and I'll tell you how I made it the other night!

Ingredients:

1 package of Italian sausages, mild or hot
Angel Hair (Capellini) pasta

2 TBSP Oil
1 white or yellow onion (medium sized), chopped
4 cloves of garlic, minced
1 red pepper, chopped
1 28 oz can of diced tomatoes
1 cup of chicken broth
2 TBSP Balsamic vinegar
red pepper flakes (to taste - I just did a light sprinkle)
2 TBSP basil (I'm really liking the organic freeze dried basil in a jar right now while the herb garden is still buried under eleventy billion feet of snow)
salt and pepper to taste
small can of sliced black olives
1 TBSP capers
grated parmesan cheese


Directions:

Pre-heat oven to 375*F
Poke sausages with a fork so the grease drains out when cooking, then place on rack on a pan (or on  a broiler pan) and bake in oven for approximately 25 minutes or until fully cooked.  Remove and let cool slightly then slice into pieces and set aside.

In a large skillet, heat oil then saute onion, garlic and red pepper together until soft.  Then add in the sausage pieces you set aside earlier.  Add the remaining ingredients except the parmesan cheese, turn to low and let simmer until it reduces.


In the meantime, prepare the pasta according to package directions.

Once the sauce has simmered enough for your liking (really it's all preference and how patient and/or hungry you are - there's no right amount of time or amount it needs to reduce if you want it a bit runnier, leave it less time, thicker and leave it longer.)

To serve you can top the pasta with the sauce or you can mix it all together in the pot first - I've done it both ways!  Garnish with parmesan cheese and enjoy!  Leftovers freeze and reheat well too by the way!


Sunday, March 13, 2016

Breakfast Poutine

It's been awhile since I have posted any recipes at all, but after posting a pic of my breakfast this morning on Facebook and Instagram a few people have been asking what it is and what was in it so I figured I'd toss it on up here on the blog for everyone's enjoyment.

There's a restaurant across the street from the school that the little boys go to and one of their claims to fame in their little country town is the different variations of poutine that they serve.  (For anyone who might not have ever encountered poutine, it's a Canadian dish that originated in Quebec and traditionally is a big old helping of fries mixed with cheese curds - or as we often call it "squeaky" cheese and topped with brown gravy.  YUM. YUM.)

So last fall I ended up at the restaurant for breakfast with some of the other "grade one moms" and I spied Breakfast Poutine on the menu.  As soon as I read the list of ingredients on the menu I was in.  Hook. Line. Sinker.  There's no gravy involved in their breakfast poutine and actually there's no squeaky cheese either, but there is hollandaise sauce and quite frankly I get weak in the knees over hollandaise.  Can not resist it.

I went out for breakfast again last week and came home raving about my breakfast poutine at which point my hard working, never get to go out for breakfast hubby inquired as to why he hadn't been served this dish of deliciousness yet, so I promised that on his first day off I would make it.


Today was that day.  Here is how I copied it

(PSA:  Wear stretchy pants and make no plans for the rest of the day.  This is the sort of meal that a) you should probably actually plan to run a marathon afterwards to burn off the badness and b) you will in all reality be so full that you will not want to move for the rest of the day.)

Breakfast Poutine

Prepare the following:

Fried cubed hash browns (I do my hash browns in the deep fryer.  Sorry, I did warn you didn't I that this is definitely not in the health food category, right?)
Scrambled eggs
Bacon, cut up into bite sized pieces
Grated cheddar cheese
Hollandaise Sauce (Sssshhh... Don't tell anyone.  I use the International brand packet one from the grocery store - but on a very slightly healthier note I use about half the margarine called for on the packet and it turns out just fine)

Build your poutine:

Now that you've prepared your ingredients it's time for assembly. In the bottom of your preferred deep styled dish (I used my smallest casserole dishes - it was all I had that was sort of suitable - my bowls were too small...) start layering like so:

1) hash browns
2) scrambled eggs
3) bacon
4) sprinkle of cheddar cheese
5) hollandaise sauce
6) top with cheddar cheese

That's it.  You're done.  Breakfast is served.

ENJOY!!!!!


Thursday, January 08, 2015

Roasted Tofu

First off, let me say that I could never be a vegetarian.  I enjoy eating steak and bacon way too much for that.  However, there are a few recipes that I have made that are meatless that I really, really like.  The first is a black bean recipe I found a couple of years ago to serve to Mom and J's girlfriend, M when they come over for BBQs.  The other recipe is one I developed in a hurry on Christmas Day.  I had planned to make roasted tofu as the main dish for M, but when I looked up the recipe I had used in the past I realized that I had almost none of the ingredients save for the actual tofu.  Grocery shopping fail at it's finest.  Ooops!  So I decided to wing it and come up with something on my own.  The end result was quite tasty if I may say so myself - I even finished the left overs the next day for lunch - so I thought that I'd share the recipe with you! It's quick and easy and uses ingredients that you most likely have on hand in your fridge and pantry right now (except maybe the tofu - if you're like me and only buy it on special, people coming to visit kind of occasions).

Roasted Tofu

1 pkg of extra firm tofu, drained and sliced
3 TBSP orange juice
3 TBSP lemon juice
2 TBSP soya sauce
1 TBSP grainy dijon mustard (I used a honey dijon blend I had in the fridge)
2 cloves garlic, minced
1/2 tsp poultry seasoning
1/2 tsp lemon pepper seasoning
fresh ground black pepper to taste

Place the sliced tofu in a lightly greased casserole dish or other shallow baking pan and set aside.  Mix remaining ingredients until well combined and pour over the tofu in the dish.  Let marinade for at least a 1/2 hour. While tofu is marinading, preheat oven to 425F/205C.  Roast tofu for approximately 25 minutes (or until the tofu is golden brown in colour).  Enjoy!  Serves 2-4 people. Recipe can easily be doubled.


Thursday, December 04, 2014

Hello Pumpkin Dip! Where Have You Been All My Life??

So, I realize that I am probably, if Pinterest is any indication, just about the last person on earth to discover the joy that is cookie dip, but I'm going to go ahead and just be ok with that.  Better late than never and all that jazz.

I needed to bring some sort of treat to a meeting last night and for some reason was completely fixated on cookies and dip.  Now, in retrospect, cookie dip is kind of like chip dip in the manner that you can't just stop with one.  Which is all good except you don't necessarily want to be eating cookies with wild abandon like you would say a potato or taco chip. It gets a bit filling (and just a teensy bit fattening) after a while.  I would highly suggest maybe serving not only cookies, but perhaps apple slices for dipping as well for those who don't want to have to put their regular clothes away in favour of sweat pants for the rest of the holiday season.

Further more, I would just like to state for the record, right here and right now, that I have been a life long fan of all things pumpkin. Loaf, cake, muffins, cookies, pie, roasted, stuffed, cooked and pureed by the spoonful - it really doesn't matter.  I wholeheartedly love the stuff.   I just feel I need people to know I'm not just hopping on the Pumpkin Spice bandwagon because it's the in thing to do.

But, before I get totally off track lets get back to cookie dip (mental note to self:  remember healthy options here... it could be fruit dip too. Really. It could.).  This is so easy and quick to make, which possibly makes it a very dangerous recipe to have in your possession depending on your love of pumpkin and the level of your snacking will power.  You decide for yourself.

Without further ado I'd like to present Pumpkin Cheesecake Dip and Gingersnap Cookies:


Pumpkin Cheesecake Dip

1/2 of 250g pkg cream cheese, softened
1/2 cup brown sugar
1 cup pumpkin puree (not pie filling)
1 tsp cinnamon
1/2 tsp ginger
1/4 tsp of nutmeg 

Put all ingredients in blender and blend until smooth.  Pour into a bowl and garnish if desired with a sprinkle of nutmeg or cinnamon.  Serve with cookies or fruit. 


Gingersnaps

2 cups flour
1 TBSP ginger
2 tsp baking powder
1 tsp cinnamon
1/2 tsp salt
1/2 cup butter or margarine
1/4 cup shortening
1 cup sugar
1 egg
1/4 cup molasses

1/4 cup sugar, reserved for later
1 tsp cinnamon, reserved for later

Preheat oven to 350F/175C

Sift together flour, ginger, baking powder, cinnamon and salt in a bowl, set aside.  In a separate large bowl, combine the remaining ingredients (except reserved sugar and cinnamon) and cream together until smooth.  Slowly mix sifted flour mixture into the large bowl, mix well using your hands if necessary until completely combined.  In a small bowl combine reserved sugar and cinnamon and then shape dough into 1" balls.  Roll balls in the cinnamon and sugar then bake on an ungreased cookie sheet for 10 minutes.  Remove from pan and cool on wire rack.  Note: cookies will still be quite soft when being removed from the pan, but harden up nicely as they cool. Store in an airtight container.  

Enjoy! 


Tuesday, December 10, 2013

Sustenance is Necessary...

I've been quiet for a little while now. Even Mom commented on my blogging silence. It's just I've been so busy with my crafting that I haven't had time to post - ssssshhhhh! Top secret! Can't tell you about anything I've been working until after Christmas, but I can tell you I just put the finishing touches on gift number 17 this morning!

I'm hoping this means that I will complete the last few gifts in plenty of time before Christmas is upon us so that this year, instead of having a crazed lunatic marathon of crafting and melting down on December 23rd like I did last year, I can just relax and enjoy the time with my family during this festive season.

Of course with all this craftiness, sustenance is necessary. Tasty, tasty sustenance.  And do I have a recipe to share with you!

I met my friend, Betty, years ago, when we both had little kids and were muddling our way through early motherhood in those first few years. I remember Betty always bringing awesome treats when it was her turn to bring snack for playgroup! Over the years due to various reasons we lost touch and then several years ago picked up our friendship through the magic of Facebook.  We live several hours apart so we haven't had an opportunity for coffee dates or in person visits yet, but we do keep in touch via the net regularly.

The last few weeks she's been posting photos of delicious looking treats on Facebook, including whipped shortbread. I had a pound of butter in the fridge that was relentless in its calling of my name, just begging to be used. So a quick message to Betty and I had the recipe in my hands.

Yesterday was shortbread day. Tomorrow maybe shortbread day again. Perhaps the next day after that.  I can't see these lasting around here very long! These are delicate, melt in your mouth, morsels from heaven. Yum. Yum.

Photobucket Pictures, Images and Photos
Happy Holidays!

So here's the recipe! (Don't worry, I'm not divulging any ancient secret recipe here although it's tried and true, she's been using it for over twenty-five years for her own family - Betty told me to go ahead and share it with everyone! )

Betty's Whipped Shortbread

1/2 cup corn starch
3 cups flour
1 lb butter, softened
1 cup powdered sugar
1 tsp vanilla
Pinch of salt

Heat oven to 350F/175C

Combine flour and cornstarch in a bowl and set aside.

Whip butter until fluffy then add powdered sugar. Whip again and add vanilla and salt when it looks creamed like whipped cream. Add the flour mixture a half cup or so at a time, whipping in between each addition.

(Betty says if you have a kitchen aid mixer use paddle attachment and at the end give it one good whip for 30 seconds. I don't, but found my electric hand mixer worked just fine!)

Spoon onto cookie sheets garnish. Betty's were so pretty - she used glacé cherries, cutting red ones into a small dot and the green ones lengthwise to make it look like holly! So festive! I didn't have cherries, so I just used colored sugar.

Bake for 6-10 minutes (start checking at about six minutes). Shortbread is done once the bottom is delicately browned. Cool on racks, then make yourself a cuppa, sit down, put on some festive tunes, relax and enjoy the season (and your shortbread)!

Thursday, October 31, 2013

Happy Halloween!!

We've been busy getting ready for Halloween for the last few weeks!  On Tuesday night, it was finally time to carve the pumpkins that the boys grew from seeds this year.  They were so eager and had been asking ever since we picked them out of the garden (Ok, flower bed, truth be known, but that's where they grow the best for some reason!) when it would be time to carve them, so you can imagine the excitement in the house the day that Daddy brought them in from the breeze way and set them on the counter for carving to begin!

Photobucket Pictures, Images and Photos
Carving pumpkins they grew themselves!
I had spent the last two weeks making the requested costumes. I thought I was going to get off easily again this year and be able to pull costumes from the costume bin, especially when, for weeks, Little Man told me he wanted to be a pirate. So simple.  He had his pirate costume from his skating show last spring! Whoot!  And then it all became so much more challenging...

He changed his mind. Only a triceratops would do.  No problem! I was going to alter my much used old Butterick pattern and add a tail and quilt a chest plate, but then I pulled the pattern out set to go and found all the major pieces missing - backs and fronts and sleeves. Gone. Bad words were said.  Then a friend told me about the simplicity pattern that I ended up having (BF)G pick up from the fabric store for me and life was good again.  It was perfect. Pretty much what I wanted. Except for a  few things. I changed up the "dino hands" from mitts to mitten covers. Years of experience tells me those costume mitts cause nothing but frustration when trick or treating. So the covers will slip easily over their mittens tonight.  Also, I made the tails detachable. They have a belt that feeds through slits in the side seams and then velcro around their tummies. Pure brilliance on my behalf I thought. Not only easy for sitting en route in their car seats, but for future use. They can use the hands, hats and tails as costumes for play without me having to put on the jumpsuit, take off the jumpsuit, put on the jumpsuit, take off the jumpsuit, put on... well you get the idea. And bonus to the costume making? They counted for Kids Clothing Week Challenge last week - making it my most successful KCWC ever.  Ha ha!!

Photobucket Pictures, Images and Photos
Dinos in our field!
Photobucket Pictures, Images and Photos
And a back view!
After the costumes were finished I had some other halloween sewing to do! When Baby Boy turned one I made all the cousins treat bags for his party using the Fishsticks Designs tutorial. All but the two that were still babies.  So I'm catching up! I made my littlest niece her's and am looking forward to giving it to her tonight when we meet up to go trick or treating!

Photobucket Pictures, Images and Photos

Yesterday I took a notion into my head to put together a little goodie bag for the two nieces we will be with this evening.  Just a fun, non-purely-sugar type treat of fruit snacks and Halloween playdoh tins. But I didn't think to buy those little plastic goodie bags at the store yesterday. So this afternoon I did this:
Photobucket Pictures, Images and Photos
Prepping the goodie bags with freezer paper stencils
Photobucket Pictures, Images and Photos
Fun and festive bags! Meow! 

Lastly, this morning we also had to do something with the tonne of pumpkin seeds we removed from our pumpkins.  I looked online for how to roast them because they've never really turned out well in the past for me.  Turns out I didn't really need to.  I had a resident expert.  Little Man made them in preschool on Monday, so he could tell me what to do.

Here's his instructions:

1) boil in a pot in salty water
2) drain
3) use oil
4) then use seasoning salt - make sure it's seasoning salt - IS THAT SEASONING SALT?!?
- what are you doing putting them in the oven. We did NOT put them in the oven at school. Well... Maybe they put them in the oven while me made slime and I didn't see it... I don't think they go in the oven... WHY ARE YOU PUTTING THEM IN THE OVEN???????

My interpretation:

Bring seeds to a boil in salted water, simmer while getting the dog out of mischief, removing cat from counter, picking up aforementioned slime - so maybe five minutes? Drained them, put them back in the pot and mixed with a little oil, and seasoning salt (yes it definitely was seasoning salt! Yikes!), then onion powder, a sprinkle of soya and Worcestershire sauce and in the oven (at 400F) for about ten minutes. Yum, yum. And the head chef approves so phew! ;)


Photobucket Pictures, Images and Photos
Very tasty! And four year old chef-approved!


So, I think we are all set for Halloween fun! I hope all of you celebrating have a safe and happy Halloween.

Photobucket Pictures, Images and Photos
Happy Halloween!

Sunday, September 08, 2013

Wild Chokecherries!

Photobucket Pictures, Images and Photos
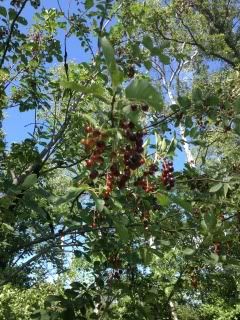
It's definitely a chokecherry tree -
 taken only a few days before the chokecherries turned dark purple
and were ready to pick!
I seem to have developed a small obsession with chokecherries after having discovered several, dripping with berries, chokecherry trees on our property (and confirmed by a quick picture text message to Mom a few weeks ago, having no desire to accidentally poison my family if I was wrong). They are actually everywhere I turn, except unfortunately the best one's seem to either be too high to reach with a ladder or too awkward for bush crashing too get too. There has even been a small incident involving over five foot tall stinging nettle in the gathering of chokecherries as well. Obsession. I have it something fierce. I seem to have a crazy need to pick all chokecherries. It's as though I dare not waste, or Mother Nature may determine my property to be unworthy of this boon of fruit.

Wild chokecherries, which are native to Western Canada, are an interesting sort of fruit. They are unbelievably tart, and more than a little astringent. They will dry your mouth out in a second when eaten fresh off the tree. One taste had me gasping and my mouth puckering for the rest of the evening. And yet, Little Man eats them by the handful. Crazy kid! Boil them, strain the juice and cook with sugar, however, and suddenly they transform themselves into amazingly delicious syrups and jellies.(and apparently wine - maybe a project for next year) just don't eat the stones if you're eating them whole or crush them if you are making juice - they contain Hydrocyanic Acid, which could make you sick if you consume too much. But the fruit itself is perfectly safe!

So, if you're like me and have chokecherries a plenty at your disposal here's a few ideas of what you can do with them!

Photobucket Pictures, Images and Photos
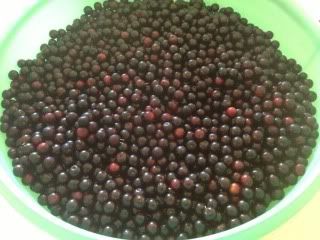
Lots and lots of chokecherries!

Preparing The Juice

First off you will need to pick, wash, boil and strain the juice. To do this, place your washed chokecherries in a large pot and barely cover with water. Bring to a boil, then reduce the heat and simmer for 15 minutes. Remove from heat and strain. You can use a couple layers of cheesecloth, a jelly bag, or like me grab an old cotton pillowcase from your linen closet that you don't care about staining.

I place my colander on top of a bowl then hang my pillowcase "jelly bag" over the colander and pour the contents of my pot into it and let it pour through. I will use a potato mashed to press a bit more juice through at the end. I know a lot of jelly makers would be horrified as you're never supposed to do anything but let juice drip through, lest your jelly be cloudy, but from what I've read you can't expect a clear juice from wild chokecherries anyways. I've certainly found this to be true - it makes a somewhat thick, opaque, pink-purple juice, not even remotely close to clear! So go ahead and get every last drop you can! Waste not want not and all that! (just don't crush the stones!)
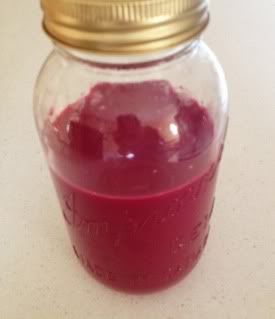
Photobucket Pictures, Images and Photos
Chokecherry Juice
So now you have juice. What to do, what to do????

All three of the following recipes will follow basically the same process once you've cooked it.

Processing Instructions

Fill clean, hot sterilized jars leaving a 1/2" headspace. Run a non-metal utensil such as a chopsticks, spatula or plastic knife, down the sides of the jar to remove any air bubbles. Wipe rims and apply snap rings and lids. Process in a boiling water bath for ten minutes.

Wild Chokecherry Syrup

There is NOTHING in this world so tasty on pancakes or waffles. Seriously. It's heaven.

4 cups prepared juice
4 cups white sugar
1/2 cup lemon juice
1/2 pkg of powdered pectin (such as Certo which comes in a 57 gr/2 oz box)

Combine all ingredients in a large pot, bring to a full rolling boil for two minutes. Remove from heat and process as above. (makes approx 3 1/2 pints)
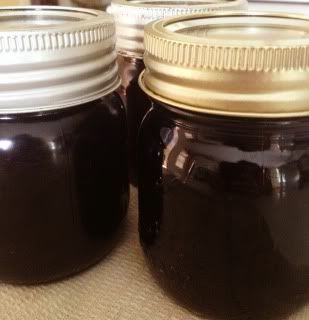

Photobucket Pictures, Images and Photos
Chokecherry Syrup

Wild Chokecherry Jelly

So good on toast and scones. YUM!!!

3 1/4 cups prepared juice
4 1/2 cups white sugar
1 pkg of powdered pectin

Combine prepared juice and pectin. Bring to a boil and then add sugar. Return to a boil, allowing the mixture to be at a full rolling boil for one minute. Remove from heat and skim foam if necessary, then process as above. (makes approx 5 half pints)


Wild Chokecherry "Soda" Syrup

So incredibly refreshing on a hot summer day!

3 cups prepared juice
1 cup white sugar

Combine prepared juice and sugar and bring to a full rolling boil for one minute. Process as above. To serve, pour a half glass of soda syrup (or to taste) over ice and top off with either soda water (we have a soda stream machine for making our "bubbly water") or ginger ale.
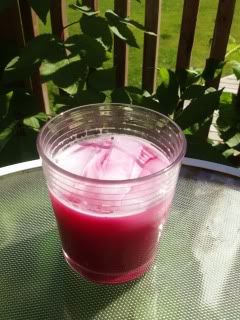
Photobucket Pictures, Images and Photos
Chokecherry Soda

And for one last treat... I whipped up some chokecherry frosting the other day to put on vanilla cupcakes! So pretty and pink and not a drop of artificial coloring used at all! I made my usual buttercream using a bit of lemon juice in place of the milk and vanilla then stirred in some jelly and blended until smooth. So simple, yet so tasty!!!

Photobucket Pictures, Images and Photos
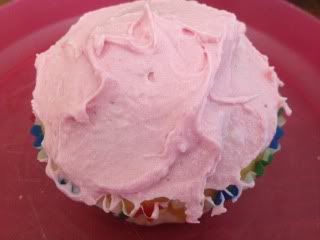
Chokecherry Frosting


I hope you enjoy these recipes as much as I do!

PS: I used a couple online resources and of course my Mom. For more info check out the following websites. Sorry I'm not sharing my mom - well except with my seven siblings, but that's only because I have too. ;)
The University of Minnesota
Manitoba Association of Home Economists


Monday, August 05, 2013

In a Pickle!

Or at least up to my eyeballs in pickles...

For a few years now, a very generous soul at (BF)G's work has been supplying us with awesome homemade dill pickles (and lately salsa too - yep! We've got it made!!) They're delicious as only homemade pickles (and salsa) can be. Mmmmmmm. Yum.

A long time ago I used to do a lot of canning. Jams and jellies and pickles - dill, beet, something called "bucket pickles" and even a most unfortunate crabapple pickle (I was trying to do sweet canned crabapples like Mom always had... You'd think the vinegar in the recipe would have clued me in. Alas...). Anyways, that was a lifetime ago and I haven't done much of anything of the sort in years.

Last year after getting a pile of second hand canning jars and a canner I thought I'd ease back in, so I made jams, apple butter and apple pie filling, but I really wanted to get back to pickles. (BF)G must have mentioned it to our pickle supplier and she offered to pick up some pickling cukes at a local Hutterite colony when she got her's. I agree (although a bit hesitantly because I figure that means the end of her pickles coming our way), because it would be great to have a pantry full of our own. So for $25, I got a HUGE 20lb box of cukes, plenty of dill, and the best part? She had tucked her own recipe inside. I had stopped by Mom's earlier in the week for some jars - I had either 500ml or gigantic old (with glass lids) jars that didn't fit my canner - so having all my supplies gathered, yesterday morning I decreed it to be pickle making day.

Wow! What a lot of work. I was pooped! I'm sure I could have streamlined my flail and fumble about the kitchen, making mad dashes out to the garage to scrounge for more jars to sterilize, frantically peeling and cutting more garlic and making more brine, running between the kitchen and the window to make certain the boys were still in the yard and not performing any death defying stunts and generally just resembling a chicken sans head. it wasn't pretty, but hopefully it was worth it. We'll know in a few weeks. (oh how I hope they are as tasty as Carol's!!!)

There is something so incredibly satisfying about hearing those snap lids snap as they cool and then standing back to admire the fruits (or in this case pickles) of your labour.

Photobucket Pictures, Images and Photos
Holy Smokes! What have I got myself into????

Photobucket Pictures, Images and Photos
Pickling cukes take a heck of a long time to wash!

Photobucket Pictures, Images and Photos
Splish, splash taking a boiling water bath!

Photobucket Pictures, Images and Photos
Yum! Pickles for winter!

Hopefully I'm not divulging some ancient family secret recipe here by sharing the one I used, but I'm pretty sure it's fairly standard.

Garlic Dill Pickles

Pickling cucumbers - gently scrubbed and washed
Garlic - peeled and bigger cloves, chopped
Heads of dill

Brine:
21 cups water
7 cups vinegar
1 cup pickling salt
2 cups sugar

Mix all ingredients in a pot and cook until salt and sugar are dissolved. (make more brine as needed)

Meanwhile pack garlic, dill heads and pickling cukes into hot sterilized jars. Pour brine over top, seal jars and process in a boiling water bath until yellow.

*********

Pretty straightforward, really.  I took a look at one of her jars to see how much garlic and dill she used and saw there were about five chunks of peeled, chopped garlic and two smaller heads of dill. I processed mine for 10 minutes in the canner.  Oh! And to do the brine I had to make only half at a time because I didn't have a pot large enough to fit it all at once.  I started out with 20 lbs of cukes and ended up with about 21 litres of pickles. The brine recipe was sufficient for about 14 jars.


Tuesday, May 21, 2013

Channel Your Inner Elvis

I spent half of last week thinking about cupcakes. Not just any cupcakes. Chocolate cupcakes. Chocolate cupcakes kicked up a notch. Chocolate cupcakes involving bananas. And peanut butter... (sometimes my mind has a lot of time on it's hands apparently)

This weekend that vision became a reality.

I started out with my usual chocolate cake recipe, but changed it up a teensy, tiny bit. Then I made my usual chocolate buttercream, but changed it up a bit too.

Success. Sweet, sweet success!!!!

Photobucket Pictures, Images and Photos
Mmmmmmmmmmmmm

Are you thinking about cupcakes now? Here's the recipe if the little voice in your head is now telling you that you need to channel your inner Elvis and dine on some chocolate banana cupcakes with chocolate peanut butter frosting.

CHOCOLATE BANANA CUPCAKES SUPREME

2 cups flour
1 2/3 cups white sugar
3/4 cup butter or margarine
1 tsp salt
2/3 cup cocoa
1 1/3 cup milk
1 1/2 tsp baking soda
1/2 tsp baking powder
2 eggs
3/4 cup mashed ripe banana
1 tsp vanilla


Pre-heat oven to 350F (170C)

Combine all ingredients into mixing bowl, beat with mixer on medium speed for two minutes until creamy then divide into muffin tins lined with cupcake liners. Bake for approx. 20 minutes

When cool finish off with the pièce de résistance - chocolate peanut butter buttercream (unless of course you are serving these to anyone who may have a nut allergy. Just stick with chocolate instead. It'll still be great. I promise. After all cupcakes should be enjoyed happily and safely by all)

Chocolate Peanut Butter Buttercream

1/2 cup shortening
1/2 cup butter or margarine
3 TBSP peanut butter
1 tsp vanilla
2-4 TBSP milk
4 cups icing (confectioner's) sugar
1/3 cup cocoa powder

Mix all with hand mixer until creamy and smooth.

Enjoy!!!!

Sunday, November 11, 2012

Going Bananas

It's been a long week.  I hurt my back last Sunday and haven't been able to do much since, but  I have done a whole lot of knitting as I sit with my heat pad, and a cup of tea.  I can't tell you about it or even show you because it's all of the super secret gift type knitting.  Which is a shame because there are a couple of projects and patterns I'm absolutely dying to tell you about, but it will have to wait till after Christmas.

Today I've been feeling a bit better so I thought I would do something with the lonely little over ripe banana that was languishing on the shelf.  I really, really wanted banana muffins so I scoured the Internet for a recipe.  I came across this little beauty. Just the thing.  Except I only had one little banana, frozen blueberries of a small size and no pecans.

So as I looked into my fridge I asked myself what would Mom do?  Then I spied the tail end of a container of vanilla yoghurt. Awhile back she'd served me a really yummy cake that she'd used leftover yoghurt in.  Feeling inspired I shuffled around the kitchen creating my version. Adding in my yogurt, eliminating the nuts from the batter,  interchanging oil for the margarine and reducing the sugar and nuts (I used walnuts) for the topping.

May I say YUM?!?!?  Try them!  You won't regret it! It makes the perfect afternoon snack. Well it'd probably be good for breakfast too. Or a coffee/tea break, or a bed time snack... You get the idea!

Photobucket Pictures, Images and Photos
Fresh from the oven. Mmmmmm good!

Blueberry Banana Oatmeal Muffins

1 1/4 cups flour
1 cup oatmeal
2/3 cups granulated sugar
1 1/2 tsp. baking powder
1 tsp. baking soda
1/2 tsp. salt
1 egg
1/2 cup mashed ripe banana
1/2 cup vanilla yoghurt
1/2 cup buttermilk
1/3 cup oil
1 cup fresh or unthawed frozen blueberries

Topping if desired: Mix together 1/4 cup oatmeal, 1/4 cup brown sugar, 2 TBSP chopped nuts (optional)


Preheat oven to 375 F.

Combine dry ingredients in mixing bowl and mix well. Fold in 3/4 cup blueberries reserving 1/4 cup for later.Add banana, yoghurt, buttermilk, egg and oil.  Mix until blended. Fill greased or paper lined muffin tins and top with remaining blueberries. Finish off with topping if desired and bake for about 20 to 25 minutes.  Enjoy!!

Monday, September 24, 2012

While There Is Tea There is Hope

There's truth to this!
Or so says the coaster I gave my Grandma several years ago. Grandma was wise. The two bits of comforting advice I remember most were "this too shall pass" and the suggestion to have a cup of tea (because everything is better after a soothing cup of tea).

Sunday, September 16, 2012

It Feels Like Fall!

And with fall comes the need for hearty warm meals. Or at least I always think it does!

It feels like fall here. Temps are cooler during the day, and chilly at night. We've already had our first frost of the season just the other night. Tonight it's to dip down to a crisp +3C!

I have a favourite fall recipe to share with you tonight! It's corn chowder. Mmmmmmm. So, so tasty! And of course one can't just serve soup for supper so I'm also going to share a recipe for cheddar biscuits.

The biscuit recipe has been adapted from a recipe one of my old co-workers shared with me. She lived close to the university and every now and again she'd bring biscuits in, still piping hot from her oven. Those were good mornings I tell you. Especially since I was pregnant with Baby Boy and always hungry.

Anyways without further ado here's the recipes!

Corn Chowder

1/2 lb bacon, cooked and crumbled
2 medium onions, chopped
2 stalks celery, chopped
4 medium potatoes, peeled and chopped
4 cups corn kernels (frozen, fresh or canned - drained)
4 cups chicken or turkey stock
2 bay leaves
Salt and pepper to taste

Add all ingredients to crock pot and cook on low for 8-10 hours or high for 4-6 hours.

Half an hour before serving prepare the cream base as follows:

2 TBSP butter
2 TBSP flour
1 can (13 oz/385 ml) evaporated milk
1 cup cheddar cheese, grated

Melt butter in saucepan over medium heat.  Add flour and mix well. Add milk and cook until thick. Stir in grated cheese continuing to stir until cheese is melted.  Remove bay leaves from crock pot and add cheese/milk mixture. Cook a further 20 minutes. Serve with extra grated cheese for garnish and fresh buns or biscuits.

Photobucket Pictures, Images and Photos
Hearty soups are made for fall!

Cheddar Chive Biscuits

2 cup flour
3tsp baking powder
1/2 tsp salt
1/2 cup butter (Margarine or oil)
1 1/4 cup sour cream
1 cup cheddar cheese, grated
1/4 cup chives

Preheat oven to 450F. Grease or parchment line baking sheets.

In large bowl combine dry ingredients, add cheese and chives and mix well.  Add in butter, cut with fork until mixture is crumbly then add sour cream and mix well. Drop dough onto prepared sheets and bake about 12 minutes until golden brown.  Serve warm.

Photobucket Pictures, Images and Photos
Nom! Nom! Cheddar and chives!

I hope you enjoy these tasty fall recipes! Now I'd better go cover up my tomato plants before I forget!

Saturday, September 01, 2012

This Mornin' I'm Makin' Waffles!

It's Saturday morning. The last glorious Saturday that (BF)G has off for the summer before his normal crazy work schedule resumes! It's been nice having home most weekends over the summer, and when he's home I always make a big breakfast. My usual repertoire consists o a rotation of things including bacon, eggs (from my neighbour's farm - farm fresh are truly the best!!!!!), homemade hash browns, toast and jam, or blueberry pancakes and sausages, or Eggs Benedict (made with homemade English muffins!) and fried potatoes, or like this morning, waffles with whip cream, strawberries (that we picked at my neighbour's early in the summer then froze) and bacon or sausages on the side.

Waffles are so easy to make and so good! Here's my go-to recipe:

Waffles

2 1/2 cups of flour
4 tsp baking powder
1/2 tsp salt
4 eggs, beaten with fork
3 cups of milk
1/2 cup oil or melted butter


Pre-heat waffle maker.

Mix dry ingredients together, then in a separate bowl, combine milk, eggs and oil. Pour liquid into dry ingredients, stirring while you pour to prevent large lumps. Mix until fairly smooth then cook according to your waffle maker's instructions until golden. Serve warm with whip cream, fruit (fresh or thawed from frozen) and syrup (ok. Admittedly I'm the sweet tooth in this house - I'm the only one that adds the syrup). Enjoy!!!

This recipe makes a lot. Enough for two adults and two small boys and enough left over for a weekday breakfast for myself and the little ones. Any leftover waffles freeze well, just wrap them well (and individually unless you like fighting with frozen baked goods) in plastic wrap. When you need a quick breakfast take them out of the freezer and pop in the toaster. You can also half the recipe easily.

Photobucket Pictures, Images and Photos
Mmmmmmmm. Good stuff!

Friday, August 17, 2012

Spicy Chicken Sandwiches

One one my favourite things to make (and eat!) are chicken sandwiches. They're quick, easy and have just the right amount of spicy kick to them. You can grill the chicken, but in this house BBQ-ing is a man's job - to be honest it's only because I'm a little terrified of lighting the thing, so I just broil mine. Much easier (and considerably less scary than dealing with propane and a lighter).

Photobucket Pictures, Images and Photos
Mmmmmmm... Spicy Chicken!


Spicy Chicken Sandwiches

4-6 boneless, skinless chicken breasts
1/2 35g. package of taco seasoning (I use Old El Paso reduced sodium but you could use any kind or make your own - let me know if you have a great homemade version!)
1/2 - 3/4 cup grated Parmesan cheese
Cheddar cheese, grated
Salsa
Onions
Tomatoes
Lettuce
Mayonnaise
Buns, split in half (I prefer homemade using my bread machine - recipe below)

Heat oven to broil while you prepare the chicken.

In a medium sized ziploc bag combine cheese and seasoning. Coat each piece of chicken one at a time by placing it in the bag and shaking it. Put coated chicken on broiler pan (or heated BBQ grill) and place in oven on rack set so the chicken is about 5" from broiler. Broil until chicken is done. Time varies with the thickness of the chicken pieces, but I find checking them after 15 minutes to work well. Once chicken is cooked, slice each breast in half, sprinkle with grated cheese and return to the oven to melt cheese.

To assemble spread split buns with mayonnaise, put on half of a chicken breast, a dollop of salsa, some sliced onions (and tomato slice and lettuce if so inclined). Serve with homemade fries or a green salad and you have a perfect fun Friday night (or any night) meal!

Note: for Baby Boy and Little Toddler Man I coat their chicken with just Parmesan and skip the salsa to make it easier on their little tummies.

Photobucket Pictures, Images and Photos
What could be better than fresh from the oven buns?

Bread Machine Buns

1 cup warm water
3 TBSP sugar
3 TBSP oil (I use Canola)
1 tsp salt
3 cups white unbleached flour
1 1/4 tsp bread machine yeast

Place ingredients in bread pan in order given. Place pan in machine and set to dough setting. When the dough cycle is finished turn dough onto a lightly floured board. Cut into eight pieces and shape into round buns. Place on parchment (or cornmeal) lined baking sheet, cover and let rise in a draft free (or in this house more importantly a thieving dog free) spot for one hour. Preheat oven to 375F (190C) and bake buns 16-17 minutes until golden brown on top. Cool on wire racks.

I use this recipe almost daily shaping it into hamburger buns, dinner rolls, hotdog buns and bread depending on what we need.

Hope you enjoy this as much as I do!


Monday, July 09, 2012

Chocolate Cake Supreme

Little Toddler Man's 3rd Birthday party was on Saturday. When I asked him what he'd like for his cake he had two very specific requests. It had to be "brown" cake and it had to have "diggers" on it.

Given these particulars I set to work. (BF)G made a trip one day after work to Toys R Us for the diggers, and I dug out my tried and true favourite chocolate cake recipe. The recipe came from Myrna, a wonderful lady, who was part of our close knit Highland Dance community here.

I've made it countless times over the years, it's easy as can be, and has never failed me yet! Next time you have a need for chocolate cake try it out! You won't be disappointed! Promise!

Photobucket Pictures, Images and Photos
Makes awesome cupcakes too!

Chocolate Cake Supreme

2 cups flour
1 2/3 cups white sugar
3/4 cup butter or margarine (or if you're like my Mom and feel ill at the very thought of using butter or margarine go ahead and sub in shortening instead)
1 tsp salt
2/3 cup cocoa
1 1/3 cup milk
1 1/2 tsp baking soda
1/2 tsp baking powder
3 eggs
1 tsp vanilla

Pre-heat oven to 350F (170C)

Combine all ingredients into mixing bowl, beat with mixer on medium speed for two minutes until creamy. Pour into greased and floured pans or divide into muffin tins lined with cupcake liners.

Bake for:
2 9" rounds - approx. 35 minutes
1 9x13" rectangle - approx. 35 minutes
Cupcakes - approx. 20 minutes

When cool complete with buttercream frosting.

Photobucket Pictures, Images and Photos
Fluffy Buttercream!


Buttercream Frosting

1/2 cup shortening
1/2 cup butter or margarine (or again see note above about subbing)
1 tsp vanilla
2-4 TBSP milk
4 cups icing (confectioner's sugar)

Mix all with hand mixer until creamy and smooth.

Variation: for chocolate add in 1/3 cup cocoa powder

Told ya it was easy peasy! :)

Happy Birthday LTM!

Photobucket Pictures, Images and Photos

Wednesday, June 13, 2012

Mmmmmmmm... Donuts!


It all started this morning when I woke up at 5:30am, rolled over and thought, "mmmmmmmm. I could sure go for a Boston Cream Donut right now." Yeah. I know. I'm just odd that way.

The little voice in my head wouldn't let up with the donut business so at 7:30am I caved into the pressure. (I have a very insistent and persuasive inner voice apparently!). No. I didn't pack the boys into the truck and head into town to Tim Horton's if that's what you thought. I haven't gone quite that far over the edge yet. What I did do is pull out my bread machine (although you could do the dough by hand just the same as any other yeast dough). A few hours later the boys and I had a tasty treat for our late morning snack. Then Little Toddler Man helped himself to another tasty treat as an early afternoon snack, and tried yet again to snag a post super snack as well.

Toddler logic gets me every time! The early afternoon snack occurred while I was otherwise occupied for about 45 seconds. I heard some rumblings around the kitchen and next thing I heard was a sweet little voice ever so generously offering me a donut (it was a donut hole to be precise - from the bowl, up on the second shelf of the cupboard. GAH!!!!)

I accepted the offered morsel and enquired of my Little Man, "Did you have one?". "Yes, Mommy!" came the happy reply. Then I discovered the now empty bowl. This was the conversation.

Me: Did you eat all the little donuts?
LTM (looking as innocent as a newborn babe): No, Mommy. I saved you one!
Me: Yes, I know and thank you, but did you eat all the ones that were left?"
LTM: No, Mommy. You ate one of them.

Yep. All I could do was laugh. Toddler logic. You'll never win in a battle of wits with an almost three year old.

Anyways. In case you'd like to make some tasty treats for yourself, here's my recipe!

Donuts

1/2 cup milk, warmed up (you don't want to give your yeast hypothermia after all!)
1/4 cup warm water
2 eggs, beaten
1 tsp salt
1/4 cup sugar
1/3 cup shortening
3 1/4 cups flour
2 tsp bread machine yeast

If using a bread machine add ingredients to the machine in order given and set on dough setting. If doing by hand, combine liquid, with 1 TBSP of the sugar, stir in yeast (If you're using regular yeast 2 1/4 tsp bread machine yeast = 1 TBSP or 1 pkg regular yeast, so you'll want to adjust accordingly). Set yeast aside. Mix remaining sugar, salt and shortening together, and once yeast has foamed up, stir it into the sugar mixture. Stir in flour, knead until smooth, then let it rise until doubled.

Once dough has risen or machine is done turn onto a lightly floured board and let rest for ten minutes. Roll dough to 1/2" thickness and cut out donuts using a donut cutter or, a round cookie cutter if making filled donuts. Let rise about an hour until doubled, then fry. Mine took about 1 1/2 - 2 minutes per side, but every fryer might be different so just turn them when they're golden brown. When done, set on paper towel lined pans to drain and cool. We tossed our donut holes in icing sugar when they were cooling, but the donuts and filled donuts got chocolate glaze.

Chocolate Glaze

1/3 cup butter
2 oz unsweetened chocolate, melted
1 tsp vanilla
1 1/2 cups icing sugar
1/3 cup hot water

Cream butter, then combine all ingredients together until a smooth consistency.

Boston Cream Filling

1 pkg of instant vanilla pudding (4 serving size)
1 3/4 cups of milk

Prepare pudding as directed on pkg using the reduced amount of milk and chill till set. Make a slit into the donuts almost all the way through to the other side, then using a pastry bag fill with pudding.

I hope you enjoy these as much as the little boys and I did!


PS: that would be a picture of LTM trying to sneak another donut...
Me: What are you doing?
LTM: Nothing! My face isn't dirty!

Sunday, May 20, 2012

A Summertime Recipe

Summer came early to the prairies this year. A mild winter was followed by an incredible spring. Which means we've been cooking on the BBQ a whole lot. One of my favourite side dishes is potato salad. Not your run of the mill potato salad that everyone grew up eating. Oh no. This is different. It is a concoction I threw together one night that has truly become our favourite potato salad. I might venture to say possibly the best potato salad going! Because I'm busily tooting my own culinary horn, I thought I might as well share my recipe. I hope you like it as much as we do!


POTATO SALAD (Note: measurements given are approximate. I rarely measure. For the dressing start with a little of the seasonings, (maybe 1/4 tsp?) you can always add more, and any fresh veg you like should be just as tasty! Increase or decrease how many potatoes you use to make more or less. Make more dressing if you want it creamier. As written, the recipe serves 4)

Ahead of time bake 4 potatoes and cook 1/2 lb of bacon. Chill completely.

Salad: mix all together in a bowl
Cubed baked potatoes
Chopped green onion
Diced cucumber
Diced red pepper
Crumbled bacon
Finely shredded cheddar cheese

Dressing: mix together in small bowl, pour over salad and gently toss to coat (here's those approximate measurements!)

1/2 c mayo
1/4 c sour cream
1 1/2 - 2 TBSP parmesan cheese
1 1/2 - 2 TBSP grainy Dijon mustard
1 TBSP chives (I used dehydrated, but fresh would be so much tastier!)
Onion powder
Garlic salt
Dill weed
Pepper

Enjoy a fresh taste of summer!

Nom. Nom. I was going to take a photo before supper, but forgot. Sorry. I know most bloggers would have a delightfully photographed setting for you, but well, it's late, and how artful could I get with leftovers and my cel phone's camera anyways?

Update! You can't take a really mouth watering appetizing picture of potato salad. I've tried. Several times. I'll share the best one so far, but I promise it tastes a billion times better than it looks in the picture!


Photobucket Pictures, Images and Photos
It's delicious! I promise!

In other areas of my creative side, I've finished a few projects, have a few in the works and approximately enough on my "hope to do list" to fill up the rest of time. I think I'll tell you about them another day. As I said, it's kind of late.

Monday, January 16, 2012

Pizza Night on the Prairies

We live in a rural area, the closest town is about 15 minutes from us. Delivery is not an option. We probably could get take out pizza, but chances are it would hardly be hot once we got it home, plus the choices of pizzerias in town are abysmal. Why spend $$ on crappy pizza? So we make it here at home. Even Baby Boy, who is (shudder) a finicky eater likes it. Little Toddler Man loves it too, so I thought I'd share my recipe for no-fail yummy crust and a few of our favorite topping combos!
Photobucket Pictures, Images and Photos
Deluxe: Pepperoni, bacon, green pepper, mushrooms and onion!

Pizza Crust
(makes three - four crusts depending on the size of your pans)

Heat oven to 205 C / 400 F
Mix 2 tsp of sugar into 2 cups of warm water
Dissolve 2 pkg of yeast in warm water/sugar and let sit about ten minutes
Add 2 tsp salt, 2 TBSP oil (at this point I usually throw in either oregano or basil or even sometimes some minced garlic)
Stir in 5 cups of flour, then knead dough until smooth and elastic.
Cover and let rise (I usually find a half hour long enough)
Divide and roll out crusts and place on pans that have been liberally sprinkled with cornmeal.
Bake in oven ten minutes (this prevents a soggy crust in the end so you don't want to skip this step.)

VARIATION: N likes to make a stuffed crust. So easy to do! Simply cut strips of mozzarella cheese and place along outer edges of pan, leaving enough dough to fold over the cheese and seal. Nom. Nom.

Cool your crusts a few minutes while you finish preparing toppings (this takes me an inordinately long time because I have two toddler sous chefs helping me!

Toppings

Ham and Pineapple - kid friendly favorite as evidenced by the fact a certain LTM ate no less than two and a half on Friday night and Baby Boy had close to two slices!

Spread about 1/4 cup zesty (or your favorite) pasta sauce on crust
Add well drained pineapple chunks and lots of diced ham. Don't skimp on ham and use luncheon meat. No, no, no. Go for the gusto and use real honest to goodness ham. You won't regret it! Promise!
Top with mozzarella cheese

Photobucket Pictures, Images and Photos
LTM and Baby Boy's fave - Ham and Pineapple

Spicey Chicken - (BF)G loves this one!

Spread about 1/4 cup ranch dressing on crust
Mix cooked, diced chicken breast with Franks Buffalo Wing Hot Sauce to taste and put on crust
Finish topping pizza with chopped tomatoes, red pepper and of course lots of cheese. For this one I like to use a combo of mozzarella and cheddar.

Greek - or Eat Your Veggies

Spread about 1/4 cup of pasta sauce on crust
Top with chopped tomatoes, green pepper, red onions and black olives. Sprinkle lightly with mozzarella and lots of crumbled feta cheese.


Bake pizza at 400 F for about 10-12 minutes, then switch to broil for about 3-5 minutes. Remove and let sit for ten minutes, cut and enjoy your feast! I guarantee you'll never want take out or delivery again!